Halloween DIY & Crafts

DIy Halloween Banners and Bunting

Today, you’re going to learn how to make your very own Halloween banners and bunting! Imagine turning your home into a spooky place filled with fun decorations that you made all by yourself. With some paper, scissors, and a little bit of creativity, we’ll make amazing crafts that will transform your space into a Halloween wonderland. Are you ready to start this exciting crafting adventure? Let’s create something spook-tacular together!

Get your own DIy Halloween Banners and Bunting today.

Choosing a Theme for Your Halloween Banners and Bunting

Halloween is a fun time for decorating, and making your own banners and bunting is a great way to add a personal touch. First, you get to pick a theme, which is like choosing the story your decorations will tell.
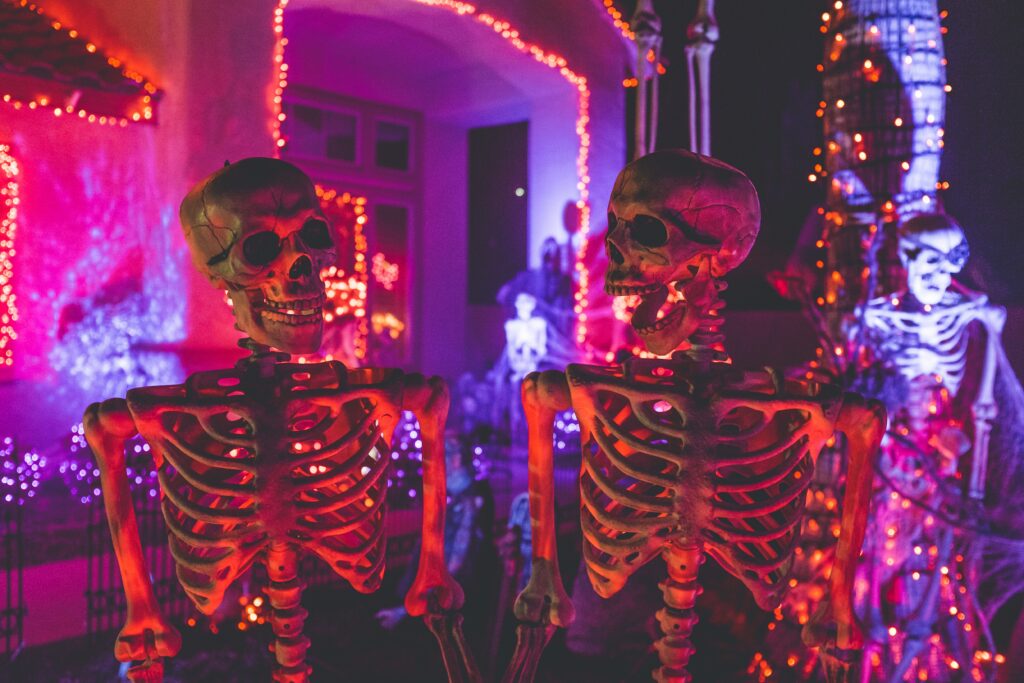
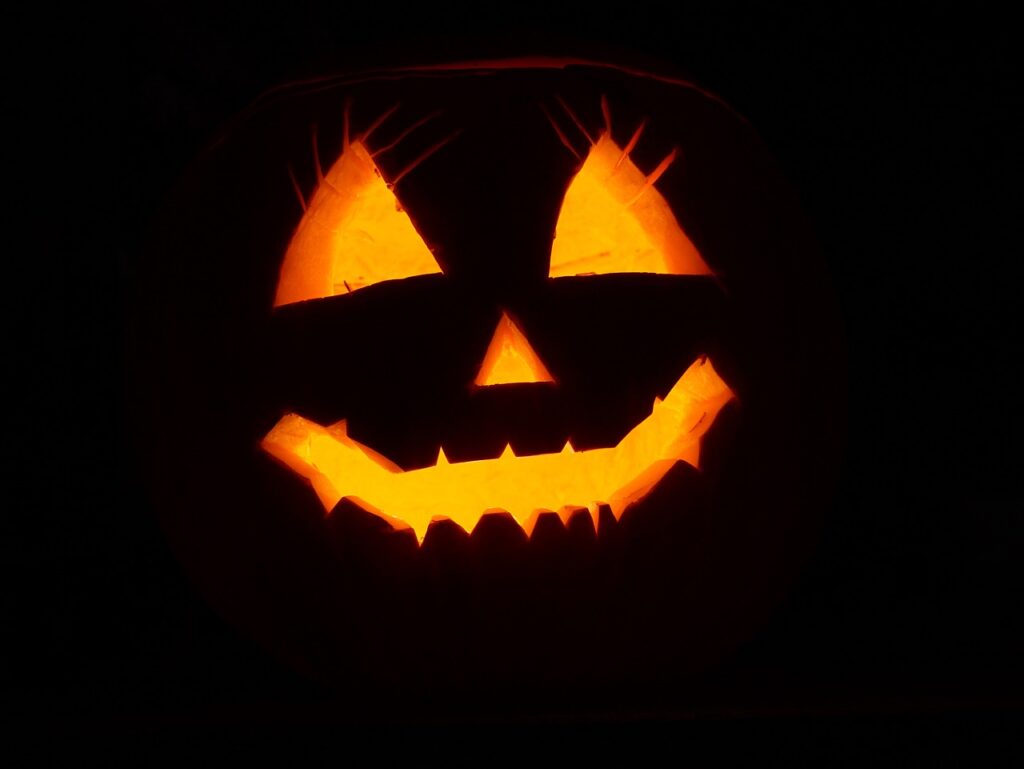
Classic Horror

Think of old, spooky movies with vampires, mummies, and ghosts. This is perfect if you love a good scare and want to make your home feel like a haunted house!
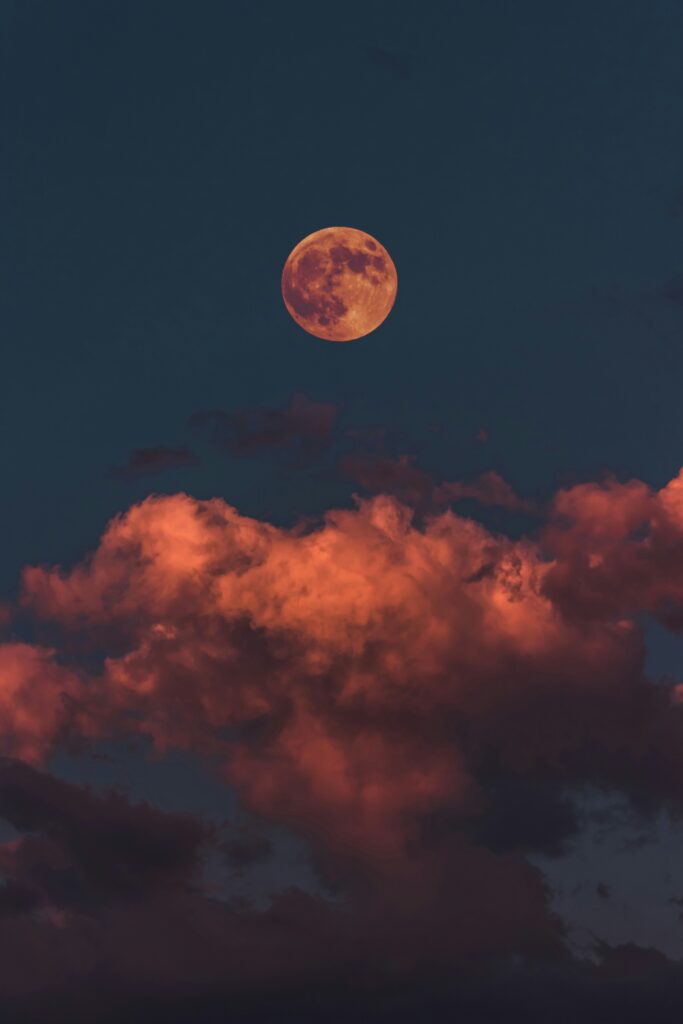
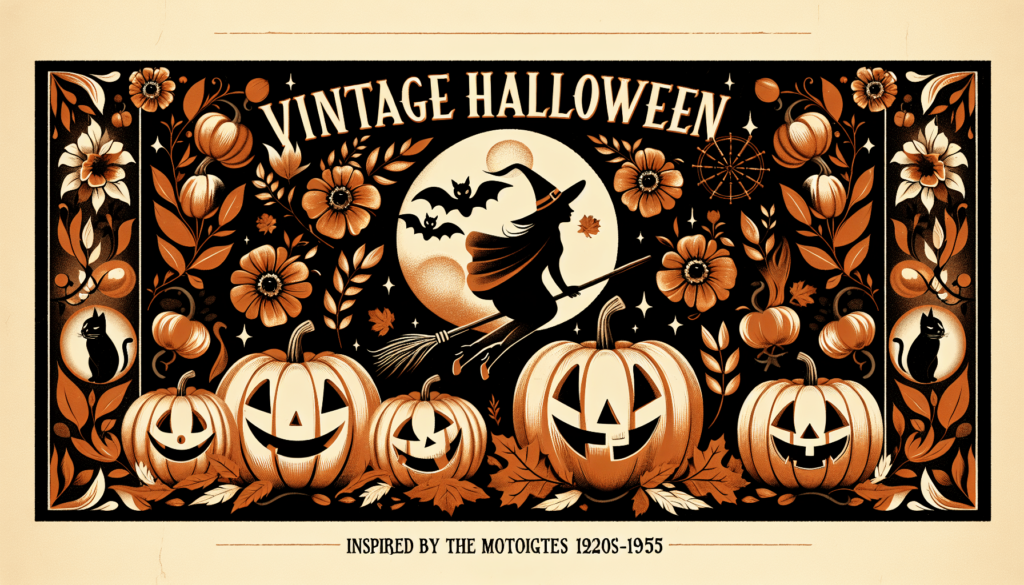
Gothic Elegance

Gothic elegance is all about dark colors, beautiful old castles, and mysterious, magical things. It’s like stepping into a fairy tale where everything is mysterious and beautiful in a spooky way.
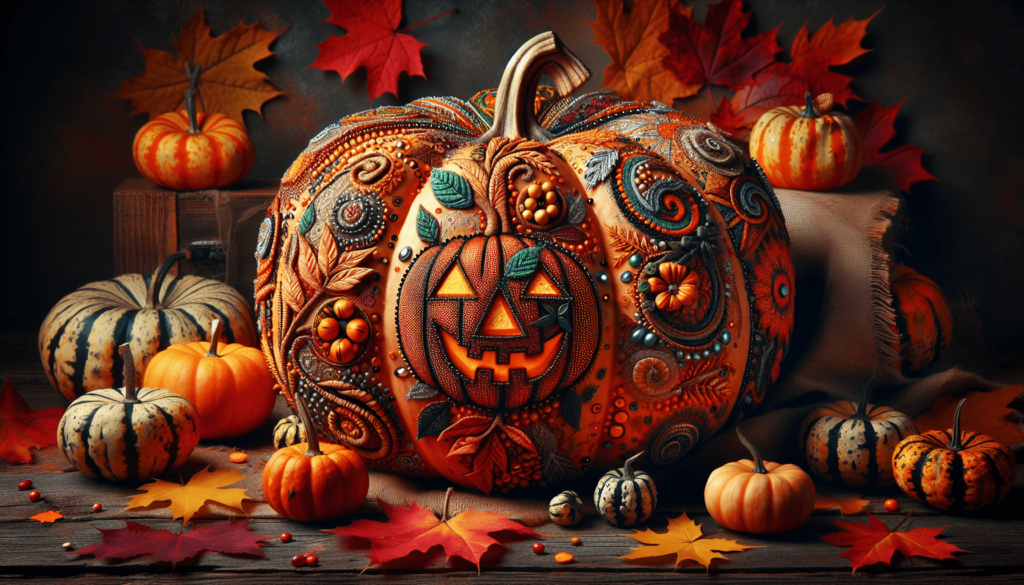
Fall Harvest

Fall harvest is all about celebrating the changing leaves and the bounty of the fall season. Imagine pumpkins, leaves, and haystacks. It’s cozy and a little less scary, perfect for a friendly Halloween vibe.
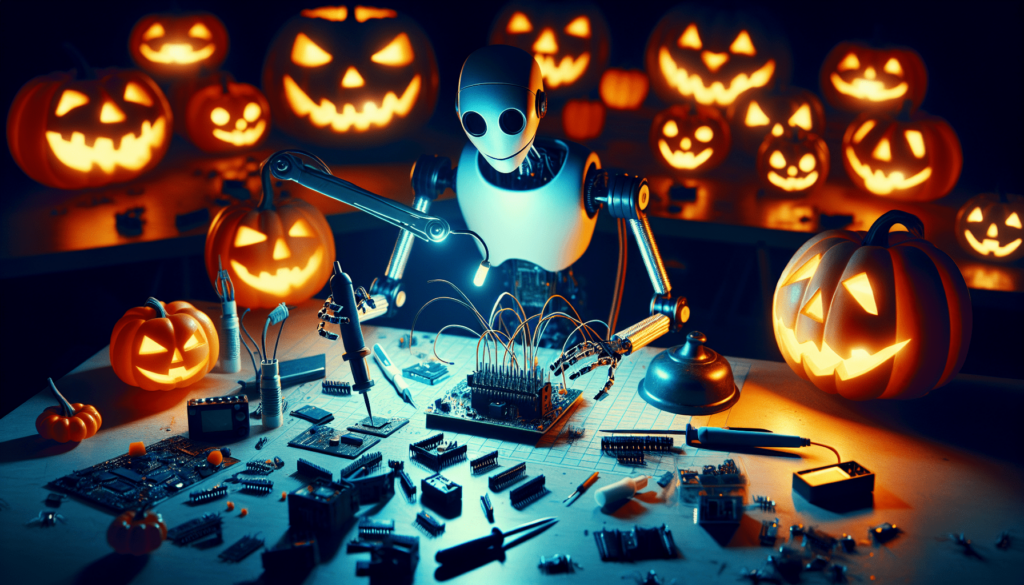
Fantasy Creatures

Fantasy creatures take you into a world of imagination with dragons, unicorns, and fairies. It’s a magical theme that’s fun and a little less spooky, great for sparking your creativity.

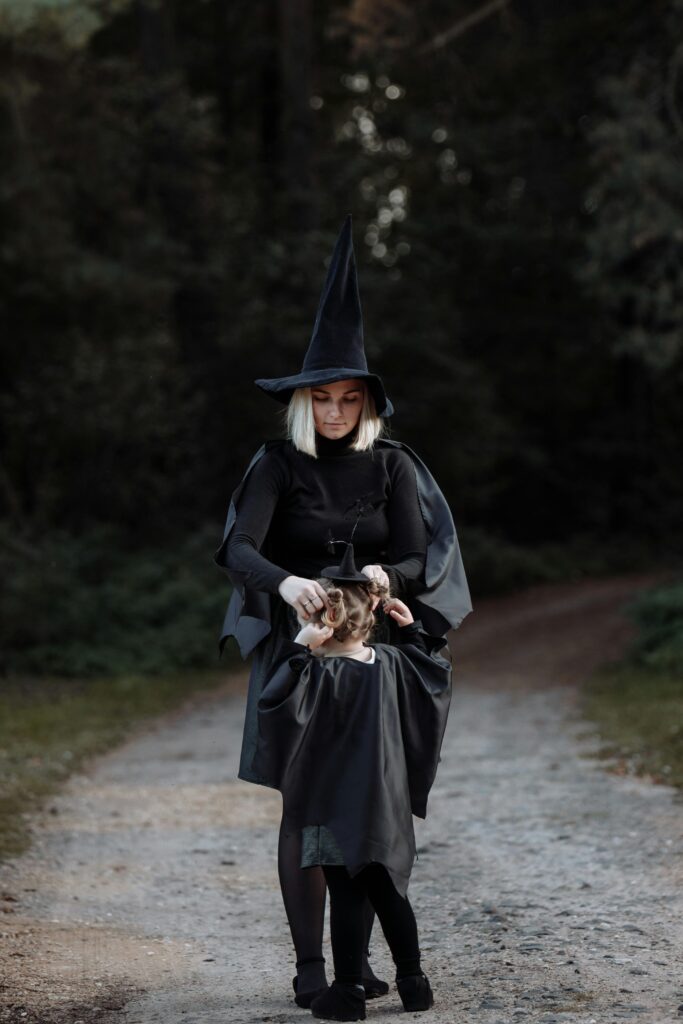
Kid-Friendly Characters

Think of smiling pumpkins, cute ghosts, and friendly witches. This theme is all about making Halloween fun and not too scary for the little ones.

Materials Needed for DIY Banners and Bunting

To make your banners and bunting, you’ll need some materials to bring your ideas to life.

Fabric Choices: Cotton, Burlap, Felt

These fabrics are great because they’re easy to work with. Cotton comes in lots of fun prints, burlap adds a rustic feel, and felt is perfect for making shapes and letters stand out.

Paper and Cardstock Varieties

Paper and cardstock are great for making decorations that are lighter and easier to hang. They come in many colors and can be cut into lots of fun shapes.

Decorative Elements: Glitter, Paint, Sequins

These are your magic dust! Glitter, paint, and sequins can add sparkle and color to your creations, making them pop.

Essential Tools: Scissors, Glue, Ruler

Scissors and glue are essential for cutting and sticking your materials. A ruler helps make sure everything is the right size and straight.

Fastening Materials: String, Ribbon, Clothespins

You need these to put everything together. String or ribbon can be used to hang your decorations, and clothespins can add an extra decorative touch.

DIy Halloween Banners and Bunting

This image is property of pixabay.com.

Get your own DIy Halloween Banners and Bunting today.

Creating a Design Plan

Before you start cutting and gluing, it’s a good idea to plan your design.

Choosing Colors and Patterns

Think about the colors and patterns that fit your theme. Do you want something bright and colorful, or dark and spooky?

Layout and Spacing for Letters and Shapes

Plan how you want to lay out your letters and shapes. Make sure there’s enough space so everything looks nice and not too crowded.

Incorporating Theme Elements into the Design

Think about how you can add parts of your theme to the design. This could be shapes, like bats or pumpkins, or specific colors.

Sketching Preliminary Designs

Grab a piece of paper and sketch out your ideas. It doesn’t have to be perfect, but it helps to see your plan before you start making it.

Deciding on Single-Sided or Double-Sided Decorations

Think about where you’ll hang your decorations. If you’re hanging them against a wall, single-sided is fine. But if they’ll be seen from both sides, you might want double-sided decorations.

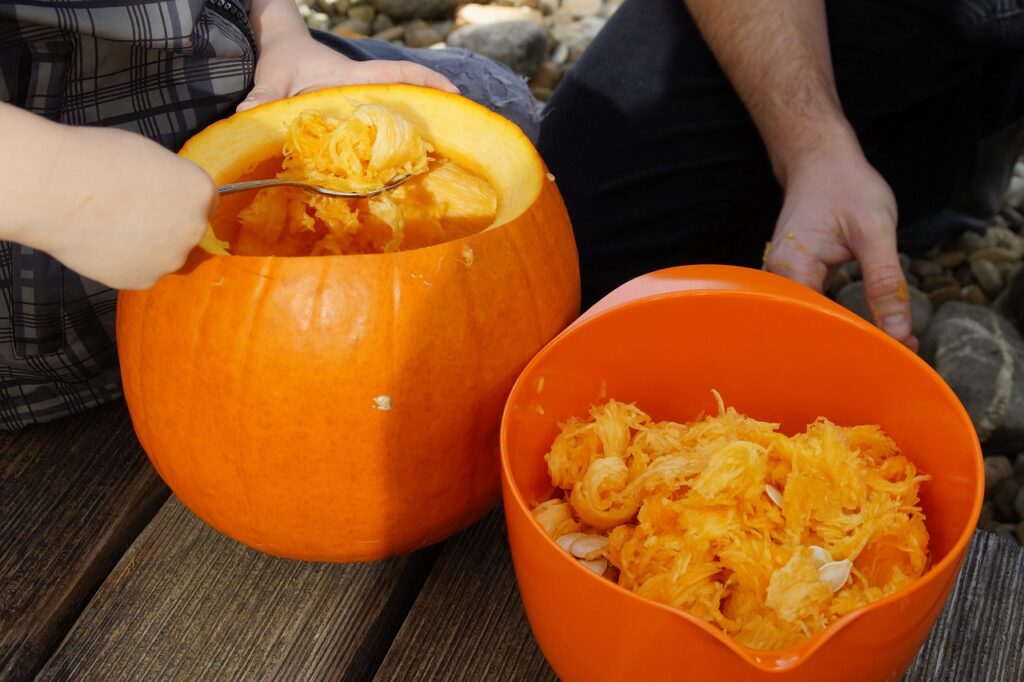
Preparation and Cutting Shapes

Once you’ve got your design plan, it’s time to start making your decorations.

Tracing Patterns onto Your Selected Materials

Use a pencil to lightly trace your designs onto your materials. This is like drawing the outline of a coloring page before you start coloring.

Cutting Techniques for Clean Edges

Make sure your scissors are sharp, and take your time to cut along the lines carefully for clean edges.

Safety Tips for Using Craft Knives and Scissors

Always cut away from yourself, and keep your fingers away from the blade. If you’re a kid, ask an adult to help with this part.

Creating Reusable Stencils for Consistency

If you’re making a lot of the same shape, a stencil can be a big help. It’s like a template you can use over and over.

Tips for Cutting Intricate Designs

For detailed designs, move slowly and carefully. Sometimes, making small snips with the scissors can help get those tricky parts right.

DIy Halloween Banners and Bunting

This image is property of pixabay.com.

Adding Text to Banners and Bunting

Words can add a fun message to your decorations.

Stencil Use for Uniformity

Using stencils for letters makes sure they all look the same. This can make your message clear and easy to read.

Hand-Painting Tips for an Artistic Touch

If you’re painting letters, go slowly and use a small brush. It’s like adding details to a drawing.

Choosing Fonts: From Spooky to Whimsical

Think about the mood you want. A spooky font might have sharp edges, while a whimsical one might be curvy and fun.

Applying Vinyl Letters for a Clean Look

Vinyl letters are stickers that can make your message look super neat.

Gluing Techniques for Adding Pre-cut Letters

If you’re using pre-cut letters, a little bit of glue goes a long way. Make sure to place them where you want before the glue dries.

Decorating Your Halloween Banners and Bunting

Now for the fun part – making your decorations sparkle!

Techniques for Applying Glitter without the Mess

A little glue and a sprinkle of glitter can make things sparkle. Doing this over a paper plate helps catch any extra glitter.

Using Stamps and Ink for Patterns

Stamps are a quick way to add fun patterns. You can even make your own stamps with foam shapes.

Creative Uses of Fabric Scraps

Leftover fabric scraps can be turned into flowers, leaves, or other fun shapes to add to your decorations.

Embellishing with Fake Cobwebs and Spiders

Adding fake cobwebs and plastic spiders can give your decorations a spooky touch, perfect for a Halloween vibe.

Incorporating LED Lights for a Spooky Glow

Stringing some LED lights along your banner or bunting can make it glow, which is especially cool in the dark!

DIy Halloween Banners and Bunting

This image is property of pixabay.com.

Assembling the Banners and Bunting

Let’s put it all together.

Laying out the Design

Spread out your letters and shapes on the floor or a big table to see how they look together.

Stringing Components Together

Using your string or ribbon, attach each piece so they’re spaced out nicely. You can use glue, tape, or even sew them if you like.

Knotting vs. Sewing: Choosing the Best Method

Knotting is easy and quick, but sewing can make certain materials more secure. Choose what works best for the materials you’re using.

Adjusting Spacing for Visual Appeal

Make sure there’s enough space between each piece so they don’t look squished together.

Ensuring Durability for Outdoor Display

If your decorations will be outside, make sure they’re weatherproof. You can do this by choosing the right materials and making sure everything is secure.

Mounting and Displaying

Your decorations are ready to show off!

Selecting the Perfect Location

Think about where your decorations will look best. It could be over a doorway, along a fence, or across a fireplace.

Safely Securing Banners Outdoors

Make sure your decorations are tied or clipped securely so they don’t blow away or fall down.

Decorative Clipping Techniques for Bunting

Using decorative clips or clothespins can add an extra touch of fun to how your bunting hangs.

Combining with Other Decorations for a Cohesive Look

Think about how your banners and bunting fit with your other decorations to create a full Halloween look.

Storage Tips for Reuse

When Halloween is over, fold your decorations gently and store them in a dry place. That way, they’ll be ready for next year.

DIy Halloween Banners and Bunting

Alternative Ideas for Non-Traditional Banners and Bunting

Get creative with these fun ideas.

Glow-in-the-Dark Designs

Using glow-in-the-dark paint or materials can make your decorations stand out at night.

Upcycling Household Items

Old clothes, paper bags, or even leaves can be turned into unique decorations.

Themed Garlands (Pumpkins, Ghosts, Bats)

Making a garland of little pumpkins, ghosts, or bats is a cute way to add theme elements to your decor.

Interactive Banners with Pockets for Treats

Imagine a banner with little pockets for treats. It’s a fun surprise for guests or trick-or-treaters.

Using Natural Elements for Rustic Vibes

Adding sticks, leaves, or stones can bring a bit of nature into your Halloween decor.

Frequently Asked Questions About DIY Halloween Banners and Bunting

Let’s answer some common questions.

How to Fix Common Mistakes

If you make a mistake, don’t worry! Most times, you can either glue a piece of the same material over it or get creative and turn the mistake into a new design element.

Adapting Designs for Different Spaces

Think about the space where you’ll hang your decorations. You might need to adjust the size or number of elements based on how much room you have.

Longevity and Storage of Handmade Decorations

Keeping decorations dry and away from direct sunlight helps them last longer. Folding them gently and storing them flat is also a good tip.

Ideas for Involving Kids in the Crafting Process

Let kids choose colors, help with painting, or even decide on the theme. It’s a fun way to spend time together and let their creativity shine.

Cost-Effective Tips for Large Scale Decorations

Buying materials in bulk or upcycling things you already have at home can help save money if you’re decorating a large space.

Check out the DIy Halloween Banners and Bunting here.

DIy Halloween Banners and Bunting Read More »

Minimalist Halloween Craft Projects

Imagine making your own spooky Halloween decorations, but in a simple and fun way! “Minimalist Halloween Craft Projects” is all about creating cool stuff for Halloween without needing too many things. You’ll learn how to make awesome decorations and crafts that bring the Halloween spirit into your home, using just a few items. So, get ready to use your creativity and make this Halloween extra special with your very own, easy-to-make decorations!

Check out the Minimalist Halloween Craft Projects here.

Black Cat Paper Plate Craft

Materials needed: Paper plates, black paint, colored paper, glue

To start making a cute black cat with paper plates, you need some simple things from around your house. You’ll need paper plates, some black paint (to make the plate look like a cat), colored paper (for the cat’s features like ears and nose), and glue to stick everything together.

Steps to create cat face and tail

First, paint the paper plate black and let it dry. While waiting, cut out two triangles from the colored paper for the ears and a long tail. Once the plate is dry, glue the ears to the top and the tail to the back.

Adding features with white paint for eyes and whiskers

Once your cat has ears and a tail, it’s time to give it a face! Dip a small brush in white paint to draw two big eyes and some whiskers. You can also add a tiny nose with pink or red paper. Now you have your own paper plate black cat to decorate your room!

Minimalist Pumpkin Carving

Choosing the right pumpkin

Look for a pumpkin that is smooth and has a nice round shape. A smooth pumpkin is easier to carve, and a round shape looks nice with simple designs.

Simple carving tools and techniques

You don’t need fancy tools for minimalist pumpkin designs. A small kitchen knife and a spoon to scoop out the insides are enough. Remember, simple shapes like circles, triangles, and squares are your best friends for a minimalist look.

Ideas for minimalist designs: Faces, geometric shapes, silhouettes

Think of making a pumpkin with a simple happy or scary face. Or you can carve geometric shapes like circles and triangles for a cool pattern. Silhouettes, like a cat or a bat, also look super cool and are easy to do.

Minimalist Halloween Craft Projects

This image is property of images.unsplash.com.

Click to view the Minimalist Halloween Craft Projects.

DIY Spider Webs

Materials: Black yarn or string, scissors, and tape

To make spooky spider webs, you need black yarn or string, a pair of scissors to cut the yarn, and tape to hang your web.

Creating a web frame

First, cut long pieces of yarn and tape them across each other to make a star shape. This is the frame of your web.

Weaving the web: Techniques for a realistic look

Now, cut a very long piece of yarn. Tie one end to the center of your frame. Weave the yarn around each strand of the frame, looping around each time you reach a strand, moving outward in spirals. Keep going until your web looks just right!

Ghost Garland

Materials: White fabric or tissue paper, string, black marker

For a ghost garland, you’ll need white fabric or tissue paper, some string to hang your ghosts, and a black marker to draw their spooky faces.

Creating ghost shapes and attaching to string

Cut the fabric or tissue paper into squares, then drape each square over a small ball or crumpled paper to make a head shape. Tie a string around the neck of each ghost to hold the head shape. Draw faces on them with the marker. Then, tie each ghost to a long string.

Hanging tips and placement ideas

Hang your ghost garland across a window, door, or even your fireplace. Try to place it somewhere where it moves slightly in the air—it makes the ghosts look like they’re floating!

Minimalist Halloween Craft Projects

This image is property of images.unsplash.com.

Witch Hat Origami

Choosing the right paper

For witch hat origami, pick a piece of paper that’s black or dark purple. It should be square and not too thin or it might rip.

Step-by-step folding instructions

Fold your square paper in half to make a triangle. Then, fold the corners up to meet at the top, forming a smaller square. Fold one layer of the bottom square up, towards the top, and tuck the other layer into it to make the brim of the hat.

Decorating and displaying your origami witch hats

You can draw on your witch hats with silver or gold pens to make them fancier. Then, place them around your house or hang them up with string for a magical Halloween vibe.

Minimalist Halloween Wreath

Materials: Twig wreath, black spray paint, Halloween-themed accessories

You need a twig wreath, some black spray paint, and a few Halloween-themed accessories like fake spiders or small skeletons.

Steps to spray paint and attach decorations

First, spray paint your wreath black and let it dry. Then, choose a few decorations and glue them on your wreath. Remember, less is more. Just a few items can make your wreath look spooky and stylish.

Ideas for a minimalist look: Fewer colors, simple designs

Stick to black and one or two other colors for a cool minimalist look. Maybe just a big, white ghost or some small, orange pumpkins. Simple designs make your decoration look chic and not too busy.

Minimalist Halloween Craft Projects

This image is property of images.unsplash.com.

Bottle Cap Spiders

Collecting and preparing bottle caps

Start saving the bottle caps from drinks. You need one cap for each spider. Wash them well so they’re clean and ready for crafting.

Materials for creating legs and eyes

For the spider legs, you can use black pipe cleaners or strips of black paper. You’ll also need small white stickers or paper for the eyes.

Assembly and ideas for display

Cut eight legs out of your materials and glue them to the sides of the cap. Stick or glue on the eyes. Then, you can place your bottle cap spiders around the house or hang them up by string to look like they’re dangling from webs!

Mason Jar Mummies

Materials: Mason jars, bandages or gauze, googly eyes

You need some mason jars, bandages or gauze for wrapping, and googly eyes for your mummy jars.

Wrapping technique for a mummified look

Wrap your jar with bandages or gauze, going all around until it looks like a mummy. Don’t cover it too tightly—you want it to look a bit messy. Stick on two googly eyes.

Lighting options: LED candles or glow sticks

An LED candle or a glow stick inside your mummy jar makes it glow spookily in the dark. It’s safe and looks really cool in your room or by the window.

Minimalist Halloween Craft Projects

Paper Bat Swarm

Materials: Black construction paper, scissors, tape or string

For a swarm of bats, you need black construction paper, scissors, and tape or string to hang them.

Creating a bat template

Draw or find a simple bat shape to use as a template. Place it on the construction paper, trace around it, and then cut out your bats.

Cutting and hanging techniques for a swarm effect

Cut out lots of bats. Use tape or string to hang them from the ceiling or stick them to the wall. You can make them “fly” in different directions to look like a real swarm of bats!

Pumpkin Fairy Houses

Selecting small pumpkins

Choose small pumpkins because they’re easier to carve and perfect for creating tiny fairy houses.

Carving techniques for doors and windows

Carefully carve small doors and windows into your pumpkin. You can use a pencil to draw the shapes first. Remember, fairy houses look whimsical, so your doors and windows don’t need to be perfect!

Minimalist decorating ideas: Natural items, simple colors

Decorate your fairy house with natural items like leaves, twigs, or small stones. Stick with simple colors—let the orange of the pumpkin shine. This gives your fairy house a magical, minimalist look, perfect for a whimsical Halloween.

Click to view the Minimalist Halloween Craft Projects.

Minimalist Halloween Craft Projects Read More »

Robotic Halloween DIY Projects

Imagine you can make Halloween even more fun by creating your own spooky robots! This article is all about helping you turn your cool Halloween ideas into real, moving decorations using simple DIY projects. With easy steps you can follow, you’ll learn how to make robots that might scare, surprise, or even make your friends laugh. Let’s get started on making this Halloween one you’ll never forget with your very own robotic creations!

Robotic Halloween DIY Projects

This image is property of pixabay.com.

See the Robotic Halloween DIY Projects in detail.

Automated Haunted House

Designing the layout using simple robotics

Creating your very own haunted house is like piecing together a giant, spooky puzzle. Before starting, sketch out your haunted house on a piece of paper. Think about where you’d like your robotic ghosts and creatures to surprise visitors. It’s like planning where to hide in a game of hide-and-seek so you can jump out and say, “Boo!”

Programming basic movements for scares

Next, we need to make our robots move in a way that’s just scary enough. Using a simple computer or a special board, you can tell your robots to do things like wave their arms or shake. It’s like teaching your toys to dance, but in a way that’s meant to give people a friendly fright!

Incorporating sound and light effects

To make your haunted house even spookier, add creepy sounds and flickering lights. Imagine hearing a ghostly “Woooo!” or seeing shadows move in the dark. You can use small speakers and lights controlled by the same computer or board that moves your robots. It’s like setting the mood for telling ghost stories with a flashlight under your chin.

Safety measures to consider

While scaring is fun, staying safe is most important. Make sure all wires are tucked away, so no one trips. Keep scary things at a distance where they can’t accidentally bump into or scare someone too much. Think of it as making sure everyone enjoys the haunted house without getting real scares.

Creepy Crawly Spider Bots

Materials needed for spider bots

To build your spider bot, you’ll need some plastic parts for the body and legs, a small motor to make it move, and some wires. You can find these in a robotics kit or gather them from a hobby store. It’s like gathering your art supplies before starting a big project.

Step-by-step construction process

First, attach the legs to the body of your spider bot. Then, connect the motor so it can make the legs move. It’s a bit like building with blocks, where each piece has a special place. After that, wire everything to a small battery. Now, your spider is ready to scuttle!

Programming spider movements

With a little bit of computer magic, you can make your spider move in a really creepy way. You’ll use simple commands to tell it how and when to move its legs. It’s like teaching your pet a new trick, except this pet is a robot spider!

Adding spooky sound effects

Lastly, why not make your spider hiss or screech as it moves? You can use a tiny speaker connected to your battery and program it to make sounds when the spider moves. It’s like your spider is saying, “Here I come, get ready to be spooked!”

See the Robotic Halloween DIY Projects in detail.

Ghost Drone

Selecting the right drone

Choosing a light drone is important because it needs to fly easily, even with a ghost costume on. Look for a drone that’s easy to control and has a decent battery life, so it doesn’t run out of power mid-flight. It’s a bit like picking the best kite that will fly the highest and longest.

Creating a lightweight ghost costume for the drone

Your ghost costume should be made of very light fabric, so it doesn’t weigh the drone down. You can cut out a simple ghost shape and drape it over your drone. Make sure the drone’s propellers and controls aren’t covered. It’s kind of like dressing up your dog in a costume that still lets it walk and see comfortably.

Flight path programming for a ghostly appearance

Plan a flight path that makes the drone glide and swoop like a real ghost. You can program this using a computer or the drone’s remote. This is much like planning a dance routine, where every move leads perfectly into the next.

Nighttime flying tips and safety

When flying your ghost drone at night, make sure you can always see it and that it’s away from trees or houses. Also, check your local flying rules to keep everyone safe. Imagine you’re a pilot ensuring your flight path is clear for takeoff and landing.

Robotic Pumpkin Carver

Tools and materials required

To make a robotic pumpkin carver, you’ll need a small carving tool, a robotic arm, and software to design and control your patterns. Gather these like you’re getting ready for a big art project in class.

Designing patterns with software

Using special software, draw the scary or funny face you want on your pumpkin. This software will tell your robotic arm exactly where to carve. It’s like using a computer game to draw, but this time your drawing becomes real.

Setting up the robotic arm

Mount your carving tool on the robotic arm, and make sure it’s secure. Then, connect the arm to your computer where your pumpkin face design is saved. It’s like assembling a model airplane, making sure all the parts fit just right.

Carving tips and tricks

Let your robotic arm do the carving for you. Watch as it follows the design, making precise cuts. If the pumpkin skin is thick, you might need to go over it a couple of times. Think of it as a robot artist creating a masterpiece.

Robotic Halloween DIY Projects

This image is property of pixabay.com.

Interactive Candy Dispenser

Building the dispenser mechanism

You’ll need a small box, a motor, and a tube that can hold and release candy. Connect these so when the motor is activated, candy falls out of the tube. It’s a bit like making a bird feeder that only gives seeds when a bird lands on a perch.

Integrating sensors for automated dispensing

Attach sensors to your candy dispenser. These can detect when someone is in front of the dispenser. It’s like the dispenser can see someone saying “trick or treat!” and knows it’s time to give candy.

Customizing the dispenser for Halloween

Decorate your dispenser with Halloween colors, stickers, or lights. Make it look as spooky or as fun as you like. This is your chance to get creative and dress up your dispenser like it’s going out for Halloween too.

Troubleshooting common issues

Sometimes, the dispenser might get stuck or not detect when someone’s there. Check if anything is blocking the sensor or the candy tube. Keep your candy dispenser happy, so it can keep sharing treats without any tricks!

Skeleton Marionette

Materials for creating the skeleton

Gather plastic bones, string, and a controller to hold the strings. The plastic bones will be the skeleton’s body, and the strings will let you control it. It’s like building your own puppet that will dance at your command.

Assembling the marionette structure

Connect the bones using string so they can move like a real skeleton. Then, attach these strings to your controller. The goal is to make it move smoothly. Imagine you’re the director of a play, and the skeleton is your star actor.

Programming movements for a realistic effect

If you’re adding robotics, program the skeleton to move on its own. Decide how it will dance, wave, or maybe even play the piano! It’s your chance to bring a bony friend to life with the push of a button.

Controlling the marionette

Use the controller to make your skeleton marionette move. With practice, you can make it look like it’s walking, dancing, or even chasing someone slowly. Remember, it’s all in good fun to make people smile and maybe just a little bit scared.

Robotic Halloween DIY Projects

This image is property of pixabay.com.

Witch’s Cauldron Stirrer

Gathering necessary components

You’ll need a large pot to act as the cauldron, a stick for stirring, a motor to move the stick, and some electronics to control it. It’s like gathering ingredients for a magic potion.

Mechanical assembly of the stirrer

Attach the stick to the motor so that when the motor runs, the stick stirs the cauldron. Secure everything to make sure your cauldron can stir without spilling its “witchy brew.”

Programming for random stirring patterns

Program the motor to stir in different directions and at different speeds. This will make it look like a real witch is brewing a spell. Imagine you’re casting a spell to make the perfect soup, but instead of soup, it’s a potion.

Adding fog and lighting effects

To make your witch’s brew even more mystical, add a fog machine and some colored lights underneath or around your cauldron. It will look like something magical is cooking. Just like in stories where witches brew potions that bubble and glow, yours will too!

Zombie Apocalypse Escape Room

Concept and storyline development

Think of a fun story where players have to escape from zombies. Write down clues they need to find and puzzles they need to solve to escape. It’s like writing your own adventure story where the heroes have to be clever to survive.

Incorporating robotics into puzzles

Use robots to act as zombies or to control parts of the puzzle. For example, a robot could hand out the next clue once a puzzle is solved. Imagine robots are your actors, taking part in the story you’ve created.

Creating realistic effects with animatronics

Animatronics can make your zombies move and look almost real. Use them to create jumpscares or as part of your puzzles. It’s like making a movie where you get to direct the zombies on what to do and when to scare the players.

Safety and emergency procedures

Make sure there’s a clear way for players to exit in case they get too scared or something unexpected happens. Safety is the most important thing, so plan your escape room with care to ensure everyone has fun without getting hurt.

Robotic Halloween DIY Projects

Eerie Sensor-Triggered Sound Effects

Choosing the right sensors

Pick sensors that can detect when someone is near. These could be motion sensors or light sensors. It’s like setting up a secret alarm that only you know about.

Compiling a library of scary sound effects

Gather sounds like creaking doors, ghostly whispers, or sudden screams. Put these sounds on a computer or a sound module. This is your toolbox of noises to surprise visitors.

Programming sensors to trigger sounds

Connect your sensors to the sound module so when someone walks by, a sound plays automatically. It’s like setting traps that, instead of catching anything, make scary sounds!

Optimizing placement for maximum scare

Place your sensors and speakers in spots where people won’t expect a scare. Hide them behind curtains or under tables. The goal is to make the sounds come from where they’re least expected, like invisible ghouls whispering secrets or objects moving on their own.

Robotic Graveyard

Designing and building tombstones

Create tombstones from cardboard, foam, or wood. Paint them to look old and weathered. Your graveyard will start taking shape, becoming a spooky landscape filled with tales of the past.

Incorporating robotic arms to simulate movement

Install robotic arms to gently move some tombstones or to make zombie hands reach out from the ground. It will seem as if the residents of your graveyard are trying to come back to life. Imagine your robots are actors in a silent, spooky play.

Adding fog machines and lighting for atmosphere

Use a fog machine to blanket your graveyard in mist. Add dim, colored lighting to create shadows and add depth to the scene. It will look like a mysterious, enchanted place where anything could happen.

Safety considerations for outdoor setup

If your graveyard is outside, make sure everything is stable and won’t blow away or become a tripping hazard. Lights and electronics should be weatherproof. Keep the path through your graveyard clear, so visitors can enjoy the scare without any real dangers. Remember, the goal is to create fun and safe Halloween magic for everyone.

Learn more about the Robotic Halloween DIY Projects here.

Robotic Halloween DIY Projects Read More »

DIY Halloween Witch Decorations

Imagine making your very own Halloween witch decorations that will make your house the spookiest on your street! This is a fun adventure where you can create all sorts of cool and scary witches using some things you might already have at home. You can make your witches look any way you want, with big hats, broomsticks, or even glowing eyes. It’s like putting together a puzzle, but this time, you’re making something special for Halloween. Let’s start this magical journey to fill your house with your handmade witchy wonders!

DIY Halloween Witch Decorations

This image is property of pixabay.com.

Click to view the DIY Halloween Witch Decorations.

Choosing Your Theme

Classic Witches vs. Modern Interpretations

When you start thinking about your Halloween decorations, you can think about whether you want classic witches with pointy hats and brooms or modern witches that might look a little different. Classic witches often ride brooms and have black cats, while modern witches could be characters you’ve seen in movies or TV shows, wearing all kinds of clothes. It’s like choosing between a fairy tale or a superhero movie; both are fun, just different kinds of stories!

Color Schemes: Traditional Black and Green vs. Pastel Goth

Next, think about what colors you want to use. Traditional witch decorations use a lot of black and sometimes dark green, like the color of a witch’s potion. But, there’s also something called pastel goth, which uses lighter colors like pink, purple, and baby blue, but in a spooky way! It’s like deciding between chocolate and strawberry ice cream; both are tasty, just depends on what you’re in the mood for.

Incorporating Other Halloween Motifs

You can also add other Halloween designs to your witch theme. Think about including pumpkins, ghosts, bats, or spiders. It’s like when you draw a picture and keep adding more things to make it even cooler. All these extra bits help make your witch decorations feel even more Halloween-y.

Materials and Tools

Essential Crafting Supplies

To start making your witch decorations, you’ll need some basic supplies like scissors, glue, tape, and maybe some paint. These are your tools to turn simple things into amazing decorations. It’s like how a wizard needs a wand; you need these tools to create your magic.

Recommended Fabrics and Papers

For some decorations, you might want to use fabric or paper. Black, green, and purple fabrics can make great witch clothes or hats. Paper, especially if it’s black or in your theme colors, is good for making things like witch silhouettes or potion labels. Choosing your fabric and paper is like picking out your outfit for the day; you want the one that fits what you’re planning to do.

Electronic Components for Interactive Decorations

If you want to make something super cool, like a decoration that lights up or makes sounds, you might need some electronic parts like little lights or a sound box. These are a bit like magic spells that make your decorations come alive. Remember, if you’re not sure how to use these, it’s a good idea to ask an adult for help.

Learn more about the DIY Halloween Witch Decorations here.

Witch Hats Decorations

Creating a Hanging Witch Hat Luminaries

You can make the night magical by making hanging witch hat luminaries. All you need is some lightweight fabric to make the hat, and then you put a little light inside it. When you hang them up, they look like floating witch hats. It’s a super cool way to light up your room or your porch.

Designing a Witch Hat Wreath

Witch hat wreaths are a fun way to welcome everyone to your haunted house. You start with a circle, like a big ring, and then you decorate it with fabric, paper witch hats, and maybe some spooky items you find. It’s like making a crown, but for your door!

Personalized Witch Hat Place Settings for Halloween Dinner

If you’re having a Halloween dinner, you can make little witch hats for everyone’s place at the table. You can write their names on them or decorate them to match the person. It’s a fun way to make everyone feel special and part of your witchy world.

DIY Witch Brooms

Materials Needed for a Handmade Broom

To make your witch broom, you need a stick for the handle and some straw or other brush-like materials for the brush part. You could even use twigs from your backyard. It’s a bit like making your own wizard tool, using things from nature.

Customizing Your Broom with Colors and Accessories

You can paint your broom handle or add ribbons and glitter to make it your own. Maybe you want your broom to match your witch hat or have the colors of your favorite superhero. It’s a chance to be creative and make something unique.

Ideas for Displaying Your Witch Brooms

Once you’ve made your broom, you can lean it against a wall, hang it up, or even make a stand for it. It can be part of a bigger Halloween display or stand on its own as a cool piece of witch art in your room.

DIY Halloween Witch Decorations

This image is property of pixabay.com.

Witch Potion Bottles

Collecting and Preparing Bottles

First, you’ll need some bottles for your potions. You can use old soda bottles, water bottles, or even jars. You’ll want to clean them out really well so they’re ready to be turned into potion bottles.

Creating Convincing Potion Labels

Next, you can make labels for your potions. Think of fun names like “Dragon Breath” or “Invisibility Juice.” You can draw the labels yourself or ask an adult to help print some out. Then, you stick them on your bottles to show what magical potion is inside.

Filling Your Bottles: Ideas for Safe, Non-Toxic Potions

You can fill your bottles with colored water, glitter, or even small beads to represent different potions. Just remember, these potions are for looking, not for drinking. Make sure everything you put inside is safe and non-toxic.

Witch-Themed Centerpieces

Designing a Witchy Table Runner

For a table centerpiece, you can start with a table runner. You could use a black cloth and then add some silver stars or moons to make it look magical. It’s like laying down a magic carpet for your other decorations to sit on.

Creating a Magical Cauldron Centerpiece

A cauldron is a big, black pot that witches use to mix their potions. For your centerpiece, you can use a small black bowl or pot. You can fill it with candy, fake spiders, or even use it to hold a small candle for a spooky glow.

Incorporating Crystals and Candles for an Enchanted Look

Adding crystals and candles around your cauldron can make your centerpiece look even more witchy and magical. The candles can give a soft, spooky light, and the crystals look like they could be part of a real witch’s spell.

DIY Halloween Witch Decorations

This image is property of pixabay.com.

Witch Silhouette Window Decor

Cutting and Placing Witch Silhouettes

You can make witch silhouettes out of black paper and then stick them on your windows. When people look at your windows from outside, they’ll see the shapes of witches, making it look like witches are inside having a meeting!

Backlighting for a Spooky Effect

Putting a light behind the silhouettes can make them stand out even more. At night, this can look really spooky and cool, like the witches are moving around.

Adding Additional Elements for a Scene

You can add more to your window scene, like a cat silhouette or a full moon made out of paper. It’s like creating a little story on your window for people to see.

Handmade Witch Dolls

Choosing Fabrics and Patterns

For your witch doll, you’ll want to choose fabrics that match what you think a witch should wear. You can even use scraps from other projects. Maybe your witch has a velvet cloak or a sparkly hat.

Sewing and Assembling Your Witch Doll

Sewing your witch doll might require some help, especially if you’re not used to sewing. But with a little patience, you can stitch together the body, clothes, and hat to bring your witch to life.

Customizing Your Doll’s Features and Accessories

You can make your witch doll unique by adding special touches. Maybe she has bright button eyes or carries a tiny broom. You can decide what makes her special.

DIY Halloween Witch Decorations

Flying Witch Mobiles

Materials and Tools Required

To make a flying witch mobile, you’ll need some thin sticks or wire for the frame, string to hang it with, and paper or fabric to make the witches. You’ll also need scissors and glue to put everything together.

Assembling the Mobile Frame

First, you’ll build the frame for your mobile. You can use sticks or wire to make the shape you want. It could be a circle or maybe even a star.

Creating and Attaching the Witches

Then, you make your witches. You can cut out paper silhouettes or sew small fabric witches. Once they’re ready, you attach them to the frame with string, so they look like they’re flying around.

Safety Tips

Fire Safety with Candles and Electronic Components

When you’re using candles or electronic lights in your decorations, it’s really important to be careful. Never leave candles burning without watching them, and make sure your electronic lights are used correctly to avoid any accidents. It’s like being a good wizard who makes sure their spells don’t go out of control.

Non-toxic Materials and Substances for Potion Bottles

Make sure everything you use for your potion bottles is safe and non-toxic. This means it shouldn’t hurt you if you touch it. Always ask if you’re not sure something is safe.

Ensuring Secure Installations and Displays

Finally, when you’re setting up your decorations, make sure everything is secure. You don’t want anything to fall down or break. It’s like making sure your magic broom is ready for a safe flight.

Learn more about the DIY Halloween Witch Decorations here.

DIY Halloween Witch Decorations Read More »

Halloween Crafts with Felt

Today, you’re going to learn about making fun Halloween crafts using felt. Felt is a soft, colorful material, and it’s perfect for creating spooky decorations or cute little crafts that can bring the spirit of Halloween into your home. You’ll discover how to cut, glue, and decorate felt to make things like pumpkins, ghosts, and bats. It’s a fantastic way to get creative and make your Halloween extra special with your own handmade decorations. Let’s get started on crafting your Halloween adventure with felt!

Check out the Halloween Crafts with Felt here.

Introduction to Halloween Crafts with Felt

Importance of Halloween crafts

Halloween crafts are super fun! They let you show off your creative side and make your home look spooky and special for Halloween. When you make your own decorations, you can make them just the way you like, with your favorite colors and designs.

Why choose felt for Halloween DIY projects

Felt is a great choice for Halloween projects because it’s easy to work with, even if you’re just learning how to craft. It doesn’t fray at the edges like some other fabrics, which means you don’t have to sew edges unless you want to. Plus, felt comes in lots of colors, perfect for making pumpkins, ghosts, witches, and all sorts of Halloween decorations.

Overview of easy-to-make felt projects for Halloween

There are so many fun things you can make with felt for Halloween. You can create decorations like pumpkins, ghosts, and bats to hang in your home. Or, you can make a witch hat to wear, and even craft a spooky garland to drape across your walls. These projects are all pretty easy, so you’ll be able to make something awesome with a bit of practice.

Basic Materials Needed for Felt Halloween Crafts

Types of felt suitable for Halloween crafts

For Halloween crafts, you can use any type of felt. There’s craft felt, which is inexpensive and comes in lots of colors. There’s also wool felt, which is a bit thicker and feels nicer, but it’s also more expensive. You can choose whichever one you like or fits your budget.

Additional materials and tools

Besides felt, you’ll need a few other things like scissors to cut your felt, glue if you don’t want to sew, and thread and a needle if you do. Sometimes, you might need a ruler or a template for your project, and things like buttons or beads to decorate.

Preparation and setup tips

Before you start, clear a space to work where you can spread out your felt and other materials. Have all your tools close by so you don’t have to stop and look for them. It’s also a good idea to read through the steps of your project before you start, so you know what to do.

Halloween Crafts with Felt

This image is property of images.unsplash.com.

Check out the Halloween Crafts with Felt here.

Felt Pumpkin Decorations

Step-by-step guide to creating a felt pumpkin

First, cut out a pumpkin shape from your orange felt. You can make it as big or as small as you like. Then, use green felt to cut out a small stem. Sew or glue the stem to the top of your pumpkin. If you want, you can add a face to your pumpkin with black felt or by drawing with a marker.

Variations in design and size

Your pumpkin doesn’t have to look like everyone else’s. You can make tiny pumpkins, big pumpkins, round pumpkins, or tall pumpkins. You can also make your pumpkin’s face look happy, spooky, or even surprised!

Ideas for using felt pumpkin decorations in your home

You can put your felt pumpkins everywhere around your house. Stick them on your walls, place them on shelves, or even hang them from the ceiling with a string. They can help make any room look ready for Halloween.

DIY Felt Ghosts for Halloween

Creating simple and cute felt ghosts

Cut out a ghost shape from white or gray felt. Ghost shapes are easy – just think of a squiggly cloud or a teardrop. You can make your ghost any size you like. Add eyes and a mouth with black felt or a marker to give your ghost a face.

Customization tips for different expressions

Your ghost can have any expression you want. Try different shapes for its eyes and mouth to make it look happy, scared, or even goofy. You can add accessories like a bow tie, hat, or carrying a tiny felt pumpkin to make your ghost unique.

Incorporating felt ghosts into your Halloween decor

Hang your felt ghosts in windows, on walls, or from the ceiling with clear fishing line to make it look like they’re floating. You can also stick them to a wreath for your door or add them to your Halloween table setting.

Halloween Crafts with Felt

This image is property of images.unsplash.com.

Crafting Felt Bats for Halloween

Pattern and cutting instructions for felt bats

Draw or print out a bat shape on paper to use as a template. Place the template on black felt and trace around it, then cut out your bat. You’ll need two bat shapes for each decoration.

Hanging and displaying felt bats effectively

Sew or glue the edges of the two bat shapes together, leaving a space to add a little stuffing or a piece of cardboard to help them keep their shape. You can hang your bats with fishing line or stick them on walls and windows.

Adding features to make your felt bats stand out

Add little white felt eyes or use glow-in-the-dark paint to give your bats spooky eyes that stand out in the dark. You can also cut your bats in different sizes to create a whole family of bats.

Making a Felt Witch Hat

Materials needed for a DIY felt witch hat

You’ll need black felt for the hat and any other colors you like for decorations. You’ll also need something like cardboard to give the brim of your hat some stiffness.

Step-by-step assembly instructions

Cut a large circle for the brim of your hat and a triangle that will become the cone. Make a slit in your circle to the center, then overlap the edges a bit to form a cone shape and glue or sew it to the brim. Add a strip around the base of the cone for a cleaner finish.

Decorating your felt witch hat for extra flair

Add colorful felt bands, stars, moons, or anything else you like to your hat to make it your own. You can also add ribbons or fabric flowers.

Halloween Crafts with Felt

This image is property of images.unsplash.com.

Felt Halloween Garland

Choosing a theme for your Halloween garland

Decide if you want your garland to have all one type of decoration, like just pumpkins, or a mix of everything like pumpkins, ghosts, and bats.

Creating felt shapes for the garland: pumpkins, ghosts, bats

Use the instructions above to make small felt shapes for your garland. You’ll want to make them a bit smaller than if they were standalone decorations.

Assembling your felt Halloween garland

Lay out a long piece of string or ribbon and arrange your felt shapes along it. When you’re happy with how it looks, sew or glue your shapes to the string. Now, it’s ready to hang across a doorway, a fireplace, or on a wall.

Spooky Felt Halloween Masks

Designing your Halloween mask template

Think about what kind of mask you’d like to make. It could be a pumpkin, a cat, a bat, or anything else. Draw your design on paper first to create a template.

Cutting and assembling your felt mask

Cut your mask shape out of felt, making sure to include eye holes. Sew or glue on additional felt pieces for details like nose, mouth, whiskers, or ears.

Decorative ideas for personalizing your mask

Use glitter, beads, or fabric paint to add details and make your mask sparkle or glow in the dark. Think about adding elastic or a stick to hold your mask in place.

Halloween Crafts with Felt

Felt Candy Corn Decorations

Creating a pattern for felt candy corn

Draw a simple candy corn shape on paper – it’s just a triangle with rounded corners. Use this as your template.

Sewing and stuffing your candy corn decorations

Cut two candy corn shapes from white, orange, and yellow felt. Sew or glue them together, leaving a little opening to stuff them lightly before closing them up.

Ideas for displaying your felt candy corn

Group your candy corn decorations in a bowl as a table centerpiece, string them into a garland, or hide them in unexpected places for a fun surprise.

Conclusion: Expanding Your Felt Halloween Crafts Collection

Mixing and matching different felt Halloween crafts

Now that you’ve made all these cool things, try putting them together in new ways. Maybe your ghosts need to ride on the witches’ hats, or your bats want to hang out with the pumpkins.

Getting creative with your own felt Halloween designs

Use what you’ve learned to come up with your own felt Halloween crafts. Can you think of a spooky creature or decoration you’d like to make? Give it a try!

Storing your felt Halloween decorations for future use

When Halloween is over, keep your felt decorations safe by storing them flat in a box or hanging them in a closet. That way, they’ll be ready to make your home spooky and fun again next year!

Check out the Halloween Crafts with Felt here.

Halloween Crafts with Felt Read More »

Halloween DIY Costumes for Couples

Imagine you and your partner dressing up in fun costumes that you made all by yourselves for Halloween! This article is going to tell you all about how you can create cool and unique Halloween costumes for couples using stuff you might already have at home. It’s like playing dress-up, but even more fun because you get to be super creative and work together. Get ready for some spooky, silly, and totally awesome costume ideas that will make your Halloween unforgettable!

Click to view the Halloween DIY Costumes for Couples.

Introduction to Halloween DIY Costumes for Couples

Halloween is a special time of year where you get to dress up and be anyone or anything you want for a night. For couples, it’s even more fun because you can team up and create costumes together. Let’s dive into why making your own costumes is so appealing and the benefits that come with it.

Understanding the appeal of DIY costumes

Making your own Halloween costumes is like being an artist for a day. You get to use your imagination to turn an idea into an actual costume. It’s not just about wearing it; it’s about creating it. Plus, when you make your own costume, no one else will have the same one as you at the party!

The benefits of creating your costumes together

When couples create their costumes together, it adds a special touch to the Halloween experience. You both get to share ideas, laugh, and maybe even learn a new skill like sewing. It’s not just about the costumes; it’s about spending quality time together and making memories.

Classic Movie Duos

Movies give us some of the best costume ideas. Here are a few classic movie duos that make for fantastic DIY costumes.

Bonnie and Clyde: Period costumes and accessories

To dress up as Bonnie and Clyde, think of old-fashioned clothes from the 1930s. Bonnie would wear a midi skirt and a sweater, while Clyde would wear a suit. You can add a beret for Bonnie and a fedora for Clyde to make it feel more authentic.

Danny and Sandy from Grease: 1950s fashion DIY

For Danny, a black t-shirt, cuffed jeans, and a leather jacket will make you look just like a T-Bird. Sandy’s final movie look requires black leggings, a black top, and, if you can manage, high heels. Don’t forget to slick back your hair if you’re Danny and to get those curls if you’re Sandy.

Jack and Rose from Titanic: Edwardian outfits and life jackets

Dressing as Jack and Rose can be a lot of fun. For Rose, look for a long, elegant dress, preferably in a pastel color, and add a big hat if you have one. Jack’s outfit is simpler, with just slacks and a white shirt, but make sure to add a life jacket to both costumes to capture the iconic Titanic element.

Halloween DIY Costumes for Couples

This image is property of images.pexels.com.

Get your own Halloween DIY Costumes for Couples today.

Superhero Couples

Superhero costumes are always a hit. Let’s look at how to make some iconic superhero couple costumes.

Batman and Catwoman: Crafting iconic masks and capes

For Batman, you’ll need a black outfit and a cape. You can make the mask out of black fabric or paper. Catwoman requires a sleek, all-black outfit. Crafting the cat ears from cardboard and covering them with black fabric can be a fun project.

Superman and Lois Lane: Capes, suits, and journalistic accessories

Superman’s costume can be made from a blue outfit with a homemade red cape and the iconic “S” logo on the chest. For Lois Lane, dress as a reporter with a classy outfit and add accessories like a notepad or a camera.

Spider-Man and Mary Jane: Homemade Spider-Man costume and stylish MJ ensemble

Creating a Spider-Man costume might be a bit tricky, but you can use red and blue fabric to sew or glue the design onto a base outfit. For Mary Jane, choose a simple, stylish outfit, and don’t forget to include a red hair accessory if you can.

Iconic TV Couples

Television shows have given us some unforgettable couples. Here are a few you can recreate.

Jim and Pam from The Office: Office attire with memorable prop additions

For Jim, it’s all about the simple office wear, but don’t forget to add a name tag that says “Jim” or one of his classic prank accessories. Pam’s costume is similar, with conservative office wear and a name tag as well. You could also recreate a specific episode’s attire for more fun.

Ross and Rachel from Friends: 90s fashion and Ross’s ‘Spudnik’

Bring Ross and Rachel to life with classic ’90s attire. For Ross’s ‘Spudnik’ costume, use a large round object as the potato base and add some antennas. Rachel can wear anything from a waitress outfit to one of her stylish ’90s looks.

Gomez and Morticia Addams: Gothic elegance on a budget

For Gomez, a sharp suit and a thin mustache are key. Morticia requires a long black dress and long, straight black hair. Add pale makeup to both to achieve the Addams’ iconic look.

Halloween DIY Costumes for Couples

This image is property of images.pexels.com.

Horror Movie Pairings

Horror movies have some of the most memorable couples. Here are a few you can recreate with DIY costumes.

Chucky and Bride of Chucky: Creating scary doll costumes

For Chucky, wear overalls with a striped shirt and add some fake scars on your face. The Bride of Chucky needs a white dress and a leather jacket, plus some scary makeup to look the part.

Gomez and Morticia from The Addams Family: Elegant, gothic attire

(See the section under Iconic TV Couples)

Frankenstein and Bride: Monster makeup and vintage clothing

Dressing as Frankenstein requires green face paint and vintage clothing that looks a bit tattered. The Bride needs her iconic white dress and the famous hairdo with white streaks.

Historical Figures

History provides a treasure trove of costume ideas. Here are some historical figures that make great couples’ costumes.

Cleopatra and Julius Caesar: Ancient Egyptian and Roman attire

For Cleopatra, a simple white dress with gold accessories will work, and don’t forget the dramatic eye makeup. Julius Caesar can simply wear a toga and a laurel wreath.

Bonnie and Clyde: Making period-appropriate costumes

(See the section under Classic Movie Duos)

Henry VIII and Anne Boleyn: Tudor outfits and royal accessories

Henry VIII’s outfit needs to be regal, with a large coat and fake fur. Anne Boleyn requires a Tudor-style dress and a distinctive necklace.

Halloween DIY Costumes for Couples

This image is property of images.pexels.com.

Fantasy and Mythology

Diving into the worlds of fantasy and mythology opens up endless costume possibilities.

Zeus and Hera: Greek god and goddess costumes

Wear togas in white and gold, and add crowns or headpieces that represent the king and queen of the gods. You can even carry a lightning bolt or a scepter.

Mermaid and Sailor: Creating under-the-sea and nautical outfits

For the mermaid costume, use shiny fabric for the tail and create a seashell top. The sailor can wear a simple navy outfit with a hat and maybe carry a toy boat.

Elf and Fairy: Crafting magical accessories and attire

Elves and fairies require a bit of creativity with accessories. Think ear tips for the elf and wings for the fairy. Use bright, natural colors and lots of glitter.

DIY Tips and Tricks

Here are some general tips for making your DIY costumes stand out.

Using everyday items creatively

Look around your house for things that can be turned into parts of your costume. Old clothes, cardboard, and even aluminum foil can be incredibly useful.

Tips for sewing and fabric manipulation

Don’t worry if you’re not a pro at sewing. Simple stitches can be very effective, and there are lots of tutorials online that can help with basic sewing and fabric manipulation.

Accessorizing: The key to a believable costume

Sometimes, it’s the accessories that make the costume. Think about what small additions can make your costume go from good to great.

Halloween DIY Costumes for Couples

Sustainable and Eco-Friendly Costumes

Halloween doesn’t have to be wasteful. Here are some tips for keeping your costume eco-friendly.

Repurposing old clothes and materials

Before buying anything new, see what you can use from your existing wardrobe or recycle materials from around your house.

Using biodegradable materials

When creating accessories or props, look for materials that are biodegradable or can be easily recycled.

Renting pieces to complete your look

If you need something specific for your costume that you don’t already have, consider renting it instead of buying. This can be a more eco-friendly option.

Conclusion

Making DIY Halloween costumes as a couple isn’t just about the costumes; it’s about the joy and bond you share while creating them. It’s a chance to be creative, have fun, and make this Halloween uniquely memorable. So, grab your crafting supplies and start bringing your costume ideas to life!

See the Halloween DIY Costumes for Couples in detail.

Halloween DIY Costumes for Couples Read More »

Crafting a DIY Halloween Village

Imagine turning your home into a little village full of spooky Halloween fun—that’s exactly what you’ll learn to do today! You’ll find out how to create your very own Halloween village with crafts and decorations you make all by yourself. It’s like becoming a magician, but instead of pulling rabbits out of hats, you’ll be crafting ghosts, pumpkins, and haunted houses right at your kitchen table. Let’s get started on this exciting adventure and make this Halloween extra special with your handmade village!

Get your own Crafting a DIY Halloween Village today.

Choosing Your Halloween Village Theme

When you start creating your own Halloween village, the first exciting step is picking a theme. Imagine a little world of your very own, filled with spooky fun. Here are some ideas to get your imagination going!

Classic Haunted Village

Think of old, crooked houses, a spooky cemetery, and maybe even a haunted castle. Ghosts might be peeking out of windows, and a mysterious fog covers the ground. It’s like stepping into a story where every corner holds a secret!

Witch’s Lair

Imagine a place where a witch brews her potions. There might be a small cottage deep in the woods with bubbling cauldrons and magical ingredients. Black cats roam around, and you might even spot a broomstick leaning against a tree.

Zombie Apocalypse

What if your village was taken over by zombies? You could have abandoned cars, broken fences, and zombies wandering the streets. It’s a little bit scary and a lot exciting to think about creating such a world.

Famous Horror Movie Scenes

Do you have a favorite spooky movie? You can recreate scenes from it in miniature form. Whether it’s a creepy mansion or a spooky street, you can bring those famous moments to life right on your display table.

Ghostly Graveyard

Imagine a graveyard with old tombstones, skeletons, and ghosts floating around. Maybe there’s an old church nearby with a broken bell. It’s a classic spooky setting that’s perfect for a Halloween village.

Planning Your Village Layout

Before you start building, it’s a good idea to think about how you want your village to look. Here’s how to plan it out:

Sketching a Basic Layout

Grab some paper and pencils and start drawing. You don’t have to be a great artist; this is just to help you imagine where everything might go.

Selecting a Display Area

Find a spot in your house where your village can stay. Maybe it’s on a table or a shelf. Make sure there’s enough space for all your ideas!

Creating Zones or Districts

Think about having different areas in your village, like a spooky forest zone or a town square. This makes your village more interesting.

Incorporating Landscape Features

Hills, rivers, and bridges can make your village look more real. You can use cardboard or foam to create these shapes.

Thinking About Lighting and Shadows

Lights can make your village spooky in a fun way. Imagine where you might want lights, like in windows or streetlights, to create spooky shadows.

Crafting a DIY Halloween Village

This image is property of pixabay.com.

Check out the Crafting a DIY Halloween Village here.

Gathering Materials

Now, you need some supplies to start building. Here’s what you might look for:

Recyclable Materials

Old boxes, toilet paper rolls, and plastic containers can be turned into houses, trees, and more. It’s fun to recycle and create at the same time!

Craft Supplies

You’ll want things like paint, glue, and scissors. Craft stores have lots of exciting supplies you can use to decorate your village.

Natural Elements

Sticks, leaves, and rocks can make your village look more outdoor and realistic. Next time you’re on a walk, keep an eye out for things you can use.

Miniature Components

Little furniture, people, and animals can be found at craft stores. They help make your village feel alive.

Lighting and Special Effects

Small LED lights or even flashlight beams can create spooky effects. Bubble wrap can look like water, and cotton balls can look like fog!

Constructing Buildings and Structures

Now, it’s time to start building your village pieces. Here’s how to begin:

Designing Paper Templates

Drawing the shapes of your buildings on paper first can help you cut out the correct shapes from cardboard.

Building with Cardboard and Foam Board

You can cut and glue these to make the walls and floors of your buildings. It’s like putting together a puzzle!

Adding Texture and Details

You can use sand, small stones, or even crumpled paper to add texture to your buildings. It makes them look more real.

Painting Techniques for Realism

Mixing different colors can give your buildings an old and spooky look. Remember, it doesn’t have to be perfect to be fun!

Creating Roofs and Architectural Details

You can use cardboard cut into shapes for roof tiles or use straws for pipes. It’s all about being creative!

Crafting a DIY Halloween Village

This image is property of pixabay.com.

Creating Spooky Landscapes

A cool landscape can make your village even more special. Check these out:

Making Miniature Trees and Bushes

You can use real branches or clump up some moss to make trees and bushes. Adding these can make your village look more outdoorsy.

Crafting Tombstones and Graveyards

With some cardboard cut into shapes and a little paint, you can create spooky tombstones. Arranging them into a graveyard scene is super fun.

Simulating Water and Fog Effects

Saran wrap can look like water, and cotton balls can look like fog. Experiment to see what looks best in your village!

Using Moss and Ground Cover

Green moss can look like grass, and sand can look like dirt paths. It’s all about using what you have to create different looks.

Incorporating Seasonal Elements

Pumpkins, fallen leaves, and even miniature scarecrows can make your village feel like it’s part of Halloween.

Assembling Miniature Figures and Characters

Characters bring your village to life. Here’s how to create them:

Customizing Store-bought Miniatures

You can paint store-bought figures to fit your theme better. Maybe you add a cape or paint them to look like zombies!

Molding Characters with Polymer Clay

If you like sculpting, you can make your own figures. It’s a fun craft to get just the look you want.

Painting Techniques for Lifelike Details

Using tiny brushes, you can add details like eyes or spooky patterns to your characters. Take your time and have fun with it.

Creating Posable Figures

Wire can help make your figures posable. This way, you can have them standing, sitting, or even waving!

Dressing Figures with Fabric and Accessories

Little pieces of fabric can make capes or gowns, and beads can be turned into mini lanterns or pots. Get creative with your decorations!

Crafting a DIY Halloween Village

This image is property of pixabay.com.

Innovative Lighting Solutions

Lighting can make your village truly magical. Here are some ideas:

LEDs for Buildings and Streetlights

Small LED lights can be used to light up your buildings or as streetlights. They make your village look charming at night.

Fiber Optics for Fairy Lights

Fiber optics can create tiny lights that look like fairy lights or magical spells. They’re perfect for adding a touch of magic.

Creating Illusions with Light and Shadow

Placing lights behind or below your structures can create spooky shadows. Experiment to see what looks the most mysterious.

Battery vs. Plug-in Lighting

Battery lights are safer and easier to place anywhere, but plug-in lights are brighter. Think about what works best for your village.

Safety Tips for Lighting

Always be careful with lights. Ask an adult for help with anything that plugs in, and make sure nothing gets too hot.

Adding Animated Elements

Movement can make your village extra special. Here’s how to add motion:

Simple Motorized Props

Small motors can make things like windmills turn or zombies walk. It’s a bit more advanced but very cool.

Using Arduino for Custom Effects

Arduino boards can control lights and motors for custom effects. It’s like being a wizard with electronics!

Incorporating Sound Effects

Spooky sounds or music can make your village feel alive. You can find small sound devices to hide in your village.

Water Features and Smoke Machines

Little pumps can create water effects, and mini smoke machines can make fog. These are advanced but make your village amazing.

Animating Characters and Scenes

With a bit of practice, you can make characters move or create scenes that change. It’s like making your own Halloween movie!

Crafting a DIY Halloween Village

Detailing and Finishing Touches

Details make your village unique. Here’s what you can add:

Weathering Techniques for Realism

Using paint and sandpaper, you can make buildings look old and worn. It adds so much character!

Adding Miniature Accessories

Little things like books, pots, or tools make your village feel real. You can make these or find them in stores.

Creating Signs and Labels

Small signs can say things like “Beware!” or “Witch’s Cottage.” You can write them yourself or print them out tiny.

Fine Painting and Detailing Tips

Using very small brushes, you can add incredible details. Take your time and enjoy adding these special touches.

Securing Loose Components

A little glue can keep everything in place. You don’t want parts of your village to move unless they’re supposed to!

Maintenance and Storage

Once Halloween is over, you’ll need to take care of your village. Here’s how:

Cleaning Your Displays

A soft brush can dust off your village. It’s good to keep it clean so it looks great next year.

Disassembly Tips

Taking apart your village carefully means you can use it again. Labeling pieces as you take them down can help you remember where they go.

Storing Fragile Pieces

Wrap up anything delicate in tissue paper or bubble wrap. You want to make sure nothing breaks while it’s put away.

Organizing Supplies for Next Year

Keeping your leftover supplies together means you’re ready to start crafting again next Halloween. It’s exciting to think about what you’ll add!

Making Repairs and Updates for Future Displays

If anything breaks or you think of new ideas, you can always add to your village. It’s a project that grows with you!

Creating your own Halloween village is a fun and creative way to celebrate. You can make it exactly how you imagine, and every year, it can get bigger and better. Start with a theme, plan it out, gather materials, and then start building. Before you know it, you’ll have a spooky little world of your own!

Find your new Crafting a DIY Halloween Village on this page.

Crafting a DIY Halloween Village Read More »

Halloween DIY Lanterns for Ambience

Today, you’re going to learn how to make your own Halloween lanterns. These lanterns will make your room or house look spooky and fun for Halloween. You’ll use simple materials to create these lanterns, and once you’re done, they will light up your space with a special Halloween glow. It’s like making a little bit of magic to share with your friends and family. Get ready to add some extra spookiness to your Halloween with these easy-to-make DIY lanterns!

Learn more about the Halloween DIY Lanterns for Ambience here.

Essential Materials for DIY Halloween Lanterns

Creating your own Halloween lanterns is a fun way to brighten up spooky nights. Before we start crafting, let’s make sure we have all the right stuff!

Selecting the right jars and containers

The best jars are clear and a good size—like a mayonnaise jar or a big juice container. Containers that are smooth and don’t have a lot of writing or pictures on them are perfect because your light will shine bright through them.

Choosing paint and decorations

You can use paint that sticks to glass for your jars. For decorations, think about using stickers, glitter, or even leaves and twigs from outside. Whatever feels spooky or fun to you!

Types of lights: candles vs LED

Candles can give a nice flicker, but if you’re worried about safety, LED lights are great. They’re not hot, so they won’t burn your fingers or anything else. Plus, they can go anywhere—even places candles can’t!

Safety materials: gloves, goggles, and aprons

Stay safe while crafting! Gloves will protect your hands, goggles will keep your eyes safe, and an apron or an old t-shirt will keep your clothes free from paint and glue.

Pumpkin Lanterns

Pumpkins are a Halloween classic. Let’s see how we can turn them into beautiful lanterns.

Carving vs painting pumpkins

You can either carve a face or a design into your pumpkin or paint it. Carving can be a bit tricky and needs a grown-up’s help, but painting can be just as fun and you can do it all by yourself!

Installation of lights inside the pumpkin

After you’ve carved or painted your pumpkin, you can put a small candle inside, or safer yet—use an LED light! If you use a candle, remember to never leave it unattended.

Decorative ideas for pumpkin lanterns

Try making your pumpkin lantern into a cat, a witch, or even your favorite cartoon character. You can also stick on sparkly gems or use washable markers to add extra details.

Preservation techniques for pumpkin lanterns

To keep your pumpkin looking fresh, you can put a little bit of petroleum jelly on the cut edges. Keep it in the fridge during the day to help it last longer.

Halloween DIY Lanterns for Ambience

This image is property of pixabay.com.

Click to view the Halloween DIY Lanterns for Ambience.

Mason Jar Lanterns

Mason jars make fantastic lanterns. Let’s learn how to decorate them for Halloween.

Preparation of mason jars

Clean your jar with soap and water and take off any stickers. Dry it well so the paint will stick.

Themed painting techniques

You can paint your mason jar like a ghost, pumpkin, or anything spooky. Use a sponge for a cool effect, or stickers as stencils to paint around.

Attaching handles for hanging

With a little bit of wire, you can twist a handle onto the top of your mason jar. Ask someone older to help with this, as the wire can be sharp.

Choosing the perfect spot for display

Hang your mason jar lanterns from trees, your porch, or place them along your walkway. Just remember to use LED lights if they’re going to be outside where it could rain.

Ghostly Milk Jug Lanterns

Milk jugs can turn into spooky ghost lanterns with just a few simple steps.

Collecting and cleaning milk jugs

Save your empty milk jugs and clean them out well. Remove any labels so the light can shine through the plastic.

Drawing and cutting spooky faces

Draw a fun or spooky face on your milk jug with a marker. You can cut out the shapes if you want, but ask for help since the plastic can be tough to cut.

Filling the jugs with the right light source

Pop some LED lights inside the jugs. They’re perfect because they won’t heat up and can make your ghost glow all night.

Arranging the ghostly lanterns for maximum effect

Line up your milk jug ghosts along a path or group them together in a dark corner. They’ll look super spooky when the sun goes down.

Halloween DIY Lanterns for Ambience

This image is property of pixabay.com.

Witch Hat Luminaries

Witch hats add a bit of magic to Halloween. Making luminaries shaped like them is easy and fun.

Crafting the witch hat shape

You can make witch hat shapes from black paper or felt. Cut a circle for the brim and a cone for the top, then stick them together.

Decorative elements to enhance the witchy vibe

Glue on some shiny stars, moons, or glitter to your witch hat for that extra magical feel. You can even add a ribbon around the base of the cone.

Choosing between hanging and tabletop placement

Decide if you want to hang your witch hat luminaries or place them on tables. If you’re hanging them, you can attach a string to the top.

Lighting options for a magical glow

Put a small LED light inside your witch hat. It will look really cool glowing in the dark, making everything seem a bit more magical.

Creepy Crawly Spider Lanterns

Spiders might be creepy, but they make excellent themes for Halloween lanterns.

Creating spider shapes and designs

You can cut out spider shapes from black paper or use toy spiders. Gluing them onto lanterns or stringing them up around lights looks awesome.

Incorporating web patterns on lanterns

Use white paint or markers to draw spider web designs on your lanterns. You can make the webs as simple or as detailed as you like.

Ideal locations for spider lantern placement

Hang your spider lanterns in trees, in your windows, or place them on your doorstep. Imagine walking up to a house covered in spider lanterns!

Lighting techniques to create spooky shadows

Position the light inside your lantern in a way that casts big, spooky spider shadows. LED lights work best because they’re bright and safe.

Halloween DIY Lanterns for Ambience

This image is property of pixabay.com.

Floating Ghost Lanterns

Floating ghosts are sure to give your Halloween decor an eerie touch. Let’s learn how to make them really float.

Materials needed for floating effect

Use white balloons and cheesecloth or thin fabric to create your floating ghosts. You’ll need string to hang them up too.

Crafting and painting tips for a ghostly appearance

Drape the fabric over the blown-up balloon to get the ghost shape. Use markers to draw on spooky faces or paint them for a more dramatic effect.

Securing the lanterns to float safely

Tie a string around the top of your ghost and hang it from trees or your ceiling. Make sure it’s secure so your ghost doesn’t fly away!

Strategic placement for a haunting ambiance

Place your floating ghosts where they will surprise guests. Near the front door or hovering over your snack table are perfect spots.

Glow-in-the-Dark Lanterns

Glow-in-the-dark lanterns are super cool and don’t even need batteries!

Choosing glow-in-the-dark paint or materials

You can find glow-in-the-dark paint at most craft stores. Pick a paint that’s safe for the surface you’re using—like glass, plastic, or paper.

Techniques for even application of glow

Apply your glow paint evenly. Sometimes it helps to do a few layers to make sure your lantern really lights up in the dark.

Creative designs for a mystical effect

Try painting stars, moons, or even ghostly shapes with your glow paint. When the lights go off, your designs will come to life.

Safety and duration of the glow effect

Glow paints are generally safe to use, but always check the label. Most glow-in-the-dark effects last for a few hours after being “charged” by light.

Halloween DIY Lanterns for Ambience

Bewitched Silhouette Lanterns

Silhouettes can create mysterious scenes right on your lanterns. Let’s get crafty!

Selecting silhouettes for a bewitched theme

Choose Halloweeny shapes like witches, bats, or haunted houses. You can find templates online or draw your own.

Cutting and attaching silhouettes to lanterns

Once you have your silhouette, carefully cut it out of black paper. Then, glue it onto your lantern. Be gentle so your paper doesn’t rip.

Impactful light sources for silhouette visibility

Place a bright LED light inside your lantern to make your silhouette stand out. The darker it gets, the spookier your shapes will look.

Arrangement ideas for a storyline effect

Set up a few silhouette lanterns together to tell a story. Maybe there’s a witch flying to her haunted house, where a cat waits by the door.

Setting the Scene: Placement and Arrangement Tips

The final touch is deciding where to put your lanterns for the best spooky effect!

Indoor vs outdoor considerations

If you’re decorating outside, make sure your lanterns are safe from wind and rain. Indoors, think about where people will see them best, like windows or tables.

Creating pathways with lanterns

Lanterns can light up a path to your door, making a fun and spooky walkway for trick-or-treaters or guests.

Pairing lanterns with other Halloween decorations

Mix and match your lanterns with other decorations. They look great with fake cobwebs, pumpkins, or even a scarecrow.

Ensuring safety in placement, especially with real candles

Always be careful with real candles. Place them where they can’t be knocked over and never leave them burning unattended. Safety first makes Halloween fun for everyone!

Learn more about the Halloween DIY Lanterns for Ambience here.

Halloween DIY Lanterns for Ambience Read More »

Vintage Halloween Craft Ideas

Get ready to make your Halloween super special and a bit old-timey with some cool vintage Halloween craft ideas! Imagine creating your own spooky decorations and fun crafts that look like they came right out of a storybook from a long time ago. You’ll learn how to make pumpkins that seem like they’ve been carved by wizards and ghosts that could have danced in an enchanted forest. So, grab your scissors, glue, and a sprinkle of imagination because we’re about to have a lot of fun turning your home into a vintage Halloween wonderland!

Vintage Halloween Craft Ideas

This image is property of images.pexels.com.

See the Vintage Halloween Craft Ideas in detail.

Vintage Paper Mâché Pumpkins

Materials needed: old newspapers, glue, balloons, paint

For making your very own vintage paper mâché pumpkins, you’ll need some old newspapers you don’t mind tearing up, glue to hold it all together, a few balloons to shape your pumpkins, and paint to give them that classic Halloween look.

Step-by-step crafting process

First, you’ll need to tear your newspapers into strips. Then, blow up a balloon to the size you want your pumpkin to be. Dip the newspaper strips into glue and place them over the balloon. Keep adding strips, crisscrossing them until the balloon is fully covered. Let it dry completely, then paint it orange with green for the stem. Now, you’ve got a paper mâché pumpkin!

Inspiration from vintage designs

To make your pumpkin look vintage, look at old Halloween decorations for inspiration. They often have softer, less bright colors and more whimsical shapes. Try to mimic these features in your painting and decorating.

Tips for achieving an aged look

To give your pumpkin an aged look, use a mix of orange and brown paint for a muted color. You can also lightly sand the painted surface once it’s dry to make it look worn.

Classic Halloween Garland

Materials: cardstock, vintage Halloween images, string or ribbon

You’ll need cardstock (a thick paper), some printed vintage Halloween images, and either string or ribbon to make a garland. You can find these images online or in old books!

Instructions for cutting and assembling

First, cut your cardstock into the shapes you want, like pumpkins or ghosts. Then, glue your vintage images onto these shapes. Make small holes in the top, and thread your string or ribbon through them to make a garland.

Ideas for incorporating vintage elements

To add that vintage touch, look for images with classic Halloween characters like black cats or witches. The older-looking, the better! You could even use tea to stain your cardstock for an aged effect.

Hanging and display suggestions

You can hang your garland across a mantel, doorway, or even around a Halloween-themed table. If you’re feeling extra crafty, add some old lace or ribbons between each piece for a more detailed look.

Learn more about the Vintage Halloween Craft Ideas here.

Victorian-inspired Ghost Decorations

Materials: cheesecloth, starch, wire, and antique doll faces

You will need some cheesecloth (that thin, gauzy fabric), liquid starch to make it stiff, some wire to create shapes, and antique doll faces for a truly vintage feel. You might find those at thrift stores or online.

Creating the ghost shapes and form

Bend your wire into a ghostly shape, like a head and arms. Dip your cheesecloth in the starch, then drape it over the wire form. Once it dries, it will hold the shape.

Adding vintage touches

Attaching an antique doll face to the head of your ghost will give it a spooky Victorian vibe. You could also dye the cheesecloth with tea before starching it for an old-fashioned look.

Setting up a spooky yet classy display

These ghosts look great in groups. Hang them from the ceiling or place them around your house where guests might not expect to find them for a little Halloween surprise.

Witch Hat Centerpieces

Materials: cardboard, fabric, and embellishments

To make a witch hat centerpiece, gather some cardboard for the structure, fabric to cover it, and any embellishments like vintage lace or ribbons you want to add.

Steps to construct and decorate the hats

Cut your cardboard into a cone and a circle for the brim. Glue these pieces together to form a hat shape, then cover with your fabric. Decorate with your embellishments to give it personality.

Incorporating vintage lace and ribbons

Using vintage lace and ribbons can add a classy, old-timey feel to your witch hats. Drape the lace around the brim or make a bow with the ribbon to decorate.

Styling tips for a Halloween table

Place your witch hat in the center of your Halloween table, perhaps on top of an old book or surrounded by vintage candle holders. It could be a spooky yet stylish centerpiece.

Vintage Halloween Craft Ideas

This image is property of images.pexels.com.

Antique Potion Bottles

Finding and selecting bottles

Look for old bottles at thrift stores or use recycled ones from home. The more unusual the shape, the better. Make sure they’re clean before starting your project.

Creating aged labels and seals

You can make labels look old by soaking them in tea or using brown ink around the edges. Writing mysterious potion names on them will add to the effect. Seal the bottles with wax if you have it, for an authentic look.

Filling ideas for a realistic look

Fill your bottles with colored water or harmless kitchen ingredients to mimic potions. Things like food coloring in water, olive oil, or dry herbs can look interesting and mysterious.

Decorating and display options

Arrange your potion bottles on a shelf or table amongst other vintage Halloween decorations. Adding old books, spider webs, or dried flowers can create a fascinating display.

Retro Halloween Candles

Materials: paraffin wax, vintage molds, wicks, and dyes

To make your candles, you’ll need paraffin wax, vintage-shaped molds (like pumpkins or skulls), wicks to burn, and dyes to color your candles.

Candle making basics

Melt your wax carefully following safety instructions, add your dye, and pour it into the molds with the wick in the center. Let them cool and harden, then remove from the molds.

Adding a vintage flair with molds and colors

Using molds that replicate vintage designs and choosing muted or classic Halloween colors like orange, black, and purple can give your candles a retro feel.

Safety tips and burning instructions

Always be careful when making and burning candles. Never leave them unattended and make sure they’re on a stable, heat-resistant surface away from anything flammable.

Vintage Halloween Craft Ideas

This image is property of images.pexels.com.

Gothic Halloween Wreaths

Material selection: grapevine wreaths, black foliage, and vintage decorations

Start with a grapevine wreath as your base. Look for black foliage or flowers and any spooky vintage decorations like small skulls or faux ravens.

Assembling your wreath

Attach your foliage and decorations to the wreath using wire or hot glue. Arrange them until you’re happy with the look, keeping it as spooky or as classy as you like.

Ideas for a vintage gothic look

Focus on dark colors and vintage elements. Adding an old brooch or lace can bring in that Victorian goth vibe. Think about using less typical Halloween items for a unique twist.

Maintenance and storage advice

To keep your wreath looking nice, dust it occasionally and store it carefully in a dry place where it won’t get squished. That way, you can use it for many Halloweens to come.

Old-fashioned Halloween Cards

Materials: cardstock, vintage images, and embellishments

Choose thick cardstock as your base. Print or find vintage Halloween images, and gather any embellishments like lace, ribbons, or old buttons.

Card design and construction tips

Fold your cardstock to the size you want, glue your image on the front, and then decorate around it with your embellishments. Remember, don’t overcrowd it; sometimes, simpler is better.

Writing fitting messages for Halloween

Inside your card, write a spooky message or a Halloween greeting. Using an old-fashioned font or handwriting can add to the charm.

Ideas for distressing and aging cards

To make your cards look old, use tea to stain them or a lighter to carefully burn the edges. This will give them an authentic vintage Halloween feel.

Vintage Halloween Craft Ideas

Spooky Vintage Photo Transfers

Choosing the right photos and materials

Look for old family photos or find vintage Halloween images online. You’ll need transfer paper that works with the type of printer you have.

Transfer process step-by-step

Print your image onto the transfer paper, then carefully press it onto the material you’re transferring it to, like fabric or wood. Follow the instructions on the transfer paper package closely.

Incorporating these into decorations

Once transferred, you can frame these images, use them to decorate pillows, or even include them in your garland. They add a personal and spooky touch to your Halloween décor.

Tips for a hauntingly realistic look

Choose images that already have a vintage or eerie feel for the best effect. Playing with the contrast or adding a sepia tone before printing can enhance the old-timey vibe.

Halloween Tin Can Luminaries

Materials needed: tin cans, paint, candles or lights

Clean empty tin cans, some paint (black works well for Halloween), and either candles or small LED lights. You’ll also need a hammer and nail to make holes.

Instructions for creating and spacing holes

Fill the cans with water and freeze them; this makes it easier to hammer in the holes without denting the can. Once frozen, use a nail and hammer to make holes in a design or pattern.

Vintage designs and painting techniques

For a vintage feel, paint your cans in muted Halloween colors, and when painting your designs or patterns, think about old-style Halloween motifs like bats, moons, or silhouettes of witches.

Safety tips and display ideas

Be careful when hammering the holes and handling the candles. When displaying, you can place your luminaries along a path, on steps, or as part of a table centerpiece. They’ll cast a spooky glow perfect for Halloween night.

Get your own Vintage Halloween Craft Ideas today.

Vintage Halloween Craft Ideas Read More »

No-Carve Halloween Pumpkin DIY

Imagine making your Halloween pumpkin look awesome without having to use sharp knives or carve into it. With “No-Carve Halloween Pumpkin DIY,” you can decorate your pumpkin in fun and safe ways! You’ll find out how to use stickers, paint, and even glow-in-the-dark decorations to make your pumpkin stand out. So, grab your pumpkin, and let’s make it spooky and special without any cutting!

No-Carve Halloween Pumpkin DIY

This image is property of pixabay.com.

Click to view the No-Carve Halloween Pumpkin DIY.

Overview of No-Carve Pumpkin Decorating

Benefits of choosing no-carve options

Choosing no-carve options for decorating your pumpkins is great! You don’t have to use sharp tools, so it’s safer, especially for young ones like you. This way, you can have fun decorating without worrying about getting hurt. Plus, no-carve pumpkins can last longer, which means your beautiful creations will stay pretty for more days!

Materials and tools needed for no-carve designs

For no-carve pumpkin designs, you’ll need a few things. First, grab some glue, paint, brushes, and maybe even some glitter or fabric. You won’t need any sharp tools, which is great because it keeps things safe and easy.

Choosing the perfect pumpkin for no-carve DIY

Picking the right pumpkin is important. Look for one that feels firm and has a nice, smooth surface. The smoother it is, the easier it will be to decorate. Also, think about the shape. Depending on your design, you might want a tall one or maybe a short, round pumpkin.

Painted Pumpkins

Selecting the right type of paint

When you want to paint your pumpkin, acrylic paints are your best friend because they stick well and dry fast. They come in lots of bright colors, so you can get creative!

Step-by-step guide to painting pumpkins

  1. First, make sure your pumpkin is clean and dry.
  2. Then, choose your favorite colors and start painting. You might want to paint a base coat first and let it dry.
  3. After that, you can paint any design you like on your pumpkin.
  4. Let your artwork dry, and voilà! You have a beautiful painted pumpkin.

Creative design ideas for painted pumpkins

You can paint scary faces, cute animals, or even your favorite cartoon characters on your pumpkins. Stripes, dots, and swirls are fun, easy patterns to try too. Let your imagination run wild!

Find your new No-Carve Halloween Pumpkin DIY on this page.

Decoupage Pumpkins

Introduction to decoupage technique on pumpkins

Decoupage is when you stick pieces of paper or fabric onto something to decorate it. It’s like making a collage but on a pumpkin. It’s a fun way to make your pumpkin look fancy without having to carve it.

Materials needed for decoupage

You’ll need some glue that dries clear, a brush to apply the glue, and some pretty paper or fabric. Napkins, tissue paper, or even magazine cutouts are perfect for this.

Step-by-step guide to decoupaging your pumpkin

  1. Cut your paper or fabric into the shapes or sizes you like.
  2. Apply a thin layer of glue onto a part of your pumpkin.
  3. Place your paper or fabric on the gluey spot and gently press it down.
  4. Cover it with another layer of glue to seal it.
  5. Keep going until you’re happy with your pumpkin. Let it dry, and you’re done!

Glittery Pumpkins

Choosing the right type of glitter and adhesive

Fine glitter works best because it sticks easily and gives your pumpkin a beautiful shimmer. Use glue or spray adhesive to make the glitter stick to your pumpkin.

Simple glitter application techniques

You can sprinkle glitter all over your pumpkin for a sparkly look or use glue to make patterns with the glitter. Stars, moons, and hearts are fun shapes to try.

Sealing the glitter to prevent shedding

Once you’re done with the glitter, spray or brush a clear sealant over it. This keeps the glitter from falling off, so your pumpkin keeps shining without making a mess.

No-Carve Halloween Pumpkin DIY

This image is property of pixabay.com.

Fabric Wrapped Pumpkins

Different fabrics suitable for wrapping

Soft fabrics like cotton or felt are the easiest to wrap around your pumpkin. You can also use lace for a fancy look or burlap for something rustic.

How to secure fabric on pumpkins

Start by cutting the fabric to cover your pumpkin. Glue one end of the fabric to the bottom of the pumpkin and wrap it all the way around. Tuck the end in and glue it down. For a clean finish, you can add a ribbon or a bow.

Accessorizing your fabric-wrapped pumpkins

Buttons, beads, or sequins can make your fabric-wrapped pumpkins even prettier. Glue them on to make fun patterns or shapes.

Natural & Rustic Pumpkin Decor

Using items from nature to decorate pumpkins

Leaves, flowers, twigs, and even small stones can be used to give your pumpkin a natural look. Arrange them in pretty patterns and glue them onto your pumpkin for a rustic vibe.

Creating a rustic look with burlap, wood, and foliage

Wrap burlap around your pumpkin or use cutouts from wood for a cozy, rustic feel. Adding some green foliage or dried flowers can also bring a touch of nature to your design.

Assembling and securing natural adornments

Use glue to attach your natural items to the pumpkin. If you’re using something heavier, like a piece of wood, you might need stronger adhesive or tape to keep it in place.

No-Carve Halloween Pumpkin DIY

This image is property of pixabay.com.

Theme-specific Pumpkin Ideas

Popular themes: spooky, whimsical, and elegant

For a spooky pumpkin, think about ghosts, skeletons, and bats. If you like something whimsical, try unicorns, rainbows, and fairies. An elegant pumpkin can have designs like leaves, vines, or even just stylish patterns in gold or silver.

Tips for designing around a chosen theme

Think about what colors match your theme and start with those. For example, black and orange are great for spooky themes, while pastels are lovely for something whimsical.

Incorporating colors and patterns to match your theme

Choose paints, papers, or fabrics that match your theme’s colors. Adding patterns that fit the theme can also make your pumpkin decoration stand out.

Lighted Pumpkin Decor

Options for internal and external lighting

Small LED lights or battery-operated candles can safely light up your pumpkin from the inside. Fairy lights wrapped around your pumpkin can give it a magical glow from the outside.

Safe light placement and pumpkin preparation

Make sure your pumpkin is stable and place your light in the center if it’s inside. If you’re wrapping lights around, spread them evenly for a pretty effect.

Creative lighting ideas for a striking effect

Using colored lights can change the mood of your pumpkin decoration. Try a spooky red glow or a calming blue. You can even carve simple designs like stars or circles to let the light shine through in patterns.

No-Carve Halloween Pumpkin DIY

Embellishing Pumpkins with Hardware

Choosing hardware for pumpkin decorating

Small nails, tacks, or metal studs can be pushed into your pumpkin to create cool designs. You can make shapes, letters, or even outline a drawing with them.

Techniques for attaching hardware to pumpkins

Push the nails or tacks straight into the pumpkin following your design. If they’re hard to push in, you can make a small pre-hole with a toothpick.

Design ideas using nails, tacks, and metal accents

Use hardware to create a face on your pumpkin or to spell out a spooky message. Arranging them in geometric patterns can also look really stylish.

Preserving Your No-Carve Pumpkins

Methods to extend the life of your decorated pumpkins

To keep your pumpkin looking fresh, store it in a cool, dry place. You can also apply a little bit of petroleum jelly to the cut areas, if there are any, to keep them from drying out.

Preventative measures to avoid rot and decay

Make sure your pumpkin isn’t sitting in a damp spot and check it regularly for signs of rot. Keeping it clean and dry is the key to making it last longer.

Tips for displaying indoors and outdoors

Indoors, keep your pumpkin away from heaters or direct sunlight to prevent it from drying out. Outdoors, place it where it’s sheltered from rain and not sitting directly on the ground to avoid rot.

Click to view the No-Carve Halloween Pumpkin DIY.

No-Carve Halloween Pumpkin DIY Read More »