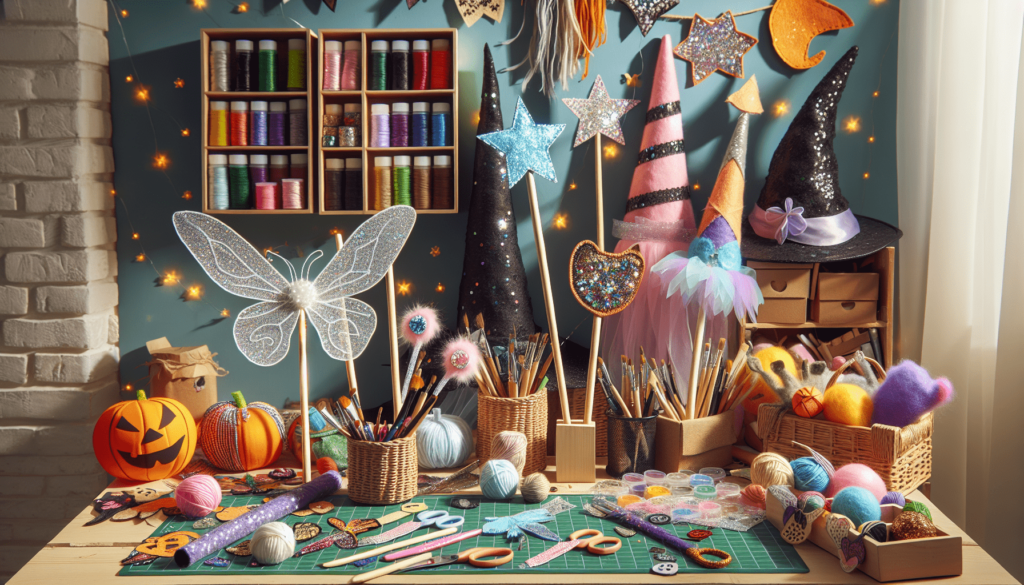
DIY Halloween Costume Accessories
Imagine you can make your own spooky accessories for Halloween! This article will show you fun ways to create things like ghostly necklaces, magic wands, and witch hats using stuff you might already have at home. It’s all about using your imagination and having a great time while you get ready for trick-or-treating. So, let’s find out how to turn everyday items into amazing Halloween costume accessories! Halloween is a fun time of year when you can dress up as anything you like! Sometimes, making your own costume accessories can make your costume even more special. Here are some ideas for DIY Halloween costume accessories that you can make yourself!

Creepy Crawly Spider Headband
For this fun accessory, you’ll need a headband, some black pipe cleaners, and small black pom-poms to make your very own spider friends.
Materials needed: headband, black pipe cleaners, small black pom-poms
First, gather your materials. You’ll need a plain headband that goes over your head, some black pipe cleaners, which are like bendy sticks, and little black pom-poms for the spider bodies.
Instructions for crafting spider legs and attaching them
To make your spider, take four pipe cleaners and twist them around the middle of the headband to make eight spider legs. You can bend them to look like they’re moving! Then, glue a small black pom-pom in the middle of the twisted pipe cleaners on the headband. This pom-pom is the spider’s body.
Ways to customize your spider headband for different looks
You can make your spiders in different colors or add tiny googly eyes to your pom-pom spiders for a cute or spooky look. Maybe even add some glitter to make your spiders sparkle!
Magical Witch’s Broom
Every witch needs a broom to fly on Halloween night. You can make your own with just a few materials.
Choosing the right stick or dowel for your broom handle
Look for a stick in your backyard that is straight and tall enough for your broom handle, or you can use a wooden dowel from the craft store. This will be what you hold when you pretend to fly.
Selecting materials for the broom bristles, such as straw or twine
For the bristles, you can use straw, which looks very authentic, or twine for a simpler version. Gather lots of it because brooms have thick bristles.
Assembling your broom with detailed step-by-step instructions
Tie your straw or twine tightly around one end of your stick or dowel. You might need an adult to help you. If you’re using twine, you can unravel the ends to make it look more like broom bristles.

This image is property of images.pexels.com.

Spooky Ghost Earrings
These adorable earrings are perfect for adding a little Halloween spirit to your outfit.
Materials list including white felt, embroidery thread, and earring hooks
You will need white felt for the ghost shapes, embroidery thread to sew them together, and earring hooks so you can wear them.
Cutting and sewing your ghost shapes
Cut two ghost shapes from your white felt. They can look however you like – happy, spooky, or silly! Then, using your embroidery thread, sew the edges together, leaving a spot to fill with a little stuffing to make them puffy.
Adding facial features and attaching to earring hooks
Draw on some cute or spooky faces with a fabric marker. Then, carefully attach your ghost to the earring hooks with a little loop of thread at the top of their heads.
Enchanted Fairy Wings
Believe in magic as you create your very own fairy wings to flutter around in.
Selecting the right wire for your wing frame
Find some wire that is flexible but strong enough to hold the shape of your wings. Bend it into the shape of fairy wings.
Covering your wings with sheer fabric or tights
You can use sheer fabric or even tights to cover your wing frame. Stretch it tightly over the wire and secure it with glue or sewing.
Decorating your wings with glitter, paints, and faux flowers
Now for the fun part – decorating! Use glitter, paint, and even fake flowers to make your wings unique and magical.

This image is property of images.pexels.com.
Pirate’s Treasure Map
Create your very own treasure map to lead you to hidden treasures!
Materials you’ll need: brown paper, pens, and coffee for aging
You will need some brown paper for your map, pens to draw it, and some coffee to make it look old and authentic.
Techniques for drawing your map and aging the paper
Draw your map with the pens, adding X marks the spot where the treasure is hidden. To age it, dip your paper into coffee and let it dry. It will look like an old pirate map!
Ideas for making your treasure map more authentic
You can burn the edges of your paper carefully with an adult’s help or crumble it up and flatten it again to make it look even older.
Vampire Fang Necklace
Fangs are a must for any vampire costume, and making a necklace is a fun twist!
Materials needed: fake fangs, red beads, and necklace chord
Get some plastic vampire fangs and red beads to look like drops of blood. You’ll also need some chord for the necklace part.
Step-by-step guide to assembling your necklace
String your fangs and beads onto the chord in a pattern you like. You can have one fang or several, depending on how you want it to look.
Customization options for your vampire fang necklace
You can add different colored beads or even use glow-in-the-dark beads for a spooky effect.

This image is property of images.pexels.com.
Zombie Apocalypse Belt
Prepare for the zombie invasion with your very own survival belt!
Gathering materials like old belts, toy weapons, and fake blood
Find an old belt, some toy weapons like knives or guns, and get some fake blood to make them look used.
Attaching your zombie-fighting tools to your belt
Attach your toy weapons securely to your belt with loops of fabric or strong tape. Make sure they’re easy to grab in case of a zombie attack!
Adding details to sell the zombie apocalypse survivor look
Splatter some fake blood on your weapons and belt to look like you’ve been fighting zombies.
Superhero Mask
Every superhero needs a mask to hide their true identity.
Selecting the perfect fabric or felt for your mask
Choose a fabric or felt in a color that matches your superhero costume. It should be comfortable to wear.
Cutting out your mask and adding details such as logos or patterns
Cut out your mask shape and add any details like logos, patterns, or glitter to make it unique.
Fastening options for keeping your mask in place
You can use elastic bands, ribbons, or even string to tie your mask on. Make sure it’s snug but comfortable.

Wizard’s Staff
Every wizard needs a staff to channel their magical powers.
Materials: finding the perfect stick, paints, and embellishments
Look for a strong, straight stick that feels right in your hands. Gather some paints and any embellishments like crystals or fake vines.
How to carve and paint your staff for an authentic wizard look
You can carve designs into your staff with a knife (ask an adult for help) and paint it in colors that match your wizard outfit.
Adding magical details like crystals, vines, or runes
Glue on crystals, wrap it with fake vines, or paint runes along the staff for an extra magical touch.
Glowing Potion Bottles
Create mystical potions that glow in the dark and complete your magical costume.
Choosing bottles and glowing materials
Find small bottles and glowing materials like glow sticks or glow-in-the-dark paint.
Safe methods for creating glowing effects
You can fill your bottles with the liquid from glow sticks (be careful and ask an adult for help) or paint the insides with glow-in-the-dark paint.
Ideas for labels and potion names to enhance your costume
Think of fun names for your potions and create labels for the bottles. You can use names like “Witch’s Brew” or “Liquid Magic” to make them sound mysterious.
With these craft ideas, you can make your Halloween costume extra special this year. Remember, the best part about DIY is you can always add your own creative twists to make your accessories uniquely yours. Happy crafting!

DIY Halloween Costume Accessories Read More »