Halloween DIY Ornaments
If you love making things and Halloween is one of your favorite times of the year, then you’re going to be super excited about making your very own Halloween ornaments. Imagine turning pumpkins, ghosts, and witches into cute decorations with your own hands! These Halloween DIY crafts are not only fun to make but will also make your home look spooky and special. So, grab your craft supplies, and let’s start creating some magical Halloween decorations together!

Choosing the Right Materials for Halloween Ornaments
Understanding Different Types of Craft Materials
When you’re making Halloween ornaments, it’s like going on a treasure hunt. You can find many different materials to use, just like different treasures. Some materials are hard and strong, like wood or plastic. Others are soft and easy to shape, like paper or clay. It’s important to think about what you’re making to choose the best material. For example, if you’re making a big, hanging ghost, you might want to pick a light and floaty material like cloth.
Eco-Friendly and Sustainable Options
Making Halloween decorations is more fun when we help the Earth too! You can look for materials that are good for the planet, like paper from recycled magazines or fabric from old clothes. Also, things from nature, like leaves or acorns, can make great decorations. These choices are not only good for our planet, but they also make your decorations special because you’re reusing materials in creative ways.
Where to Source Your Materials
Finding materials for your Halloween crafts can be an adventure. You can start at home by looking for old boxes, paper, or fabric that you don’t need anymore. If you want more, garage sales and thrift stores are like treasure chests waiting to be opened. They often have lots of things you can use, and it helps to recycle too. Craft stores are also great, especially for special items like sparkly glue or Halloween stickers. Just remember, the best materials are the ones that let you create, have fun, and care for our Earth.
Basic Tools Required for DIY Halloween Ornaments
Crafting Scissors and Cutting Tools
To make your Halloween crafts, you’ll need some tools to cut things into spooky shapes. A good pair of scissors is like a wizard’s wand; it lets you turn ordinary materials into magical decorations. For harder materials, you might need help from an adult to use special cutting tools. Safety first means more fun making and less time worrying!
Glues and Adhesives Best for Crafts
Sticking things together is a key part of crafting. Imagine glues and adhesives as the invisible force that holds your Halloween world together. There are many kinds, like white glue for paper or stronger ones for wood and plastic. There’s even glitter glue to add some sparkle! Remember, choosing the right glue means your spooky creations will last longer and look better.
Paints, Brushes, and Coloring Tools
Think of your Halloween decorations as a blank canvas waiting to come to life. Paints, markers, and crayons are your tools to add color, shadows, and details. Brushes can be big for covering large areas or tiny for adding small, scary details. Choosing water-based paints is a good idea because they’re safer and easier to clean up. Let your imagination play with colors and make your Halloween decorations unforgettable.

This image is property of images.pexels.com.

Theme Ideas for Halloween Ornaments
Classic Horror and Gothic Themes
For a really spooky Halloween, think about classic horror stories and gothic tales. Imagine creating your own haunted castle with paper and paint, or scary vampires out of clay. You can make decorations that remind everyone of thrilling stories and spooky nights, like gloomy bats or mysterious fog around a moon.
Cute and Spooky: Kid-Friendly Options
Not all Halloween decorations need to be scary. You can also make them cute and friendly! Think about a smiling ghost or a goofy pumpkin. These can be fun to make and won’t give you nightmares. Using bright colors and soft materials can help make your Halloween cute and spooky at the same time.
Modern and Artistic Halloween Inspirations
You can also turn Halloween into an art project. This means thinking outside the box and using colors like purple, green, and silver. You can make decorations that are different, like a neon-colored spider web or abstract pumpkin art. It’s all about being creative and making Halloween your own.
Creating Ghostly Ornaments
Materials and Templates
To start your ghostly creations, you need some white or light-colored fabric and maybe some paper to draw your ghost shapes. There are templates online, or you can draw your own spooky ghost shapes. You’ll also need something like yarn or string to hang them up.
Step-by-Step Instructions
- First, cut your fabric into ghost shapes using your template or drawing.
- If you want, you can draw faces on your ghosts with markers.
- Attach a piece of string or yarn to the top of each ghost.
- Now, your ghosts are ready to fly around and spook up the place!
Customization Ideas
You can make each ghost unique by adding different faces, using different fabrics, or even tying little bows around their necks. Think about creating a whole family of ghosts with big ghosts, little ghosts, and even pet ghosts!

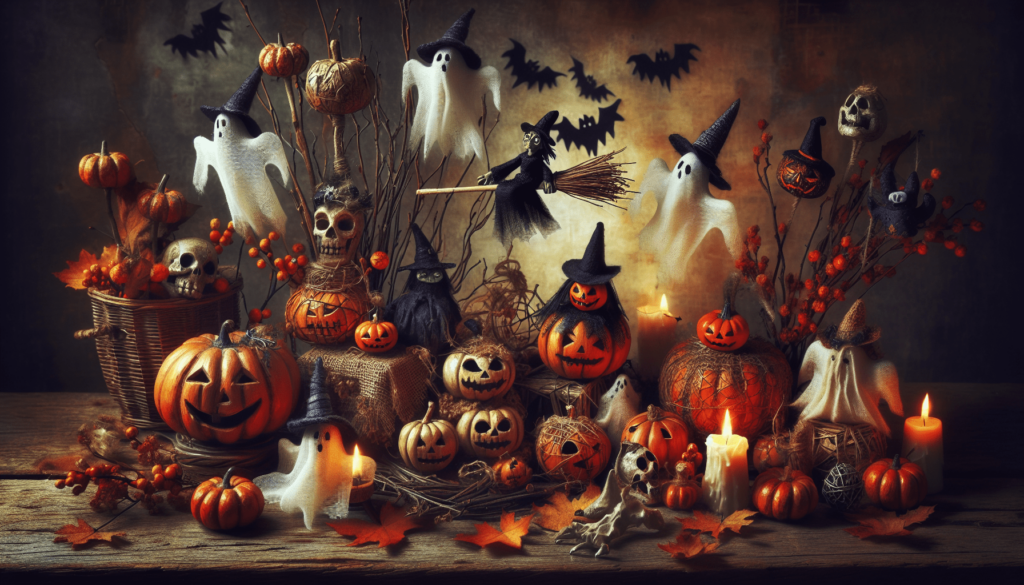
This image is property of images.pexels.com.
Crafting Witchy Decorations
Witch Hat and Broomstick Ornaments
For witchy decorations, you can make small witch hats out of black paper and tiny broomsticks from twigs and string. Imagine how cute they would look hanging around or placed next to each other as if a group of witches has just flown in!
Potion Bottle Charms
Potion bottle charms can be made using small glass bottles filled with colored water or glitter. You can even draw or print tiny labels to stick on them, naming each potion. It’s like making your own magical concoctions!
Incorporating Witchy Symbols
Adding symbols to your decorations can make them even more mysterious. You can draw moons, stars, or even little cats to add to your witchy theme. These can be added to any decoration, like the hats, broomsticks, or around your potion bottles.
Jack-O’-Lantern Creations
Choosing the Right Pumpkins
For your Jack-O’-Lanterns, it’s fun to pick different sizes and shapes of pumpkins. Some can be tall and thin, while others are short and round. Think about what kind of faces they might have based on their shapes!
Carving Techniques and Safety
Carving pumpkins is a big project and should be done with an adult. You can draw the face you want on the pumpkin first, then carefully cut along the lines. Remember, safety is the most important thing, so take your time and be careful.
Alternative No-Carve Pumpkin Ideas
If carving isn’t your thing, you can decorate pumpkins without cutting them! You can paint faces on them, glue decorations like paper bats or hats, or even use stickers. This way, everyone can safely make a special pumpkin for Halloween.

This image is property of images.pexels.com.
Spooky Tree and Hanging Ornaments
Creating a Haunted Tree Centerpiece
You can make a spooky tree using branches you find outside. Paint them black or dark gray and let them dry. Then, you can set them up in a vase to make a haunted tree. After that, you can hang your homemade ghosts, bats, and spiders from the branches.
DIY Bats, Spiders, and Web Ornaments
Making bats and spiders is fun with black paper or felt. You can cut out their shapes and add details like eyes or webbing with white paint. Then, you can hang them around your haunted tree or anywhere you want to add some spookiness.
Balancing Theme and Aesthetics
When making your Halloween decorations, think about how they all look together. You can choose a color theme, like black and orange, or mix different shapes and sizes. Remember, the most important thing is that it makes you happy and adds to the Halloween fun.
Haunted House Miniatures
Building the Base Structure
Creating a miniature haunted house starts with making the shape of the house from cardboard or thick paper. You can cut out windows and doors and even add a roof. It’s like being an architect for a tiny, spooky world.
Adding the Spooky Details
Once your house is built, you can add the spooky details. This means painting it dark colors, drawing cracks in the walls, or making tiny ghosts to live inside. You can also make tiny furniture or cobwebs to make it look old and haunted.
Lighting and Special Effects
A really cool part of making a miniature haunted house is adding lights or special effects. You can put a small light inside to make the windows glow or add cotton to look like fog. This makes your haunted house come to life in a spooky but fun way.

Ghoulish Garland and Banners
Paper Crafts and Fabric Options
Making garland or banners is easy with paper or fabric. You can cut out shapes like pumpkins, ghosts, or bats and then string them together. If using fabric, you can sew or glue the shapes to a long string. It’s a fun way to decorate any room or door.
Designs and Lettering Ideas
You can also add letters to your decorations to spell out “Happy Halloween” or any spooky message you like. Using different colors and fonts can make your message stand out. Think about using glitter or glow-in-the-dark paint for extra fun.
Assembly and Display Tips
Once your garland or banner is ready, think about where it will look best. You can hang it above a door, across a window, or even around a table. Using tape or small hooks can help hang your decorations without damaging walls or furniture.
Packaging and Storing Your Halloween DIY Ornaments
Materials for Safe Storage
When Halloween is over, storing your decorations carefully means you can use them again next year. Wrapping fragile items in tissue paper or bubble wrap can protect them. Storing everything in boxes or bags keeps them clean and organized.
Organizing Tips for Small and Fragile Items
For small or delicate items, using small boxes or containers can help keep them safe. You can label everything so it’s easy to find next year. Remember, taking care of your decorations means more fun for many Halloweens to come.
Preventing Damage and Wear
A good tip is to keep your decorations in a cool, dry place. This helps prevent damage from moisture or heat. Checking your decorations when you take them out next year means you can fix any small problems before they get bigger. It’s like taking care of a little Halloween garden every year.

Halloween DIY Ornaments Read More »