Holiday Decor

Minimalist Halloween Craft Projects

Imagine making your own spooky Halloween decorations, but in a simple and fun way! “Minimalist Halloween Craft Projects” is all about creating cool stuff for Halloween without needing too many things. You’ll learn how to make awesome decorations and crafts that bring the Halloween spirit into your home, using just a few items. So, get ready to use your creativity and make this Halloween extra special with your very own, easy-to-make decorations!

Check out the Minimalist Halloween Craft Projects here.

Black Cat Paper Plate Craft

Materials needed: Paper plates, black paint, colored paper, glue

To start making a cute black cat with paper plates, you need some simple things from around your house. You’ll need paper plates, some black paint (to make the plate look like a cat), colored paper (for the cat’s features like ears and nose), and glue to stick everything together.

Steps to create cat face and tail

First, paint the paper plate black and let it dry. While waiting, cut out two triangles from the colored paper for the ears and a long tail. Once the plate is dry, glue the ears to the top and the tail to the back.

Adding features with white paint for eyes and whiskers

Once your cat has ears and a tail, it’s time to give it a face! Dip a small brush in white paint to draw two big eyes and some whiskers. You can also add a tiny nose with pink or red paper. Now you have your own paper plate black cat to decorate your room!

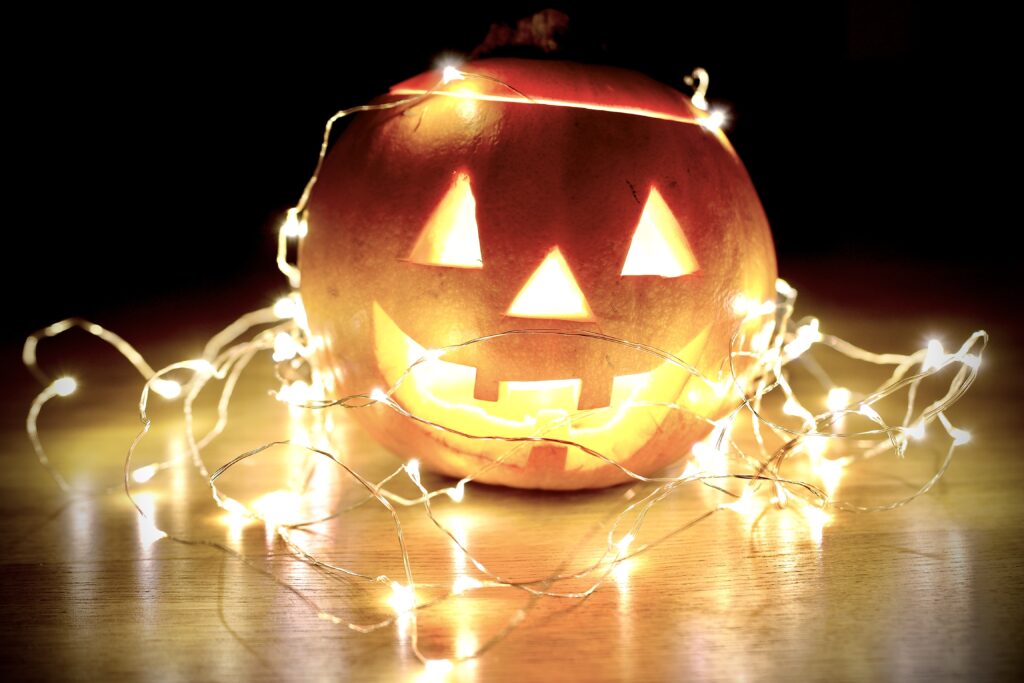
Minimalist Pumpkin Carving

Choosing the right pumpkin

Look for a pumpkin that is smooth and has a nice round shape. A smooth pumpkin is easier to carve, and a round shape looks nice with simple designs.

Simple carving tools and techniques

You don’t need fancy tools for minimalist pumpkin designs. A small kitchen knife and a spoon to scoop out the insides are enough. Remember, simple shapes like circles, triangles, and squares are your best friends for a minimalist look.

Ideas for minimalist designs: Faces, geometric shapes, silhouettes

Think of making a pumpkin with a simple happy or scary face. Or you can carve geometric shapes like circles and triangles for a cool pattern. Silhouettes, like a cat or a bat, also look super cool and are easy to do.

Minimalist Halloween Craft Projects

This image is property of images.unsplash.com.

Click to view the Minimalist Halloween Craft Projects.

DIY Spider Webs

Materials: Black yarn or string, scissors, and tape

To make spooky spider webs, you need black yarn or string, a pair of scissors to cut the yarn, and tape to hang your web.

Creating a web frame

First, cut long pieces of yarn and tape them across each other to make a star shape. This is the frame of your web.

Weaving the web: Techniques for a realistic look

Now, cut a very long piece of yarn. Tie one end to the center of your frame. Weave the yarn around each strand of the frame, looping around each time you reach a strand, moving outward in spirals. Keep going until your web looks just right!

Ghost Garland

Materials: White fabric or tissue paper, string, black marker

For a ghost garland, you’ll need white fabric or tissue paper, some string to hang your ghosts, and a black marker to draw their spooky faces.

Creating ghost shapes and attaching to string

Cut the fabric or tissue paper into squares, then drape each square over a small ball or crumpled paper to make a head shape. Tie a string around the neck of each ghost to hold the head shape. Draw faces on them with the marker. Then, tie each ghost to a long string.

Hanging tips and placement ideas

Hang your ghost garland across a window, door, or even your fireplace. Try to place it somewhere where it moves slightly in the air—it makes the ghosts look like they’re floating!

Minimalist Halloween Craft Projects

This image is property of images.unsplash.com.

Witch Hat Origami

Choosing the right paper

For witch hat origami, pick a piece of paper that’s black or dark purple. It should be square and not too thin or it might rip.

Step-by-step folding instructions

Fold your square paper in half to make a triangle. Then, fold the corners up to meet at the top, forming a smaller square. Fold one layer of the bottom square up, towards the top, and tuck the other layer into it to make the brim of the hat.

Decorating and displaying your origami witch hats

You can draw on your witch hats with silver or gold pens to make them fancier. Then, place them around your house or hang them up with string for a magical Halloween vibe.

Minimalist Halloween Wreath

Materials: Twig wreath, black spray paint, Halloween-themed accessories

You need a twig wreath, some black spray paint, and a few Halloween-themed accessories like fake spiders or small skeletons.

Steps to spray paint and attach decorations

First, spray paint your wreath black and let it dry. Then, choose a few decorations and glue them on your wreath. Remember, less is more. Just a few items can make your wreath look spooky and stylish.

Ideas for a minimalist look: Fewer colors, simple designs

Stick to black and one or two other colors for a cool minimalist look. Maybe just a big, white ghost or some small, orange pumpkins. Simple designs make your decoration look chic and not too busy.

Minimalist Halloween Craft Projects

This image is property of images.unsplash.com.

Bottle Cap Spiders

Collecting and preparing bottle caps

Start saving the bottle caps from drinks. You need one cap for each spider. Wash them well so they’re clean and ready for crafting.

Materials for creating legs and eyes

For the spider legs, you can use black pipe cleaners or strips of black paper. You’ll also need small white stickers or paper for the eyes.

Assembly and ideas for display

Cut eight legs out of your materials and glue them to the sides of the cap. Stick or glue on the eyes. Then, you can place your bottle cap spiders around the house or hang them up by string to look like they’re dangling from webs!
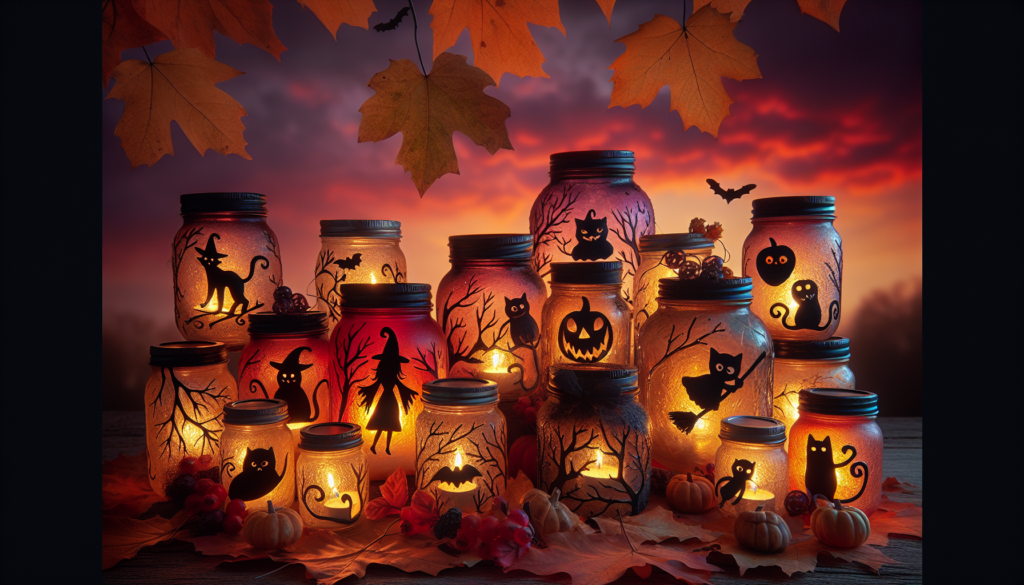
Mason Jar Mummies

Materials: Mason jars, bandages or gauze, googly eyes

You need some mason jars, bandages or gauze for wrapping, and googly eyes for your mummy jars.

Wrapping technique for a mummified look

Wrap your jar with bandages or gauze, going all around until it looks like a mummy. Don’t cover it too tightly—you want it to look a bit messy. Stick on two googly eyes.

Lighting options: LED candles or glow sticks

An LED candle or a glow stick inside your mummy jar makes it glow spookily in the dark. It’s safe and looks really cool in your room or by the window.

Minimalist Halloween Craft Projects

Paper Bat Swarm

Materials: Black construction paper, scissors, tape or string

For a swarm of bats, you need black construction paper, scissors, and tape or string to hang them.

Creating a bat template

Draw or find a simple bat shape to use as a template. Place it on the construction paper, trace around it, and then cut out your bats.

Cutting and hanging techniques for a swarm effect

Cut out lots of bats. Use tape or string to hang them from the ceiling or stick them to the wall. You can make them “fly” in different directions to look like a real swarm of bats!

Pumpkin Fairy Houses

Selecting small pumpkins

Choose small pumpkins because they’re easier to carve and perfect for creating tiny fairy houses.

Carving techniques for doors and windows

Carefully carve small doors and windows into your pumpkin. You can use a pencil to draw the shapes first. Remember, fairy houses look whimsical, so your doors and windows don’t need to be perfect!

Minimalist decorating ideas: Natural items, simple colors

Decorate your fairy house with natural items like leaves, twigs, or small stones. Stick with simple colors—let the orange of the pumpkin shine. This gives your fairy house a magical, minimalist look, perfect for a whimsical Halloween.

Click to view the Minimalist Halloween Craft Projects.

Minimalist Halloween Craft Projects Read More »

Halloween Crafting with Mason Jars

Get ready to make your Halloween extra spooky and fun with mason jars! You can turn these simple glass jars into amazing Halloween decorations with a bit of creativity. Paint them with ghostly faces, fill them with colorful candy, or light them up with glow sticks. Whether you’re a crafting beginner or a DIY expert, mason jars are the perfect way to add some handmade magic to your Halloween. Let’s grab some jars and get ready to create some boo-tiful crafts that will be the talk of the neighborhood!

Get your own Halloween Crafting with Mason Jars today.

Understanding Mason Jar Craft Basics

Choosing the Right Mason Jars

Before you start making crafts, you need to pick the right mason jars. Mason jars come in different sizes and shapes. Some are small and cute, and others are big and can hold lots of things. They can be clear or have a little color. When you choose a jar, think about what you want to make. If you want to fill your jar with lots of candy, a bigger jar might be better. Or, if you want to make a tiny fairy house, a small jar could be just right.

Gathering Essential Crafting Supplies

Now, it’s time to collect all the things you’ll need to make your crafts. You’ll need glue to stick things on your jars, paint to decorate them, and maybe some sparkly glitter. Also, if you want to make your jars light up, you’ll need little lights, like the kind you can take out of a small flashlight. Remember to ask an adult to help you find all your supplies.

Safety Tips for Crafting with Glass

Before you start crafting, there are some important safety tips you should know because you’re working with glass. Always be gentle with mason jars, as they can break and cause sharp edges. If one does break, tell an adult right away so they can clean it up. When you’re using glue or paint, cover your working space with newspapers or an old sheet to keep it clean. Always wear clothes that you don’t mind getting messy.

Illuminated Mason Jar Creations

Creating Mason Jar Jack-o’-Lanterns

One super fun craft is making mason jar jack-o’-lanterns. You paint the entire jar orange, just like a pumpkin, and when it’s dry, draw a jack-o’-lantern face on it with black paint. Once that’s dry, place a little light inside. At night, it will glow and look just like a mini pumpkin, but it’s actually a jar!

DIY Mason Jar Ghost Lanterns

For a spooky ghost lantern, you’ll need a clear mason jar. Paint it white and draw a ghost face on it with a black marker. When you place a light inside the jar, your ghost will light up in the dark. It’s a simple and fun way to make something a little spooky.

Spooky Mason Jar Light Strands

If you want to make something really cool, try creating light strands with mason jars. You’ll need a few jars and some light strands, like the ones used for Christmas trees. Carefully place the lights inside the jars, and you can even paint the jars with spooky colors or designs. When you turn the lights on, you’ll have a glowing decoration that’s perfect for Halloween.

Halloween Crafting with Mason Jars

This image is property of images.unsplash.com.

Check out the Halloween Crafting with Mason Jars here.

Mason Jar as Halloween Party Favors

Fillable Mason Jar Treat Containers

Mason jars are perfect for holding treats. You can fill them with candy corn, chocolate, or other goodies. To make them festive, decorate the outside with Halloween stickers or draw your own designs. Then, give them to friends as party favors, so they have something special to take home.

Personalized Mason Jar Mementos

You can also make personalized mason jars as party favors. Use paint to write your friends’ names on the jars and decorate them with Halloween-themed drawings or stickers. Fill the jars with tiny toys or more treats. Your friends will love having a jar that’s just for them.

Halloween Themed Jar Decorations

Get creative with your jars and turn them into scary monsters or cute Halloween characters. You can add googly eyes, draw on faces, or use pipe cleaners to make arms and legs. These decorated jars can hold candy or just be fun decorations for a Halloween party.

Eerie Mason Jar Terrariums

Assembling a Miniature Graveyard Scene

You can make a little graveyard inside a mason jar. Start by putting in some dirt or sand at the bottom. Then add small toy skeletons, fake tombstones made of cardboard, and maybe even a tiny fake tree. When you look into the jar, it will be like peeping into a tiny, eerie graveyard.

Haunted House Terrarium

For a haunted house terrarium, you can create a spooky scene inside your jar using small craft items. Make a little haunted house out of paper or find a toy one, and place it inside on top of some dirt or sand. Add in some fake spider webs and tiny ghosts to complete your haunted scene.

Creating a Creepy Forest Ecosystem

If you love the idea of a creepy forest, you can make one inside a jar too. Put some real or fake moss on the bottom to look like forest ground. Then, add small trees (you can make these from twigs and leaves) and maybe a tiny owl or wolf figurine. With a little dark paint around the edges, your forest will look super mysterious.

Halloween Crafting with Mason Jars

This image is property of images.unsplash.com.

Halloween Mason Jar Vases

Design Ideas for Spooky Floral Arrangements

Turn your mason jars into spooky vases by painting them with Halloween colors like black, orange, and purple. You can draw spider webs, bats, or ghosts on them too. Once you’re done, fill your jar with pretty flowers. Choose darker colors or even fake flowers that look a bit spooky, like black roses.

Incorporating Halloween Colors and Themes

Remember to use lots of fun Halloween colors when you’re decorating your vases. Besides black, orange, and purple, you can add green for a witch’s brew look, or red for something a little scarier. You can even stick on Halloween-themed ribbons or stickers to make your vase extra special.

Upcycling Mason Jars into Unique Vases

If you have old mason jars at home, you can turn them into something new! Clean them up and get ready to decorate. It’s a great way to reuse jars, and it’s better for the Earth too because you’re recycling. Plus, each jar will be unique, just like a piece of art that you made all by yourself.

Candy Corn Inspired Mason Jar Crafts

Candy Corn Color Layering Techniques

Candy corn is a yummy Halloween treat, and you can use its colors to decorate a jar. Start at the bottom with yellow paint, add a layer of orange in the middle, and then white on top, just like the layers of a candy corn. When it’s dry, it will look just like the candy but much bigger!

Incorporating Candy Corn into Mason Jar Designs

Besides painting your jar to look like candy corn, you can glue actual pieces of candy corn onto the jar in fun patterns. Just remember, this jar is for looking, not eating! You can also fill the jar with candy corn for a colorful decoration.

Making a Candy Corn Mason Jar Luminary

To make a luminary, you’ll need those candy corn colors again. Paint the outside of a clear mason jar with yellow on the bottom, orange in the middle, and white on top. After the paint dries, put a light inside. The jar will glow with candy corn colors, and that’s really cool for Halloween night!

Halloween Crafting with Mason Jars

This image is property of images.unsplash.com.

Ghoulish Mason Jar Drinkware

Spooky Labeling and Presentation Ideas

If you’re having a Halloween party, you can turn mason jars into spooky cups for drinks. You can draw or paint creepy creatures on the jars or stick on labels that say silly things like “Witch’s Brew” or “Zombie Juice.” It’s lots of fun, and everyone will know which drink is supposed to be spooky.

Creating Washable and Reusable Drinkware

To make sure you can use your jars again and not just for one party, use washable paint or stickers. That way, after the party, you can clean them, and they will be ready for your next fun event. Remember, if a jar ever looks cracked or chipped, tell an adult so they can check if it’s still safe to use.

Safe Sealing Techniques for Beverages

If you want to put lids on your drink jars to keep bugs out or to shake up a spooky concoction, you need to make sure the lids close tight. Use the flat metal lids that come with the jars and screw on the ring part tightly. If you’re using straws, make a small hole in the lid so the straw can fit through, but liquids won’t splash out.

Mason Jar Witch’s Apothecary Jars

Designing Labels for Your Potion Jars

Turn your mason jars into a witch’s collection of potion ingredients. You can make labels out of paper and draw things like “Dragon Scales” or “Fairy Dust” on them. Stick the labels on your jars and fill them with fun things that match the names, like shiny glitter or colored water.

Selecting Contents for a Witches’ Brew Display

You can fill your jars with lots of different things to look like potion ingredients. Dried herbs, colored water, plastic bugs, or cotton balls that look like fog are all good ideas. Arrange your jars together, and you’ll have a whole witches’ brew display.

Assembly and Presentation Tips

When you’re setting up your witches’ apothecary jars, put them at different levels so people can see all of them. You can use books or boxes to make some jars higher. Remember to keep these jars away from little kids or pets, especially if you put things inside that shouldn’t be eaten.

Halloween Crafting with Mason Jars

Halloween Countdown Mason Jar Calendar

Daily Treat-Filled Jars Concept

You can make a countdown to Halloween with mason jars. Get enough jars for each day leading up to Halloween—one jar for each day. Fill each jar with a little treat or a note with something fun to do. Then each day, you can open one jar and get a surprise!

Designing and Arranging the Countdown Display

Decorate each jar with numbers for the days of the countdown. You can use stickers or paint them on. Then, line up your jars in order or make a fun design with them. Each day, you get to find the right jar with the number that matches the day and see what’s inside.

Creative Labeling and Numbering

Get creative with how you write the numbers on your jars. You can make them look spooky with drips like blood, or cute with Halloween stickers around the numbers. Each jar will look fun, and it’s like a tiny party every day when you open one.

Crafting a Mason Jar Pumpkin Patch

Painting Techniques for Realistic Pumpkins

To make your jars look like pumpkins, you’ll need orange paint. Paint your whole jar orange and add lines from top to bottom to make it look like a pumpkin’s ridges. You can even add a little brown stem on top by gluing on some felt or painted cork.

Assembling a Mason Jar Pumpkin Display

Once you’ve made a bunch of pumpkin jars, you can set them up to look like a little pumpkin patch. You can put them on a table or line them up on some green fabric or paper that looks like grass. It’s like having your own pumpkin farm, but indoors.

Ideas for Group Crafting and Family Activities

Making mason jar pumpkins is more fun with others. You can have a crafting day with your family or invite some friends over for a pumpkin-making party. Everyone can paint and decorate their own jars. In the end, you’ll have lots of different pumpkins, and every one will be special.

Find your new Halloween Crafting with Mason Jars on this page.

Halloween Crafting with Mason Jars Read More »

The Halloween Junkie Take: Crafting Spooky and Creative Decorations

Are you ready to make this Halloween the spookiest one yet? In “The Halloween Junkie Take: Crafting Spooky and Creative Decorations”, you will learn how to transform your home into the most haunted house on the block! This is all about filling your home with your own creepy and creative decorations. With each step, your hands will be busier than a witch brewing potions, but don’t worry, there’s no magic involved in these Halloween crafts, just loads of fun!

Understanding the Charm of Halloween

Halloween is a special day when you can pretend to be anyone or anything you want to be. It’s a fun holiday where people of all ages put on costumes, carve pumpkins, and decorate their homes with spooky decorations.

Embracing the Halloween Spirit

To embrace the Halloween spirit is to let your imagination fly. You can pretend that there are witches, ghosts and monsters all around, for just one day. It’s a fantastic time to think about all the creative, fun things you can do to scare your friends or just have a laugh.

Cultural Significance of Halloween

Halloween is more than just dressing up and eating candy. Long time ago, people thought that on Halloween the world of the living and the world of the dead became one. They would light bonfires and wear costumes to ward off evil ghosts. Today, it’s a time when we can all share in a little bit of make-believe and playfulness.

How Halloween Spurs Creativity

Halloween lets everyone show off their creative side. Whether you’re coming up with the perfect costume, carving a unique pumpkin, or spinning a spooky story, Halloween is all about letting your creativity shine!

Setting the Mood for Halloween

Getting ready for Halloween is not just about the costumes, it’s also about giving your home a spooky makeover.

Selecting a Theme for Your Halloween Decoration

Your Halloween decorations can follow a theme, like witches, pirates, or even your favorite scary movie! You can make it fun and silly or truly spine-chilling. It’s all up to you!

Setting Up Spooky Atmosphere

Adding a spooky atmosphere to your home can help get everyone in the Halloween spirit. You could perhaps play some creepy background music, dim the lights or fill your home with flickering candles.

Choosing the Right Halloween Colors

Choosing the right colors is essential. Dark colors like black and deep purple can give off a spooky vibe, while orange and bright green can keep things fun and playful.

The Halloween Junkie Take: Crafting Spooky and Creative Decorations

This image is property of images.unsplash.com.

Spooky and Scary Halloween Decoration Ideas

Making your home look eerie and scary is half the fun of Halloween. Here are some ideas you can try this year.

Ghoulish Figures and Statues

You can get ghoulish figures like skeletons, witches, and zombies to set up around your home. These can be used both inside and outside to give a creepy feeling to your house.

Implementing Flickering Lights

Flickering lights can really add a mysterious feeling to your house. You can replace some of your regular bulbs with flickering ones, or buy special Halloween lights.

Use of Cobwebs and Spiders

Fake cobwebs and plastic spiders are another great way to up the scare factor. You can stretch the cobwebs across doorways and hang spiders from ceiling corners to give a really creepy effect.

Utilizing Fake Blood for a Gruesome Appeal

Fake blood can make your home look like a creepy haunted house. You can splash some on the walls, the doors, or even on your Halloween pumpkins.

Creative and Fun Halloween Decoration Ideas

If you want a more fun, creative look for Halloween, try these unique decorating ideas.

Crafting Jack-o’-Lanterns

Jack-o’-lanterns are the heart of Halloween decoration. Carving pumpkins is a fun activity that you can do with your family. You can get creative and carve anything from smiling faces to spooky creatures on the pumpkins.

Making Homemade Halloween Banners

A homemade banner can add a personal touch to your Halloween decorations. You can draw fun or spooky pictures on your banner, and hang it in the doorway or across a wall.

Creating Unique Halloween Wreaths

Wreaths aren’t just for Christmas. You can make a special Halloween wreath out of black and orange materials like ribbons, artificial flowers, and decorative Halloween items.

Designing DIY Ghosts and Bats

Paper ghosts or bats can be handcrafted and hung around the house. Cutting out shapes and crafting them into scary creatures is a fun and creative way to add to your Halloween decor.

The Halloween Junkie Take: Crafting Spooky and Creative Decorations

This image is property of images.unsplash.com.

Using Recyclable Materials for Halloween Décor

Recyclable materials can be a great addition to your Halloween decorations. Here are some easy and eco-friendly ideas.

Turning Milk Jugs into Ghosts

We all have milk jugs lying around the house, don’t we? Well, you can turn these into spooky ghosts simply by drawing faces on them and putting a small light inside.

Recycling Old Clothes into Scarecrows

If you have any old clothes, you can stuff them and make your very own scarecrow. Pop a pumpkin or a mask on top and you have a spooky figure for your yard!

Transforming Cardboard Boxes into Coffins

With some paint and creativity, your old cardboard boxes can become spooky coffins. You can set these up in your yard or use them for a unique interior decoration.

Repurposing Glass Jars into Mummy Lanterns

With just a bit of bandages or white cloth, you can turn glass jars into mummy lanterns. Just wrap the jars in white material, glue on some googly eyes and put in a small candle!

Kids-Friendly Halloween Crafts Ideas

Halloween crafts are fun for everyone. Here are some ideas that are great for kids.

Creating Paper Plate Spiders

With some black paint and black pipe cleaners, kids can create their very own spiders. Paint the plate black, bend the pipe cleaners into legs, and voila! A creepy crawler is born!

Making Handprint Ghosts

A fun and simple craft is creating handprint ghosts. All you need is white paint and black paper. Then, simply have your kids leave their handprint on the paper and add spooky ghost eyes and a mouth!

Designing Toilet Paper Roll Bats

This is an eco-friendly craft perfect for children. Decorate toilet paper rolls with black paint and craft paper to make cute hanging bats!

The Halloween Junkie Take: Crafting Spooky and Creative Decorations

This image is property of images.unsplash.com.

Halloween Decorations for Outdoor Spaces

Make your yard the spookiest one in the neighborhood with these haunting ideas.

Setting Up a Spooky Yard

You can set up spooky decorations, like fake tombstones, in your yard. Add some fake cobwebs and a few jack-o’-lanterns and you have yourself a Halloween graveyard!

Creating a Graveyard Scene

A spooky graveyard can be created with fake tombstones and a creepy fog-maker. Add some ghouls or skeletons for an extra scare!

Designing a Scary Porch

Your porch could be a creepy entrance with some Halloween ornaments hung from the ceiling, fake cobwebs on the walls, and a scary doormat to welcome your guests.

Halloween Decorations for Indoor Spaces

Give your home’s interior a sinister makeover with these ideas.

Decorating the Living Room for Halloween

Decorate your living room with Halloween-themed pillows, a creepy-looking throw blanket, and some dim, flickering lights for a haunted house feel.

Developing a Haunted Dining Room

A Halloween tablecloth, some jack-o’-lantern centerpieces and creepy crawly table decorations can turn your dining room into a gothic feast.

Setting Up a Spooky Halloween Party Table

For a party table, get Halloween-themed plates, cups, and straws. Add some Halloween confetti and a cake with a spooky design to complete the look!

Safety Measures While Decorating for Halloween

Halloween should be fun and safe. Here are a few safety tips you should keep in mind.

Ensure the Safety of Electric Decorations

Make sure all wires are in good condition and kept away from areas where kids or pets might trip over them. Avoid overloading outlets with too many decorations.

Placement considerations for Lighted Pumpkins

Make sure your lighted pumpkins aren’t placed near anything that could catch fire. Don’t leave them unattended and always use a small candle or battery-operated light.

Importance of Non-toxic Decoration Materials

For kids, ensure that materials used in decorations or costumes do not contain toxic substances. Always double check labels before purchasing Halloween items.

The Halloween Junkie Take

Halloween is a holiday that allows you to stretch your creativity. Whether it’s getting creative with your costume, making a DIY decoration, or even adding a sprinkle of scare, each Halloween is a unique experience!

Recap on Making the Most of Halloween Decors

It’s about selecting a theme, setting up the right atmosphere, and embracing the fun and mischief of the spooky season. Making use of everything you have, from recyclable items around your house to handmade crafts, can make a huge difference!

Unleashing Your Creativity on Halloween

Use this time of year to let your creativity run wild. Remember, the aim is to have fun, and to share that fun with your friends, family, neighbors, and anyone who happens to pass by.

Creating a Spooktacular Atmosphere with Halloween Crafts

Let your imagination take flight and create crafts that kids will love and adults will admire. Remember the goal is to have fun, stay safe and create lasting memories! Halloween only comes once a year, make the most of it!

The Halloween Junkie Take: Crafting Spooky and Creative Decorations Read More »