homemade

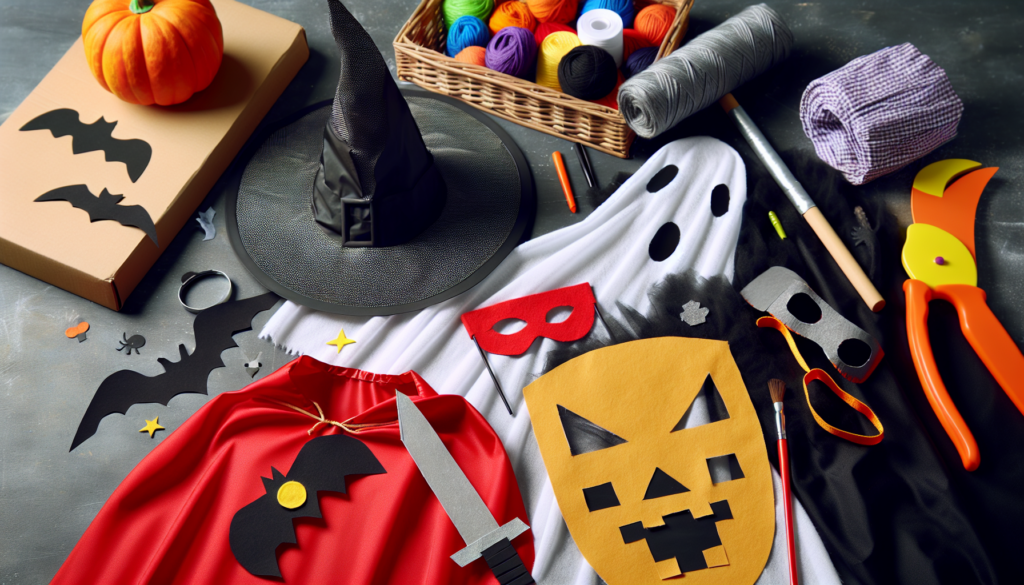
Easy to Make DIY Halloween Costumes

Are you excited about Halloween and want to make your own costume? You can create something super cool using things you already have at home! This article is all about easy-to-make DIY Halloween costumes that will make you look like you stepped out of a spooky story. You’ll find fun ideas for turning old clothes and craft supplies into a disguise that will have all your friends saying, “Wow!” Get ready to make this Halloween the most fun one yet with your awesome homemade costume!
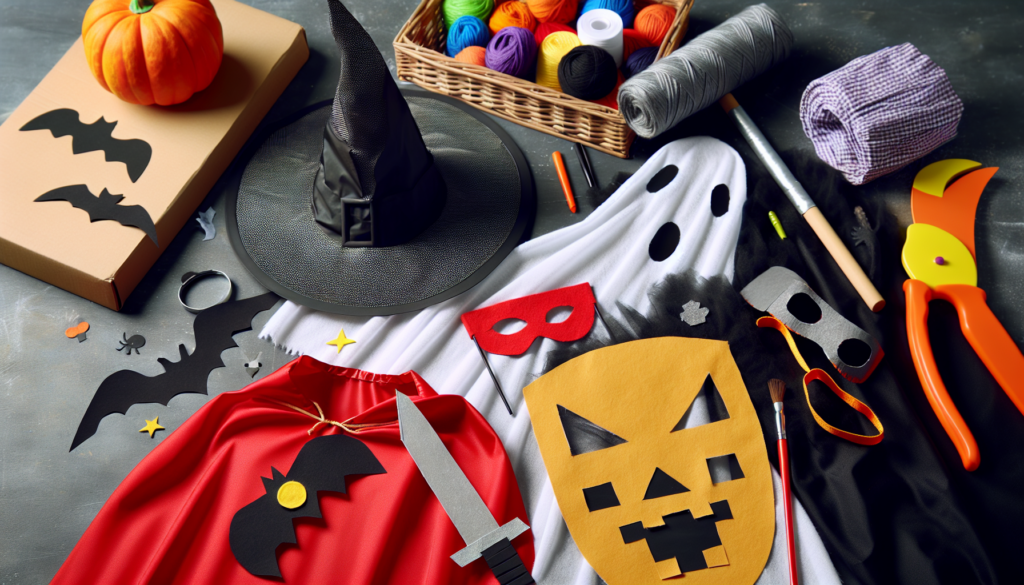
Easy to Make DIY Halloween Costumes

Find your new Easy to Make DIY Halloween Costumes on this page.

The Classic Ghost Costume

A ghost costume is super fun and really easy for you to make. You’ll look like a spooky ghost in no time!

Essentials: What You Need to Start

To make a ghost costume, you only need a few things. Grab an old white sheet from your home that you don’t need anymore and some scissors. Then, find a grown-up to help you cut the sheet.

Creating the Perfect Ghostly Shape

Lay the sheet over your head carefully, so you know where to put the eyes. Make sure it isn’t too long so you won’t trip. Gently take off the sheet and with help, cut holes where your eyes are.

Detailing: Adding Eyes and Mouth

Once the eye holes are cut out, you can make a sad, scary, or silly mouth. You can draw the mouth shape with a marker then cut it out. Remember to see where you are going, so only cut holes where you need to see.

Personalization Tips: Making It Unique

To make your ghost costume unlike any other, you could add some glitter, use colorful markers to draw patterns, or even add a bow. It’s your ghost, so make it special!

Creepy Scarecrow Ensemble

A scarecrow costume is a great idea for Halloween, and you can be creative with clothes you already have!

Gathering Materials: Clothing and Accessories

First, find an old flannel shirt and some baggy pants; jeans or brown pants work well. Look for a floppy hat and some straw or yellow yarn which will be like the scarecrow’s straw.

Assembling the Costume: Stitching and Patching

If the clothes are perfect, you’re lucky! But to make them look more like a scarecrow, add some patches. You can cut other fabric and glue or sew it on for a patchy look.

Adding the Scare Factor: Makeup and Props

For your face, you can use makeup or face paint to draw stitches or a big smile. Find a stick to carry as your scarecrow post, and don’t forget to act a bit floppy!

Safety and Comfort: Ensuring a Good Fit

Make sure your costume isn’t too big; it should be comfy and safe to walk in. Use a belt to hold up the pants if you need to.

Find your new Easy to Make DIY Halloween Costumes on this page.

Classic Witch or Wizard Look

With a cape, a hat, and a wand, you can become a witch or a wizard and cast spells all night!

The Basics: Cape, Hat, and Wand

Your cape can be any color. A simple black trash bag with a hole for your head can work! For the hat, you can make one from paper or find an old hat and cover it with fabric. Don’t forget a stick from the yard for your wand!

DIY Wand Craft: Materials and Design

To make the wand special, you can paint the stick or cover it with tin foil or shiny paper. You can even add beads or ribbons.

Styling the Cape and Hat: Adding Personality

If you want to make the cape and hat look cooler, add some glitter, stars, or moon shapes. You can use fabric paint or glue things on.

Accessorizing: Adding the Magic Touch

Find a necklace, a magic-looking stone, or anything shiny. It’ll make you feel more like a real witch or wizard.

DIY Superhero Glam

Being a superhero is exciting, and you can create your very own superhero costume!

Selecting Your Superhero: Inspiration Sources

Think about your favorite superhero or create your own. What colors do they wear? What are their powers? Keep this in mind as you make your costume.

Crafting the Emblem: Logo Creation

Every superhero has a logo! You can cut out a logo design from felt or cardboard and then attach it to the front of your shirt using glue or tape.

Cape or No Cape?: Making the Costume

Some superheroes have capes, and some don’t. If you want one, you can make it out of fabric or even a towel. If no cape, that’s okay—maybe you’ll be a flying superhero!

Final Touches: Mask Making and Accessories

Make a mask out of cardboard or fabric; just ensure you can see properly. You can also create cuffs from toilet paper rolls and decorate them to wear on your wrists.
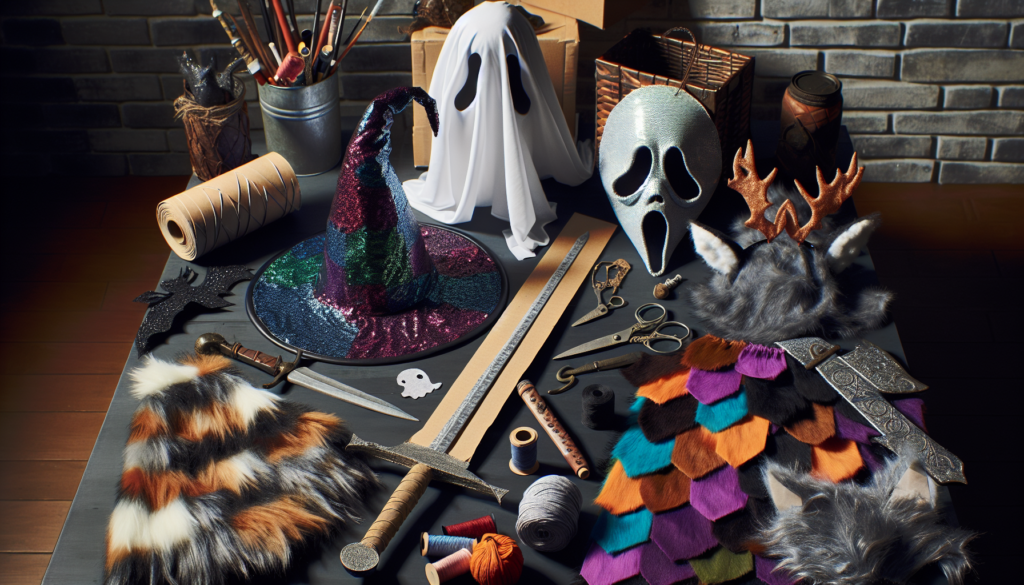
Easy to Make DIY Halloween Costumes

Pop Art Character Costume

Pop art characters look like they’re from a comic book. They’re very colorful and fun to make!

Inspiration and Design: The Pop Art Look

Look at pop art pictures and see how they use bright colors and bold lines. You want your costume to have those same bright colors and fun shapes.

Face Painting: Achieving the Comic Effect

With face paint, you can draw thick lines to outline your features like in a comic book. Make sure someone helps you and always be mindful not to get paint too close to your eyes.

Dressing Up: Outfit Considerations

Choose clothes that are one solid color or have big, bold patterns. Brightly colored pants and a matching top will give you that classic pop art style.

Accessorizing: Props and Hair

Find accessories that stand out, like a big colorful necklace or a hat. You can also use temporary hair color for a wild hairdo!

Homemade Pirate Attire

Pirates are always a hit! With a few items, you can become a fearsome pirate in no time.

Assembling the Base Outfit: What You Need

For your pirate costume, you’ll need baggy pants and a baggy white shirt. If you have a vest, that would be awesome too!

Creating the Pirate Jacket: A Simple Guide

If you have an old jacket, you can make it look like a pirate one by cutting the sleeves to make them look ragged. If not, that’s okay—you’re still a pirate!

Accessorizing: Hats, Swords, and Eye Patches

To be a great pirate, you need an eye patch you can make from black paper or cloth. A toy sword and a big hat with a feather will complete your look.

Adding Realism: Distress Techniques

Make your outfit look old and worn by rubbing some dirt on it or pulling at the edges to fray it. This makes it look like you’ve been sailing the seas for years!

Zombie Apocalypse Survivor

Surviving a zombie apocalypse means looking rough and ready. You can use old clothes and make them look really worn.

Base Outfit: Rugged and Ready

Find clothes that you can get dirty and tear up a bit. Ripped jeans and a tattered shirt are perfect for a survivor look.

Gory Details: Fake Wounds and Blood

Use red face paint for fake blood. You can even create wounds with tissue paper dipped in the paint. Stick these on your face or arms for a scary effect!

Props: Survival Gear Essentials

Carry props like a toy walkie-talkie, a water bottle, or a toy weapon. This makes it look like you’re ready for anything.

Creating a Backstory: Character Development

Think about the story of how you survived. Did you hide? Did you help save other people? This will make playing your part even more fun!

Famous Movie Monster

You can become a famous monster from a movie and scare all your friends.

Choosing Your Monster: Popular Options

Think about what monster you like the most. Is it Frankenstein, Dracula, or maybe a werewolf?

Facial Features: Masks vs. Makeup

You can use a mask if you find one, or make one using face paint. Whichever way you choose, just remember that being able to see and breathe comfortably is important.

Wardrobe: Authenticity and Comfort

You want to look like the monster but also be able to move around. Find clothes that match what the monster wears and fit you well.

Props and Sound Effects: Adding Scares

If you can find a prop like a chain for Frankenstein or fake fangs for Dracula, that’s perfect! And don’t forget to practice your monster growl or laugh!

Easy Animal Onesies

Animal onesies are comfy and cute. You can make one that’s just your size!

Selecting the Right Fabric: Comfort and Type

Choose a fabric that’s soft and warm. Fleece or flannel are good choices, and they come in a lot of colors.

Pattern Making: Simple Steps for Beginners

You can find simple patterns online or in craft stores. They’ll show you how to cut the fabric so it fits you right.

Sewing and Assembly: Bringing It Together

Ask for help to cut out your fabric and sew it together. Make sure the onesie isn’t too tight or too loose.

Finishing Touches: Ears, Tails, and Paws

Cut out shapes for ears and a tail from your fabric. Sew them onto your onesie and add little paw prints to the feet. Now you’re a cute and cuddly animal!

Fairy Tale Characters

You can be any fairy tale character you like. Choose someone fun, then start creating your costume.

Choosing Your Character: Classic vs. Modern

Would you like to be a classic princess or a brave knight? Or maybe you prefer modern versions of these characters. Decide who you want to be.

Materials and Color Schemes: Setting the Theme

Use colors and materials that match your character. Princesses might wear shiny fabric, while knights can have metallic-looking material.

Creating Accessories: Wands, Crowns, and More

Make your accessories match your character. Crowns can be made of cardboard covered in foil, and wands can be made from sticks with a star on top.

Final Outfit Assembly: Tying It All Together

Put on your outfit and accessories. Do a final check to make sure everything stays in place as you move around and have fun being your fairy tale character!

Discover more about the Easy to Make DIY Halloween Costumes.

Easy to Make DIY Halloween Costumes Read More »

Homemade Potions: The Halloween Junkie’s Guide to Crafting Decorative Witchy Brews and Elixirs

Imagine yourself standing in front of a cauldron full of colourful, bubbling liquid, a wizard hat on your head, and a magic wand in your hand. You’re about to create magic potions right in your own kitchen, just in time for Halloween! This guide, “Homemade Potions: The Halloween Junkie’s Guide to Crafting Decorative Witchy Brews and Elixirs”, will show you how to mix, stir, and brew your way to the best decorative potions. Be ready to cast a spell that will leave your friends and family amazed at your Halloween creativity!

Homemade Potions: The Halloween Junkies Guide to Crafting Decorative Witchy Brews and Elixirs

This image is property of images.pexels.com.

The Appeal of Homemade Potions

Have you ever wanted to be a powerful wizard or a talented witch who can brew magical potions? Well, Halloween is the perfect time to put your skills to the test and create your very own batch of homemade potions and brews!

Why making your own potions is fun

Making your own potions is much like making your own artwork – it’s totally fun! Instead of using paints and brushes, you get to mix liquids and powders, and watch them fizzle, pop, and change colors right before your very eyes! Just imagine having a potion that smokes like a dragon’s fiery breath or one that sparkles like a thousand tiny stars in a night sky.

Impressing visitors with DIY spooky decor

Halloween is all about tricks, treats, and scares. What better way to impress your friends than showing them a shelf full of eerie-looking potions you made yourself? They would be amazed and wonder if they’ve walked straight into a wizard’s lair or a witch’s coven!

The joys of crafting unique Halloween creations

Every single potion you make is unique, with its own color, shine, and magic. Each bottle you fill tells a different tale, and every label you stick carries a whisper of mystery. The endless possibilities in potion crafting truly make it a joyous activity for every spooky-loving crafter.

Safety First: Responsible Potion crafting

Now, before we dive into the exciting world of potion crafting, we must learn to play it safe.

Careful use of ingredients

Not all things that glitter are gold, and not every substance you find in your kitchen or garden should go into your potion! It’s important to remember to only use safe and non-toxic ingredients in your potion crafting adventures.

The importance of an adult supervising children

Little witches and wizards should speak to their grown-ups first before trying any potion craft. Adults can help make sure that the ingredients are safe to touch and use. They can also help prevent accidents, like spills and breakage.

Wise actions when crafting

And don’t forget to take care when working with liquids and glass containers. Always make sure you’re mixing your potions in a safe and secure area, like a kitchen countertop or a sturdy table. Remember, no running or playing around while carrying your potion ingredients or finished potions!

Essential Supplies for Potion Crafting

Every talented potion crafter needs the right supplies to create magical concoctions.

The necessity of glass jars and bottles

First off, you’ll need jack-o’-lantern loads of glass jars and bottles. Clear glass containers work best as they let you show off your vibrant potion colors. Plus, they add a certain spooky charm when lined up together.

Appropriate labels for your brews

Labels are not only for decoration but also help in keeping track of your potions. You can jot down the potion’s name, ingredients used, or simply put a warning sign to keep the unknowing away!

The role of faux herbs and spooky items

Fake spiders, cloth cobwebs, plastic eyeballs, faux herbs – these tiny spooky items can make your potions look more authentic and mysterious when added. So make sure you have enough of them in your witchy craft box!

Creating the Perfect Potion Base

The magic of every potion lies in its base.

Choosing the right liquid base

You can use any liquid as your potion base. Water, juice, soda, or vinegar – it’s totally up to you! Some liquids can even react with the other ingredients to make your potions fizz and bubble.

Tips for coloring your potions

Food coloring or washable paint are great for giving your potions their bewitching hues. You can stick to traditional colors like green for a classic yucky look, or experiment with every color in the spectrum to bring some rainbow magic!

Making your potions sparkle and fizz

Add a sprinkle of glitter to bring a mystical shimmer to your potions. And to make it fizz, a spoonful of baking soda and a splash of vinegar should do the trick. The more fizz, the more magical your potion appears!

Homemade Potions: The Halloween Junkies Guide to Crafting Decorative Witchy Brews and Elixirs

This image is property of images.pexels.com.

The Art of Potion Labeling

Now, labeling your potion is as fun as crafting it.

Making your own authentic labels

Working on your own labels allows you to showcase your creativity. It’s like naming your own pets! You can use simple papers and pens, or ask your grown-ups if you could print some snazzy labels online.

What to write on your potion labels

Remember, the labels should not only look pretty but also provide information. Write down the name of the potion, and maybe include a simple warning for extra spookiness.

Aesthetically arranging your labels

Placement of the labels is key to making your potions look even more charming. You can put it up on the cork, or smack in the middle of the bottle, or even in a corner for an offbeat look.

Potion Crafting 101: Simple Witchy Brews

Ready to start with your potion crafting? Let’s begin with a few simple brews.

Cauldron Boil and Bubble recipe

This spooky potion starts with a water base. Add drops of green food coloring, a sprinkle of glitter, and a spoonful of baking soda. Set it aside and in another jar mix some vinegar and red food coloring. Pour the vinegar mixture into the water base and watch your potion boil and bubble!

Midnight Serpent Slime recipe

For this one, start with a clear glue base. Add some liquid starch and keep stirring until it turns into stretchy slime. To create a serpent-like look, add some black and green food coloring.

Ghoul’s Blood Brew recipe

This blood-red potion begins with a red fruit juice base. Adding edible gold glitter will make it fizz and sparkle like real magic, and maybe a fake eyeball or two for added eeriness.

Homemade Potions: The Halloween Junkies Guide to Crafting Decorative Witchy Brews and Elixirs

This image is property of images.pexels.com.

Advanced Potion Crafting: Elixirs and Potent Brews

Once you master simple potions, you can move onto more complex brews.

Recipe for Witch’s Elixir of Shadows

Start with grape juice as a base. Then, stir in black food coloring, a pinch of edible silver glitter for that mysterious shimmer, and few drops of lemon juice for an unexpected zing.

Banshee Breath Elixir

This breathy concoction calls for a club soda base. Adding blue food coloring will give it an icy look, and a handful of dry ice can create spooky smoke, making it look like a Banshee’s breath.

Phantom Vision Tonic

For this ethereal blend, a tonic water base is perfect. A combination of purple and blue food coloring will give it a mystical hue, and tonic water will glow under a blacklight!

Displaying Your Homemade Potions

Once your potions are prepared, they deserve a special display.

Creating an atmospheric potion rack

Displaying your potions on a special rack can create a spooktacular Halloween atmosphere. A wooden shelf or an old spice rack can work as a perfect potion rack.

Adding your potions to a witch’s altar

If you’re building a witch’s altar for Halloween, your homemade potions would be great addition to it. Place them around cauldrons or spell books for a truly bewitching display.

Incorporating potions into your Halloween décor

Tufts of cloth cobwebs, crawling plastic spiders and glow-in-the-dark stickers can help integrate your potions seamlessly into your Halloween décor.

Fun Ways to Use Your Homemade Potions

Your homemade potions aren’t just for show – they can actually be part of your Halloween fun!

Using your potions in Halloween games

Potions can be used in Halloween versions of classic games. For example, play a potion scavenger hunt or use them as prizes for costume contests!

Presenting your potions as eerie refreshments

Serve your edible potions as refreshments during your Halloween party. Just make sure to tell your friends they’re completely safe to drink!

Gifting your potions as Halloween favors

Your crafted potions could make the perfect Halloween party favors. Just make sure you label them properly so everyone knows they’re getting a fun souvenir and not a real potion!

The Halloween Junkie Take

And finally, it’s not just about creating spooky potions or trying to impress your friends. It’s the thrill of making something with your own hands, the satisfaction when your potions bubble right, the excitement when you try out a new recipe, and above all, inspiring others with your Halloween creativity. After all, isn’t that what being a Halloween Junkie is all about?

Homemade Potions: The Halloween Junkie’s Guide to Crafting Decorative Witchy Brews and Elixirs Read More »

Spooky Sprucing: DIY Halloween Accessories to Jazz Up Your Costume

You love Halloween, right? Imagine this: this year, instead of buying a new costume, you decide to make it better with your own two hands. The story, “Spooky Sprucing: DIY Halloween Accessories to Jazz Up Your Costume” is all about doing just that! It’s filled with fun and scary ideas that you can create yourself to make your costume the best in the neighborhood. Let’s get started and see how your hands-on magic can bring your Halloween costume to life!

Spooky Sprucing: DIY Halloween Accessories to Jazz Up Your Costume

This image is property of pixabay.com.

Flashy Pumpkin Brooch

Halloween is coming and it’s so much fun to create your very own flashy pumpkin brooch to wear!

Materials required

To make your cool pumpkin brooch, you will need orange and green felt, a small piece of black felt, scissors, glue, a brooch pin, and a marker.

Step-by-step guide

First, draw a pumpkin shape on the orange felt and cut it out. Then, cut out a tiny green leaf and a little stem from the green felt. You also need to cut out two small triangles for the eyes, a little nose, and a toothy smile from the black felt. Now, paste those on the orange pumpkin shape. Finally, stick the brooch pin to the back of the pumpkin. And there you have it – your very own pumpkin brooch!

Tips to wear

The best part of your brooch is that you can wear it everywhere – on your shirt, hat, or even your bag. It will give anything you wear an extra Halloween touch.

Glowing Ghost Necklace

Items you need

Making a glowing ghost necklace is easy and fun. You will need white clay, a glow-in-the-dark paint, a necklace chain, and a small brush for painting.

Detailed tutorial

First, shape the clay into a small ghost about the size of your little thumb. Use your fingers to make the ghost’s eyes and mouth. Once you’re happy with your ghost, let it dry. Then, paint it with the glow-in-the-dark paint. Lastly, attach your ghost to the necklace chain. Voila, your ghost necklace is ready!

How to flaunt your ghost necklace

The best part about your necklace is the glow. When you go out in the dark, you will have a glowing ghost right there with you! This makes it perfect for a night-time Halloween party.

Homemade Witch Hat

Essentials needed

To make your homemade witch hat, you will need black paper, glue, a bit of purple ribbon and some Halloween stickers.

Making steps

First, create a big cone with the black paper and tape it together. Cut a circle for the bottom of the hat and stick the cone on the top. Now, around the bottom of the hat, wrap some purple ribbon. Once this is done, go crazy with your Halloween stickers all over the hat.

Wearing suggestions

Your hat adds a magical touch to any witch costume. Just remember to make sure it fits properly on your head. You don’t want it too big that it keeps falling off while trick-or-treating!

DIY Vampire Fangs

Materials for the fangs

Making vampire fangs is fun. All you need is white clay, some toothpicks for shaping and a small bag to keep them safe.

Crafting process

To start, shape the clay into two little fangs. Use the toothpicks to make them really pointy at the ends. Then, let the fangs dry.

Safety precautions while wearing

Remember, even though the fangs look cool, they’re not real teeth. They can break if you try to bite something hard. Also, make sure you always keep them in your bag when you’re not using them so you won’t lose them.

Spooky Sprucing: DIY Halloween Accessories to Jazz Up Your Costume

This image is property of pixabay.com.

Homemade Spooky Eye Lenses

Supplies for the spooky eyes

For your spooky eye lenses, you will need plastic wrap, red and green markers, some tape, and your sunglasses.

Making tutorial

First, take a piece of plastic wrap and draw a big green circle on it. Fill the circle with red color, leaving a small part green in the middle. Next, cut out your colored circle and tape it on the sunglasses’ lens. You will need to do this twice, one for each lens.

Guide to use safely

Remember, these lenses are just for fun and you should not ever try to actually look through them like real glasses. Just use them to make your Halloween costume extra spooky!

Ghoulish Zombie Arm Band

List of items

For your ghoulish zombie arm band, you will need a bit of black fabric, some green and red paint, and a safety pin.

Stepwise guide

First, paint a zombie hand on the fabric with green paint and let it dry. Then, add some red paint at the end of each finger like claws. After it dries, just wrap the fabric around your arm and secure it with the safety pin.

Suggestions to display it

Your zombie arm band will look great with a zombie or monster costume. Try wearing it with a ripped shirt or dress to make your outfit even more ghoulish!

Spooky Sprucing: DIY Halloween Accessories to Jazz Up Your Costume

This image is property of pixabay.com.

Creepy Bat Wing Headband

Required materials

Making a bat wing headband is fun! You’ll need black paper, a headband, glue, and scissors.

DIY instructions

First, cut out two bat wing shapes from the black paper. Then, simply glue them onto the headband. Once the glue is dry, your bat headband is ready to wear!

How to wear for maximum effect

The bat headband can make any costume spooky in an instant! Try it on with a black dress or with your witch’s hat.

Mysterious Magic Wand

Getting the materials

To make a magic wand, you’ll need a twig, some silver paint, twine, and a gem or bead.

Process of making

First, find a twig and paint it silver. Then, wrap some twine around the bottom like a handle. Final touch, glue a gem or bead at the top.

How to incorporate it in your costume

The magic wand goes well with many costumes, such as a wizard or fairy. Remember to wave it around to spread your magic spell!

DIY Glittering Skeleton Earrings

Materials you need

You need some white clay, earrings hooks, black paint, glitter, and a small brush for painting.

Detailed tutorial

First, shape the clay into tiny skeleton hands. Then, when they’re dry, paint them black and sprinkle some glitter on before the paint dries. Finally, attach the earrings hooks.

Advice for wearing

These earrings are perfect for your Halloween costume. They’re a little touch that adds a lot of sparkle and spookiness to your look!

The Halloween Junkie Take

Final words on DIY Halloween accessories

Making your own Halloween accessories is not only fun but also lets you create something unique. Your own DIY accessories add a personal touch to your Halloween outfit. Don’t forget, the most important part is to have fun and enjoy the process of creating something spooky.

Encouragement for festive creativity

Let your creativity run wild this Halloween! Remember, there’s no right or wrong when it comes to your accessories. As long as you’re having fun and feel excited about Halloween, everything is perfect.

Concluding thoughts on bringing your costume to life

A costume isn’t just about a spooky mask or a cool dress. It’s also about the little details, like a handmade brooch or a pair of eerie earrings. These accessories can help bring your costume to life and make your Halloween night unforgettable!

Final safety reminder

While you’re having fun making and wearing your accessories, remember to stay safe. Never put small pieces in your mouth and always be careful when using scissors or glue. Now go on, have a spooktacular Halloween!

Spooky Sprucing: DIY Halloween Accessories to Jazz Up Your Costume Read More »