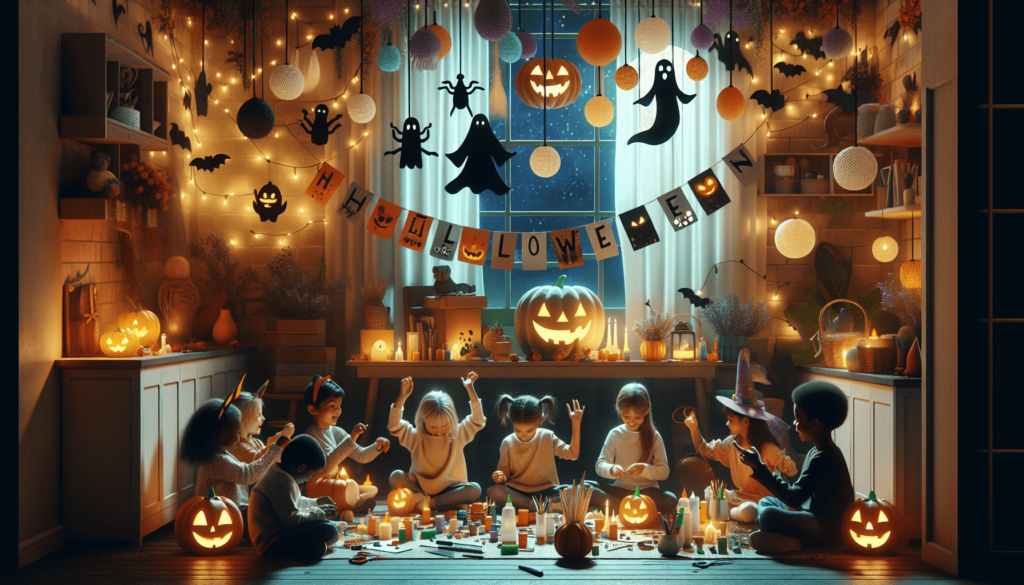
Halloween DIY Crafts for School Parties
Imagine it’s Halloween, and you’re at school, excited to celebrate with your friends. There’s a special way to make this day even more fun – by creating your very own Halloween decorations and crafts! This article is all about easy and fun crafts that you can make yourself for your school’s Halloween party. You’ll find lots of cool ideas that will turn the celebration into a spooky and exciting adventure. Let’s start crafting and make this Halloween unforgettable!
This image is property of images.unsplash.com.

Spooky Paper Garland
Materials needed
To make a spooky paper garland, you’ll need colored paper (like black, white, and orange), scissors, a pencil, string or yarn, and some tape or a stapler. These are easy things you can find at home or at any store.
Step-by-step instructions
- First, decide what shapes you want, like ghosts or pumpkins.
- Draw the shapes on the paper with your pencil. If drawing isn’t easy, you can find shapes in books or online and trace them.
- Carefully cut out the shapes with your scissors.
- Make little holes in your shapes and thread the string through, or simply tape them to the string.
- Hang your garland around the room with tape.
Variety of designs (ghosts, bats, pumpkins)
There are so many fun shapes you can make! Ghosts, bats, and pumpkins are perfect for Halloween. You can make them look happy, scary, or silly. Remember, no two ghosts or bats look alike, so have fun with it!
Decorating ideas for the classroom
Hang your garlands across the ceiling, around the whiteboard, or even in the windows. You can also make a garland-making station where everyone makes one shape to add. This way, your classroom will be filled with spooky decorations that everyone helped make!
Halloween Themed Mason Jars
Materials needed
For this craft, you’ll need mason jars (empty and clean), paint (orange, white, or green are fun colors for Halloween), paintbrushes, and decorations like stickers or markers.
Painting and decorating the jars
- Choose a color to paint your jar. Think about what it will be – a pumpkin needs orange, a ghost needs white.
- Paint the jar carefully. You might need a few coats!
- After the paint dries, decorate your jar. You can draw faces or stick on spooky stickers.
Ideas for jar uses (candy holders, pencil holders)
Your spooky jar can hold pencils on your desk, saving them from disappearing like ghosts! Or, fill it with candy for a sweet treat everyone in class can enjoy. Just make sure to ask your teacher where to put it.
Safety tips for using glass in the classroom
Glass jars can break and be dangerous. Always carry them carefully, and if you see a broken piece, don’t touch it! Tell an adult so they can clean it up safely.

Monster Pencil Toppers
Materials needed
To make monster pencil toppers, you’ll need pencils, colored paper or foam, glue, scissors, and some markers for decorating.
Creating different monster designs
You can make all kinds of monsters! Some might have two eyes, while others have three or even just one. Use different colors to make them unique. Maybe add sharp teeth, wiggly arms, or whatever you think a monster might have.
Assembly instructions
- Cut out the monster shapes from your colored paper or foam.
- Decorate them with markers to add faces, scars, or spots.
- Glue the monsters to the top of your pencils. Make sure they are secure!
Ideas for incorporating them into Halloween stories or games
These monster toppers can be characters in a Halloween story you write. Or use them for a guessing game where you describe a monster, and your friends have to pick which pencil topper matches your story.
Witch Hat Making
Materials needed
You’ll need black paper, ribbon, tape or glue, and any decorations like stars or moons.
Step-by-step crafting guide
- Cut a large circle for the brim and a cone shape for the top.
- Attach the cone to the circle with tape or glue – this is your basic hat!
- Decorate your hat with ribbon around where the cone and brim meet, and add any other decorations you like.
Customization ideas (colors, accessories)
Not all witch hats must be black! Use purple, green, or any color you love. Stick on paper stars or moons, or maybe add a paper buckle.
How to organize a witch hat parade
Once everyone has made their hats, line up and take a walk around the classroom or play area, showing off your wonderful creations. You could even have awards for the silliest, spookiest, and most creative hats!

This image is property of images.unsplash.com.
Pumpkin Decorating Station
Materials needed for no-carve pumpkins
Gather small pumpkins, markers, stickers, paints, and any other decorations that can stick to a pumpkin, like sequins or googly eyes.
Different decorating techniques (stickers, markers, paint)
You can make a pumpkin look like anything! Use markers to draw faces, or paint them in different colors. Stickers can make patterns, and sequins can add sparkle.
Safety tips
When decorating, make sure you’re in a space where it’s okay to get a little messy. Wear old clothes or a smock. If you’re using glue or paints, ask an adult for the non-toxic kind.
Setting up a classroom pumpkin decorating contest
Once everyone’s done decorating, you can have a contest! Categories can include the scariest pumpkin, the funniest face, or the most colorful. Make sure everyone gets a vote.
Ghostly Lanterns
Materials needed
For these, you’ll need white paper or fabric, balloons, glue, and black markers. You might also want string lights or small flashlights to make them glow.
Instructions for creating ghost shapes
- Inflate the balloons a bit.
- Cover them with the white paper or fabric and glue it down, leaving a hole at the bottom to remove the balloon and add lights later.
- Once dry, pop the balloon and pull it out, leaving a ghost shape.
- Draw spooky faces on your ghosts with markers.
Lighting options
You can put string lights inside to make your ghosts glow. Another option is to use a small flashlight or battery-operated tea light. Always ask an adult to help with this part.
Ideas for using the lanterns to decorate the classroom
Hang your ghostly lanterns around the room where everyone can see them. They might look great in a dark corner or near the window to greet visitors. Make sure the lights you use are safe and won’t get hot.

This image is property of images.unsplash.com.
DIY Halloween Masks
Materials needed
You’ll need card stock or paper plates, elastic string, markers, paints, and any other decorations like feathers or sequins.
Design ideas (animals, monsters, superheroes)
Think about what you want to be. A fierce lion? A scary monster? Or your favorite superhero? You can make any mask you imagine with just a bit of creativity.
Instructions for making the masks
- Cut your card stock or paper plate into the shape of your mask.
- Cut out eye holes.
- Decorate your mask with paints, markers, and decorations.
- Punch holes on the sides and tie the elastic string so you can wear it.
Incorporating mask-making into a Halloween costume contest
After everyone has made their masks, you can have a costume contest. See who makes the scariest, most beautiful, or funniest mask. Remember, it’s all about having fun and being creative, so every mask is a winner!
Creepy Crawly Spider Webs
Materials needed
For spider webs, all you need is white yarn or string, scissors, and tape. If you want to add spiders, you can make those with black paper.
Instructions for making spider webs
- Cut your yarn into long pieces.
- Tape one end to a surface and start creating a web design by crossing and tying the yarn. Use tape to secure the crossings.
- When you’re happy with your web, carefully remove it from the surface and tape it where you want to display it.
Adding spiders for effect
Cut out spider shapes from black paper and glue or tape them to your web. You can make your spiders big or small, scary or silly.
Ideas for spider web placement and games
Hang your webs in doorways, windows, or walls. You can even create a game where you throw small, soft balls (pretend flies) to stick onto the web, seeing who can make the most stick.

Haunted House Diorama
Materials needed
Gather a shoebox, paint, scissors, construction paper, glue, and any other decorations you’d like to add, like cotton for cobwebs or small toys for ghosts.
Step-by-step assembly
- Paint the inside of your shoebox to look like the inside of a haunted house.
- Cut out furniture, ghosts, or other spooky decorations from construction paper and glue them inside.
- Add any other decorations to make it look even spookier.
Ideas for customizing the diorama
Think about what makes a house haunted. Maybe add a hidden room, or make a ghost that moves when you shake the box. It’s your haunted house, so you can make it as scary or as fun as you want.
Incorporating storytelling into the diorama project
Create a scary story about your haunted house. Who lived there? Why is it haunted? Share your story with the class, using your diorama to help tell the tale.
Vampire Bookmark Crafting
Materials needed
You’ll need red and black paper, scissors, glue, and a marker to draw your vampire’s face.
Fold and cut instructions
- Cut a rectangle out of the black paper for the body.
- Fold a smaller piece of red paper in half, cut it into a heart shape for the cape, and glue it to the body.
- Cut out a smaller rectangle for the head and glue it on top.
- Use the marker to draw a scary or funny vampire face.
Customization tips (colors, faces)
Your vampire doesn’t have to be traditional. Use different colors of paper, or give your vampire a unique face. Maybe it’s a friendly vampire with a big smile!
Using the bookmarks in Halloween-themed books or as party favors
These bookmarks can be a fun addition to your Halloween reading. Use them to keep your place in a spooky story. They also make great party favors for a Halloween party, giving your friends a little monster to take home.

Halloween DIY Crafts for School Parties Read More »