Seasonal Projects

Halloween Crafts with Felt

Today, you’re going to learn about making fun Halloween crafts using felt. Felt is a soft, colorful material, and it’s perfect for creating spooky decorations or cute little crafts that can bring the spirit of Halloween into your home. You’ll discover how to cut, glue, and decorate felt to make things like pumpkins, ghosts, and bats. It’s a fantastic way to get creative and make your Halloween extra special with your own handmade decorations. Let’s get started on crafting your Halloween adventure with felt!

Check out the Halloween Crafts with Felt here.

Introduction to Halloween Crafts with Felt

Importance of Halloween crafts

Halloween crafts are super fun! They let you show off your creative side and make your home look spooky and special for Halloween. When you make your own decorations, you can make them just the way you like, with your favorite colors and designs.

Why choose felt for Halloween DIY projects

Felt is a great choice for Halloween projects because it’s easy to work with, even if you’re just learning how to craft. It doesn’t fray at the edges like some other fabrics, which means you don’t have to sew edges unless you want to. Plus, felt comes in lots of colors, perfect for making pumpkins, ghosts, witches, and all sorts of Halloween decorations.

Overview of easy-to-make felt projects for Halloween

There are so many fun things you can make with felt for Halloween. You can create decorations like pumpkins, ghosts, and bats to hang in your home. Or, you can make a witch hat to wear, and even craft a spooky garland to drape across your walls. These projects are all pretty easy, so you’ll be able to make something awesome with a bit of practice.

Basic Materials Needed for Felt Halloween Crafts

Types of felt suitable for Halloween crafts

For Halloween crafts, you can use any type of felt. There’s craft felt, which is inexpensive and comes in lots of colors. There’s also wool felt, which is a bit thicker and feels nicer, but it’s also more expensive. You can choose whichever one you like or fits your budget.

Additional materials and tools

Besides felt, you’ll need a few other things like scissors to cut your felt, glue if you don’t want to sew, and thread and a needle if you do. Sometimes, you might need a ruler or a template for your project, and things like buttons or beads to decorate.

Preparation and setup tips

Before you start, clear a space to work where you can spread out your felt and other materials. Have all your tools close by so you don’t have to stop and look for them. It’s also a good idea to read through the steps of your project before you start, so you know what to do.

Halloween Crafts with Felt

This image is property of images.unsplash.com.

Check out the Halloween Crafts with Felt here.

Felt Pumpkin Decorations

Step-by-step guide to creating a felt pumpkin

First, cut out a pumpkin shape from your orange felt. You can make it as big or as small as you like. Then, use green felt to cut out a small stem. Sew or glue the stem to the top of your pumpkin. If you want, you can add a face to your pumpkin with black felt or by drawing with a marker.

Variations in design and size

Your pumpkin doesn’t have to look like everyone else’s. You can make tiny pumpkins, big pumpkins, round pumpkins, or tall pumpkins. You can also make your pumpkin’s face look happy, spooky, or even surprised!

Ideas for using felt pumpkin decorations in your home

You can put your felt pumpkins everywhere around your house. Stick them on your walls, place them on shelves, or even hang them from the ceiling with a string. They can help make any room look ready for Halloween.

DIY Felt Ghosts for Halloween

Creating simple and cute felt ghosts

Cut out a ghost shape from white or gray felt. Ghost shapes are easy – just think of a squiggly cloud or a teardrop. You can make your ghost any size you like. Add eyes and a mouth with black felt or a marker to give your ghost a face.

Customization tips for different expressions

Your ghost can have any expression you want. Try different shapes for its eyes and mouth to make it look happy, scared, or even goofy. You can add accessories like a bow tie, hat, or carrying a tiny felt pumpkin to make your ghost unique.

Incorporating felt ghosts into your Halloween decor

Hang your felt ghosts in windows, on walls, or from the ceiling with clear fishing line to make it look like they’re floating. You can also stick them to a wreath for your door or add them to your Halloween table setting.

Halloween Crafts with Felt

This image is property of images.unsplash.com.

Crafting Felt Bats for Halloween

Pattern and cutting instructions for felt bats

Draw or print out a bat shape on paper to use as a template. Place the template on black felt and trace around it, then cut out your bat. You’ll need two bat shapes for each decoration.

Hanging and displaying felt bats effectively

Sew or glue the edges of the two bat shapes together, leaving a space to add a little stuffing or a piece of cardboard to help them keep their shape. You can hang your bats with fishing line or stick them on walls and windows.

Adding features to make your felt bats stand out

Add little white felt eyes or use glow-in-the-dark paint to give your bats spooky eyes that stand out in the dark. You can also cut your bats in different sizes to create a whole family of bats.

Making a Felt Witch Hat

Materials needed for a DIY felt witch hat

You’ll need black felt for the hat and any other colors you like for decorations. You’ll also need something like cardboard to give the brim of your hat some stiffness.

Step-by-step assembly instructions

Cut a large circle for the brim of your hat and a triangle that will become the cone. Make a slit in your circle to the center, then overlap the edges a bit to form a cone shape and glue or sew it to the brim. Add a strip around the base of the cone for a cleaner finish.

Decorating your felt witch hat for extra flair

Add colorful felt bands, stars, moons, or anything else you like to your hat to make it your own. You can also add ribbons or fabric flowers.

Halloween Crafts with Felt

This image is property of images.unsplash.com.

Felt Halloween Garland

Choosing a theme for your Halloween garland

Decide if you want your garland to have all one type of decoration, like just pumpkins, or a mix of everything like pumpkins, ghosts, and bats.

Creating felt shapes for the garland: pumpkins, ghosts, bats

Use the instructions above to make small felt shapes for your garland. You’ll want to make them a bit smaller than if they were standalone decorations.

Assembling your felt Halloween garland

Lay out a long piece of string or ribbon and arrange your felt shapes along it. When you’re happy with how it looks, sew or glue your shapes to the string. Now, it’s ready to hang across a doorway, a fireplace, or on a wall.

Spooky Felt Halloween Masks

Designing your Halloween mask template

Think about what kind of mask you’d like to make. It could be a pumpkin, a cat, a bat, or anything else. Draw your design on paper first to create a template.

Cutting and assembling your felt mask

Cut your mask shape out of felt, making sure to include eye holes. Sew or glue on additional felt pieces for details like nose, mouth, whiskers, or ears.

Decorative ideas for personalizing your mask

Use glitter, beads, or fabric paint to add details and make your mask sparkle or glow in the dark. Think about adding elastic or a stick to hold your mask in place.

Halloween Crafts with Felt

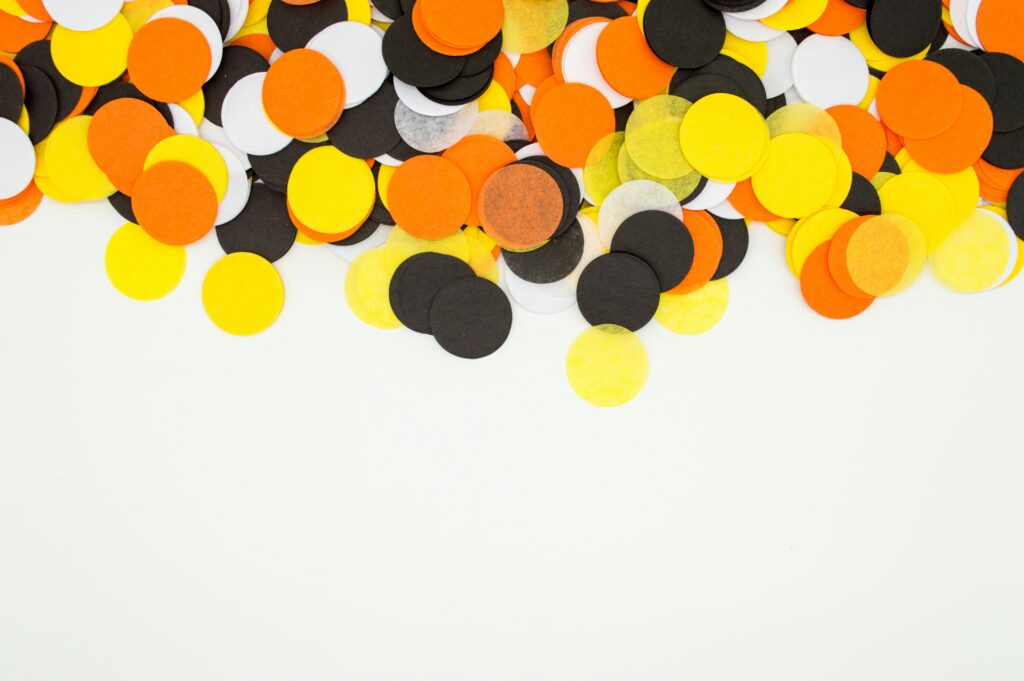
Felt Candy Corn Decorations

Creating a pattern for felt candy corn

Draw a simple candy corn shape on paper – it’s just a triangle with rounded corners. Use this as your template.

Sewing and stuffing your candy corn decorations

Cut two candy corn shapes from white, orange, and yellow felt. Sew or glue them together, leaving a little opening to stuff them lightly before closing them up.

Ideas for displaying your felt candy corn

Group your candy corn decorations in a bowl as a table centerpiece, string them into a garland, or hide them in unexpected places for a fun surprise.

Conclusion: Expanding Your Felt Halloween Crafts Collection

Mixing and matching different felt Halloween crafts

Now that you’ve made all these cool things, try putting them together in new ways. Maybe your ghosts need to ride on the witches’ hats, or your bats want to hang out with the pumpkins.

Getting creative with your own felt Halloween designs

Use what you’ve learned to come up with your own felt Halloween crafts. Can you think of a spooky creature or decoration you’d like to make? Give it a try!

Storing your felt Halloween decorations for future use

When Halloween is over, keep your felt decorations safe by storing them flat in a box or hanging them in a closet. That way, they’ll be ready to make your home spooky and fun again next year!

Check out the Halloween Crafts with Felt here.

Halloween Crafts with Felt Read More »

Halloween Crafts with Pipe Cleaners

Today, you’re going to learn about how to make cool Halloween decorations using something called pipe cleaners. Imagine twisting and turning colorful, fuzzy sticks into shapes like pumpkins, ghosts, and spiders. It’s going to be super fun and easy, and you can do it all by yourself or with a little help from someone older. You’ll see how pipe cleaners can turn into amazing Halloween crafts that you can hang in your room or give to your friends to spook them in a fun way!

Find your new Halloween Crafts with Pipe Cleaners on this page.

Introduction to Halloween Crafts with Pipe Cleaners

Brief overview of pipe cleaners in crafting

Pipe cleaners are thin wires covered in a soft, colorful material. They are very bendy and can be twisted together to make lots of different shapes. Because they are so flexible, people love using them to create cool crafts, especially during Halloween.

Benefits of crafting with pipe cleaners for Halloween projects

Crafting with pipe cleaners for Halloween is great because they are safe to use, affordable, and you can find them in many colors. Making Halloween decorations and characters with pipe cleaners is not only fun but also helps you get better at being creative and solving problems. Plus, it can be a cozy way to spend time with family and friends, making spooky decorations together.

Getting Started: Materials and Tools

List of essential materials needed for pipe cleaner crafts

To start your Halloween crafts with pipe cleaners, you’ll need some basic materials. You’ll want lots of pipe cleaners, of course. Try to get a variety of colors like black, orange, white, and green to fit the Halloween theme. You’ll also need some glue, scissors, and perhaps some googly eyes to bring your creations to life.

Overview of additional tools for enhancing pipe cleaner crafts

To make your pipe cleaner crafts even cooler, consider using some extra tools. Things like colorful beads, tiny pompoms, and felt can add more details to your crafts. Using wire cutters can also help you cut pipe cleaners more easily than scissors, but always ask an adult for help with that.

Safety tips when handling pipe cleaners and tools

Remember to be careful when using scissors and when bending pipe cleaners, so you don’t poke yourself. Always use tools like wire cutters under adult supervision. Keep your crafting area clean to avoid any accidents, and make sure to put away all your materials when you’re done crafting.

Halloween Crafts with Pipe Cleaners

This image is property of images.unsplash.com.

See the Halloween Crafts with Pipe Cleaners in detail.

Pipe Cleaner Halloween Characters

Instructions for creating a pipe cleaner witch

To make a pipe cleaner witch, you’ll need black, green, and orange pipe cleaners. Twist a black one into a cone shape for the hat and wrap a green one around a pencil to make the head. Then, add an orange pipe cleaner for the hair. Twist them all together, add a face with a marker, and you have a tiny witch!

Steps to make a pipe cleaner ghost

Making a pipe cleaner ghost is super easy. Take a white pipe cleaner and wrap it around a pencil to make it curly. Then, pull it off and shape the top into a head. Draw two small eyes with a black marker, and you’ve got a cute ghost!

How to craft a pipe cleaner vampire

For a vampire, use black, red, and white pipe cleaners. Make a little body with white, then add a black cape around it. Use a red pipe cleaner for a scary cape collar and add a little face. Don’t forget two tiny fangs with a marker!

Creating a pipe cleaner black cat

To create a black cat, start by making a small loop with a black pipe cleaner for the head and add two small pieces for ears. Twist more black pipe cleaners to make a body and a tail. Add small pieces of white pipe cleaner for the eyes, and draw in the details with a marker.

Spooky Halloween Decorations

Making Halloween garlands with pipe cleaners

Stringing together various Halloween characters like ghosts, witches, and pumpkins you’ve made from pipe cleaners makes a perfect garland. Twist the top of each figure around a long string or use additional pieces of pipe cleaner to attach them. Hang your garland around the room for instant Halloween vibes.

Crafting spider webs from pipe cleaners

Take some white or silver pipe cleaners and cut them into pieces. Lay out one piece as the center, and then keep adding pieces around it, twisting at the middle to secure them. Connect the ends with smaller pieces to make the web pattern.

DIY pipe cleaner pumpkins for table decorations

For a pumpkin, wrap orange pipe cleaners around a marker to create loops. Remove them and twist all the loops together at one end to form the pumpkin’s top. Bend a green pipe cleaner into a stem and leaf, attaching it to the top. Make a few of these for a festive table display.

Halloween Crafts with Pipe Cleaners

This image is property of images.unsplash.com.

Halloween Jewelry and Accessories

Creating Halloween bracelets with pipe cleaners

Twist orange, black, and white pipe cleaners together to make a cool, twisty bracelet. You can add small beads or cut pieces of different colored pipe cleaners to decorate it like a tiny pumpkin or ghost. Just wrap it around your wrist, and you’re Halloween ready!

How to make pipe cleaner spider rings

For a spider ring, wrap a black pipe cleaner around your finger to make the ring. Use another pipe cleaner to make the spider by bending four small pieces into legs and twisting them around the ring. Add a larger piece for the body and use googly eyes or small white pipe cleaner bits for eyes.

Designing pipe cleaner witch hats for pencils

Wrap a black pipe cleaner around a pencil to make a cone shape for the hat. Cut a circle from black felt and poke the pencil through its center. Slide the cone down to meet the circle, and you’ve got a witch hat topper for your pencil!

Interactive Halloween Crafts for Kids

Easy-to-make pipe cleaner finger puppets

Take your pipe cleaner characters and simply make them with longer bodies. Then, twist the bottom part to fit snugly around your finger, and voila! You’ve got Halloween finger puppets like witches, ghosts, or vampires to play with.

Crafting a pipe cleaner Halloween mobile for rooms

Create several Halloween characters and decorations out of pipe cleaners. Attach them with strings to a hanger or a stick. Hang your mobile from the ceiling, and enjoy watching your spooky creations dangle and spin.

DIY Halloween-themed bookmarks with pipe cleaners

Make a long, flat shape (like a ghost or pumpkin) with pipe cleaners. Glue it onto a piece of cardboard for stability, then cut around the shape, leaving a little border. You’ve just made a fun, Halloween-themed bookmark to keep your place in spooky stories!

Halloween Crafts with Pipe Cleaners

This image is property of images.unsplash.com.

Educational Halloween Crafts

Using pipe cleaners for Halloween-themed counting activities

Create 10 little pumpkins out of orange pipe cleaners. Number them with a marker. Ask a grown-up to write down simple math problems, and use your pumpkins to help you figure out the answers.

Making a color matching game with pipe cleaners

Cut small pieces of pipe cleaners in different Halloween colors. Draw matching colored circles on a piece of paper. Challenge yourself or a friend to match and place the right colored pipe cleaner on its corresponding circle as fast as you can.

Crafting a Halloween story wheel with pipe cleaners

Make a large circle from cardboard and divide it into sections. In each section, use pipe cleaners to create a different part of a Halloween story (e.g., a haunted house, a witch, a black cat). Attach a spinner in the middle. Spin to create random Halloween stories by combining the sections where the spinner lands.

Outdoor Halloween Decorations

Creating large outdoor spider decorations with pipe cleaners

Use black duct tape to join several large black pool noodles together for the spider’s body. Cut long lengths of black pipe cleaners for legs, and attach them to the body. Add large googly eyes or cut out eye shapes from white paper. Place your giant spider in the garden for a spooky surprise.

How to make a Halloween-themed wreath with pipe cleaners

Form a large circle with thick, black pipe cleaners twisted together. Decorate it with smaller Halloween-themed crafts like tiny pumpkins, ghosts, and bats you’ve made. Hang your wreath on the door to welcome trick-or-treaters.

Crafting hanging bats with glowing eyes using pipe cleaners

For a bat, twist a black pipe cleaner into wings and a body. Cut small pieces of a glow stick (with adult supervision) and insert them into the head part as spooky glowing eyes. Hang your bats around your porch for a glowing Halloween night.

Halloween Crafts with Pipe Cleaners

Upcycled Halloween Crafts with Pipe Cleaners

Incorporating recycled materials with pipe cleaners for Halloween decor

Gather old jars, bottle caps, and other recyclables. Use pipe cleaners to add Halloween touches, like tiny ghosts on jars or spiders on bottle caps. It’s a great way to reuse stuff and make unique decorations.

Making eco-friendly Halloween party favors with pipe cleaners

Create small Halloween figures like pumpkins or ghosts from pipe cleaners. Add a tiny thank-you note, and give them as party favors. They’re not only cute but also a great way to be kind to the planet.

Crafting Halloween lanterns using jars, candles, and pipe cleaners

Wrap colored pipe cleaners around clean, empty jars to create Halloween patterns. Add a battery-operated tea light inside each jar. These lanterns will make your Halloween night glow in a fun, spooky way.

Conclusion

Recap of the diverse uses of pipe cleaners in Halloween crafts

From creating tiny characters to spooky decorations, pipe cleaners are an amazing tool for Halloween crafts. They’re easy to work with and transform into anything your imagination comes up with.

Encouragement to experiment and create unique Halloween crafts

Don’t be afraid to try new ideas and mix different materials with your pipe cleaners. Make your own special Halloween decorations that show off what you love about this spooky season.

Sharing your Halloween pipe cleaner crafts on social media

When you’re done crafting, take pictures of your creations and share them on social media. It’s a fun way to show your friends what you’ve made and maybe inspire them to get crafty, too! Who knows? Your pipe cleaner crafts could become the next Halloween trend.

See the Halloween Crafts with Pipe Cleaners in detail.

Halloween Crafts with Pipe Cleaners Read More »

DIY Halloween Bat Crafts

Imagine you can make your own spooky bats to decorate your room for Halloween! With DIY Halloween Bat Crafts, you’ll get to use your hands to create cool bats out of things you might already have at home. You’ll learn how to cut, glue, and paint, turning simple stuff into fun bat decorations. These crafts are perfect for making your space extra special for Halloween, and you’ll have a blast showing off your creations to your friends and family!

DIY Halloween Bat Crafts

This image is property of images.unsplash.com.

Click to view the DIY Halloween Bat Crafts.

Understanding the Basics of Bat Crafts

Materials You Will Need for Bat Crafts

Hi there! If you want to make some fun bat crafts, you’ll need some special things. Think of these like the ingredients in a yummy recipe. For most bat projects, you’ll use things like paper, fabric, or maybe even felt. Sometimes, you might find a project that uses natural stuff like leaves or pine cones! Make sure to check what you need for every craft before you start.

Essential Tools for DIY Crafting

When you make crafts, it’s like being a builder—you need tools. These can be scissors to cut shapes, glue to stick parts together, and maybe a ruler to make sure everything is just the right size. If you’re sewing, needles and thread are important. Always ask an adult to help with any tools that could be tricky to use, okay?

Safety Tips for Crafting with Kids

Crafting is super fun, but you want to do it safely so no one gets hurt! Always have grown-ups around when you’re using things like scissors or hot glue. If you’re using something like paint or glue, wear old clothes so you don’t make a mess on your nice ones. And keep your crafting area clean, so you can find everything easily and nothing gets lost.

Choosing the Right Craft for Your Skill Level

Not all crafts are the same! Some are perfect for beginners, and some are good for kids who have done lots of crafts before. If you’re just starting, look for simple projects that say things like “easy” or “for beginners.” As you get better and better, you can try the harder ones!

Paper Bat Cutouts

Step-by-Step Guide to Creating Paper Bat Silhouettes

Making paper bats is so much fun and pretty easy, too! First, you fold black paper in half and draw half a bat shape along the fold. Then, keep the paper folded and cut out the bat shape you drew. When you open it up—ta-da!—you have a perfect bat silhouette!

Decorating Your Bats with Patterned Paper

You can make your bats super special by adding patterns! Use paper that has cool designs, or you can even draw on the plain paper before you cut it out. How about polka dots, stripes, or even scary faces?

Tips for Hanging Paper Bats as Decorations

Once your bats are ready, you can hang them up for everyone to see! Use string or tape to stick them to walls or ceilings. If you want them to look like they’re flying, use fishing line—it’s almost invisible!

Interactive Crafts: Paper Bat Mobile for Kids

For a swinging bat craft, make a mobile! Cut out lots of bats and attach them to a hanger or a stick with string. Hang your mobile somewhere it can move in the breeze. It will look like a bunch of bats flying around together!

Discover more about the DIY Halloween Bat Crafts.

Cloth and Fabric Bat Decorations

Selecting Fabrics for Your Bat Crafts

If you want your bats to be soft, use cloth or fabric like old T-shirts or socks. Pick dark colors like black or purple, or anything spooky that you like!

Sewing Simple Bat Plushies

Sewing bat plushies is like making a little stuffed toy. Cut out two bat shapes from fabric, sew them together, but leave a little hole to put stuffing in. After they’re stuffed, sew the hole closed. Now you have your very own bat buddy!

No-Sew Fabric Bats for Beginners

If sewing sounds too hard, don’t worry! You can still make fabric bats. Cut out a bat shape and decorate it with fabric markers. You can glue on eyes or use other bits of fabric to decorate it without needing to sew.

Creating Bat Wing Chair Covers for Halloween

For an awesome Halloween surprise, make bat wing chair covers. Cut out big bat wings from black fabric and drape them over the backs of your chairs. Your kitchen will instantly turn spooky!

Recycled Material Bat Ornaments

Turning Toilet Paper Rolls into Bats

For a quick and eco-friendly craft, use toilet paper rolls! Paint them black, pinch the top to make ears, and add wings cut out from cardboard. Add googly eyes, and you have a cute recycled bat!

Crafting Bats from Upcycled Egg Cartons

Egg cartons can be turned into little bats too. Cut up the carton to make each cup into a bat body. Paint it, add wings from more carton pieces, and decorate with eyes and teeth!

Bottle Cap Bat Magnets: A Simple Tutorial

Save bottle caps for this one! Paint them black, add small wings from paper or felt, and glue a magnet to the back. Stick them on the fridge for bat-tastic decorations!

Eco-Friendly Crafting with Paper Mache Bats

For paper mache bats, mix water and flour to make paste, dip strips of newspaper in it, and cover a balloon. When it’s dry, pop the balloon, paint it black, add wings, and you get a cool bat!

DIY Halloween Bat Crafts

This image is property of images.unsplash.com.

Felt Bat Crafts

Cutting and Stitching Felt Bats

Felt is nice because it doesn’t fray. Cut out bat shapes and, if you’re up for it, stitch around the edges for a neat finish. Add button eyes for a cute look!

Glue-Free Felt Bat Coasters

For a no-glue project, make felt coasters. Just cut out bat shapes and use them to keep your drinks from making rings on tables. Super easy and helpful!

Personalized Bat Hair Clips and Accessories

Make bat hair clips by cutting small bats from felt and gluing them onto hair clips. You can even add your name with thread or glue for a personal touch.

Educational Bats: Storytelling with Felt Boards

With felt bats and a felt board, you can tell stories. Move the bats around on the board as you make up adventures. It’s fun and a great way to learn how to tell stories!

Wooden Bat Creations

How to Carve and Paint Wooden Bats

This one is for the more experienced crafters. Carve bats out of wood and then paint them dark and spooky. Always have an adult help with this because carving can be tricky.

DIY Bat Puzzles for Children

Create puzzles by drawing a bat on a piece of wood and cutting out pieces with a jigsaw. Paint the pieces and let kids put together their bat puzzle.

Wooden Bat Wind Chimes for Your Porch

Make a bat wind chime by hanging wooden bats from strings on a branch or a small piece of wood. When the wind blows, your bats will dance in the air!

Rustic Bat Garland for Mantel Decor

Cut out bat shapes from thin wood and string them together for a cool garland. Hang it over a fireplace or on the wall for a rustic, spooky vibe.

DIY Halloween Bat Crafts

This image is property of images.unsplash.com.

Innovative Bat Crafts with Pipe Cleaners

Easy-to-Make Bat Rings for Halloween Parties

Twist black pipe cleaners around your finger to make rings, add little bat wings, and you get the perfect accessory for Halloween!

Crafting 3D Bats with Pipe Cleaners and Pom Poms

Use a pompom for the body and pipe cleaners for wings and ears to make tiny 3D bats that can stand up by themselves!

Flexible Bat Figurines as Bendable Toys

Create whole bats from pipe cleaners, then bend and twist to make them fly or hang upside down. They’re toys that you can change whenever you want!

Pipe Cleaner Bat Glasses Frames for Costumes

Wrap pipe cleaners around old glasses frames to make bat-shaped decorations. You’ll have the coolest glasses for your Halloween costume!

Crafting Bats with Natural Materials

Leaf Bats: A Craft for Autumn

Gather fall leaves and make bats by adding small sticks for ears and painting faces on them. They’re perfect for autumn!

Acorn and Twigs Bat Craft

Stick twig wings and acorns together to create tiny bat friends. Just a drop of glue will do to make them all stick!

Pine Cone Bats: A Festive Fall Decoration

For a pine cone bat, glue on some felt wings and googly eyes. Hang them up or put them on tables to bring fall inside your home.

Rock Painting: Halloween Bat Edition

Find smooth rocks and paint them to look like bats. It’s a simple craft, and you can hide these little bats all over your garden for a Halloween treasure hunt!

DIY Halloween Bat Crafts

Foam and Sponge Bat Projects

Cutting Foam Shapes for Bat Figurines

Foam sheets are great because they’re easy to cut and sturdy. Draw a bat on the foam and cut it out for a start of a cool figurine or a floating decoration for your pool.

Sponge Painting Bat Artwork for Kids

Dip a sponge cut into a bat shape in paint and press it onto paper to create lots of bat prints. It’s fun and a bit messy—in the best way!

Waterproof Bat Decorations with Foam Sheets

If you use foam, your bats can get wet and still be okay. Cut out bat shapes and use them to decorate outside—even if it rains, they’re safe!

Using Sponges to Create Bat Stamps for Crafting

Cut a sponge into the shape of a bat, then use it as a stamp to decorate all sorts of things—a great way to add some bat fun to anything!

Reusable Bat Crafts for Every Year

Crafting With Durability in Mind

To make bat crafts you can use again and again, choose strong materials like wood or felt, and put them together carefully so they’ll last a long time.

Storing Your DIY Bat Decorations

When Halloween is over, put your bat decorations in a box where they won’t get squished. Wrap them in tissue paper if they’re delicate, so they’ll be ready for next year.

Refurbishing and Repurposing Old Bat Crafts

If you have old bat crafts that are looking a bit tired, don’t throw them away! You can paint them, add new parts, or even turn them into something completely different.

Ideas for Multi-Use Bat Themed Items

Some things can be more than just decorations—like a bat plushie can be a toy, a pillow, or even decor! Think of other ways to use your crafts, so you get the most fun out of them.

And that’s it, a whole bunch of ways to make bats for Halloween—or anytime you feel spooky! Remember, always craft with care, and most importantly, have fun creating!

Check out the DIY Halloween Bat Crafts here.

DIY Halloween Bat Crafts Read More »