DIY Halloween Garland Decorations
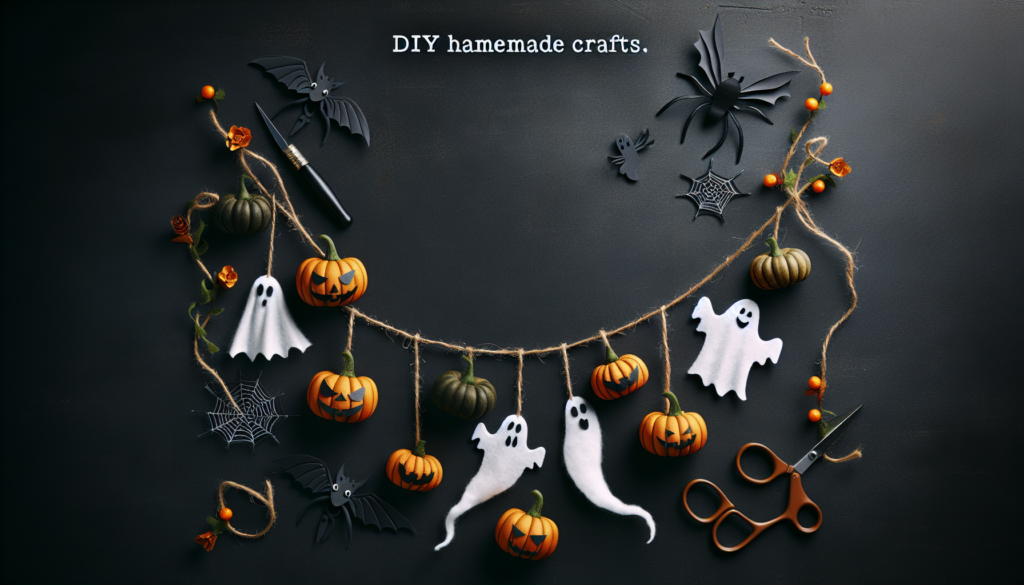
Get ready for a spooky and fun craft! In this article, you’ll learn how to make your very own Halloween garland decorations. With some simple supplies and a bit of creativity, you can create something really special to hang in your house. This will make your home look perfect for Halloween, and you’ll have a great time making it. So grab your scissors, and let’s start crafting some ghostly garlands together!
This image is property of pixabay.com.
Choosing Your Halloween Garland Theme
When you decide to make your own Halloween garland, you’ll want to pick a theme that you really like. This theme decides what colors, shapes, and decorations your garland will have. Here are some fun ideas.
Classic Spooky: Ghosts, Bats, and Spiders
Imagine your room with little white ghosts, black bats, and creepy spiders hanging around. That is what a Classic Spooky theme looks like. You can use white, black, and maybe some orange to keep it looking Halloween-y.
Autumn Harvest: Pumpkins, Leaves, and Acorns
If you love when leaves change color and the weather gets cooler, the Autumn Harvest theme might be perfect for you. Your garland can have orange pumpkins, yellow and red leaves, and brown acorns. It will feel like you brought the outdoors, inside!
Ghoulish Glam: Black, Purple, and Silver Accents
Sometimes, Halloween can be a bit fancy. That’s where Ghoulish Glam comes in. This theme uses dark colors like black and adds shiny purple and silver. It’s spooky in a really cool way!
Haunted House: Creepy Portraits and Aged Paper
Do you like old, spooky houses with secrets? A Haunted House theme can have pictures like the ones you might find in an old mansion, with frames drawn on aged paper. It’s like making your place into a fun, scary story.
Pop Culture: Icons from Horror Movies and TV Shows
For those who love movies and TV shows with monsters and heroes, you can make a Pop Culture theme garland. Cut out shapes or characters from your favorite scary stories. It’s like throwing a party with famous monsters and ghosts!
Gathering Essential Supplies
Before you start making your garland, let’s gather all the things you’ll need to create your spooky masterpiece.
Types of Paper and Cardstock
You can use different kinds of paper, like thin regular paper or thick cardstock. Cardstock is really good for keeping your garland strong. You can find it in lots of colors too!
Adhesives: Glue, Tape, and More
Things might get a little sticky! You’ll use glue or tape to put your garland together. Stick the parts carefully so they stay and look nice.
Crafting Tools: Scissors, Punches, and Cutting Machines
You’ll need tools like scissors to cut out shapes. If you have them, punches or cutting machines can make super cool shapes without a lot of work.
Decorative Elements: Glitter, Paint, Ribbons
Make your garland special by adding fun stuff like glitter, paint, or ribbons. Just remember to let paint and glue dry before hanging up your garland.
Hanging Supplies: String, Twine, and Fishing Line
To hang up your garland, you’ll need something like string, twine, or clear fishing line. Make sure it’s strong enough to hold up all your amazing decorations.
Paper Garland Basics
Now let’s learn how to make a simple paper garland!
Cutting Out Shapes: Templates and Freehand
You can draw shapes yourself or use templates, which are like patterns, to help make perfect ghosts or pumpkins. If templates sound tough, don’t worry, doing it freehand is also fun!
Creating Paper Chains: Loops and Strips
Cut paper into strips and then make them into loops, sticking each one into another to make a chain. This is an easy way to make a garland that you can decorate even more!
Accentuating with Color and Texture
Add different colors or textures to your shapes to make them stand out. You can use crayons, markers, or even different types of paper that feel bumpy or smooth.
Assembling Layers for a 3D Effect
You can stick layers of paper on top of each other to make your decorations look 3D, like a pumpkin that looks round. It’s like making a paper sticker pile!
Securing Pieces Together
Make sure you stick everything together really well with glue or tape. You don’t want your spooky friends falling down during your Halloween fun!
Fabric Garland Variations
Fabric garlands are a bit different from paper ones, so here are some ways to play with fabric.
Choosing Halloween-Themed Fabrics
First, pick out some Halloween-themed fabrics. Look for ones with pumpkins, ghosts, or just cool colors like orange and black.
Cutting Fabric Strips: Sizes and Patterns
Cut the fabric into strips. They can be thick or thin, straight or zigzag. They don’t all have to be the same, and mixing them up can look really nice.
Knotting Techniques for a Rustic Look
Tie the fabric strips in knots on a string to make them look rustic, like they belong in a cozy, spooky cabin in the woods.
Adding Extras: Burlap and Lace
You can add other cool stuff to your fabric garland, like rough burlap for an old-timey look or pretty lace for a fancy touch.
Maintenance and Storage Tips
When you’re taking down your garland after Halloween, fold it nicely and put it somewhere safe so you can hang it up again next year without it being all wrinkly and messy.
This image is property of pixabay.com.
Lighting Up Your Garland
Lights make everything more magical! Here’s how to light up your garland.
Incorporating String Lights
Wrap a string of small lights around your garland. This works really well with paper or fabric and looks like tiny stars shining in between your decorations!
Selecting Safe and Suitable Lights
Pick lights that are safe. LED lights are cool because they don’t get hot, so they won’t start a fire or hurt your fingers.
Battery-Powered Versus Plug-In Options
Decide if you want battery-powered lights, which don’t need to be near a plug, or plug-in ones, which can glow as long as you want without needing new batteries.
Weaving Lights Into Your Garland
Carefully weave the lights in and out of your garland. You want them to show, but you also don’t want the wires to be the main thing people see.
Troubleshooting Common Lighting Issues
Sometimes, lights don’t work the way they should. Check if the batteries need changing or if a bulb has gone out. Be careful and ask an adult if you need help!
Eco-Friendly and Upcycled Garlands
It’s important to take care of our planet, so here are some tips for making a garland that’s good for the Earth.
Using Recycled Materials
You can use things like old newspapers or magazines to make your garland. This helps recycle, which is great for the Earth!
Repurposing Old Decorations
If you have old Halloween decorations, you can turn them into parts of your new garland. It’s like giving them a second chance to be awesome!
Natural Elements: Sticks, Stones, and Pinecones
You can even use things from outside like sticks, stones, or pinecones. Just make sure they’re clean before you bring them inside.
Biodegradable Alternatives to Traditional Supplies
Instead of plastic, look for things that can break down in the ground over time, like paper or natural string.
Crafting with a Sustainable Mindset
Think about how you can make cool stuff while still caring for the planet. Use less plastic and try not to waste materials.
This image is property of pixabay.com.
Creating Character-Specific Garland Pieces
Let’s make some garland decorations that look like different Halloween characters.
Designing Your Own Monsters
Draw and cut out your own monsters. Give them funny eyes or silly teeth. It’s your chance to make a monster friend!
Witches and Wizards: Hats and Cauldrons
Cut out shapes that remind you of witches and wizards, like pointy hats or bubbling cauldrons. You can even draw stars or moons on them.
Zombies and Mummies: Bandages and Braaains
To make zombie or mummy decorations, use strips of white paper or fabric to look like bandages. If you want to be a bit gross (in a fun way), you can add pink and red paper to look like brains.
Vampires and Werewolves: Fangs and Fur
For vampires, you can cut out sharp fangs from white paper. For werewolves, use brown or gray fabric that’s soft like fur.
Stitching and Stuffing 3D Elements
If you want to make your shapes puffy, like a round pumpkin, you can stitch around the edges and stuff it with a little bit of cotton or fabric scraps.
Interactive Garland Ideas
Garlands can be more than just pretty to look at. They can be fun to play with too!
Adding Hidden Surprises
Put little surprises or candies in your garland that people can find and take out. It’s like a mini treasure hunt!
Making Moveable Parts
Use thread or brads (those little metal things that let paper spin around) to make parts of your garland move. Maybe a bat can flap its wings!
Crafting Garland That Doubles as a Game
Create a garland that’s also a game. You can play by trying to guess the names of the different monsters or finding the matching pairs of decorations.
Educational Themed Garlands for Kids
If you’re making a garland for little kids, you can include shapes or colors they’re learning about. It’s fun and helps them learn at the same time.
Ensuring the Safety of Interactive Components
Make sure any parts that move or can be pulled off are safe for everyone, especially little kids who might put things in their mouths.
Garland Installation and Placement
Once your garland is ready, decide where to hang it up to make your space extra spooky.
Assessing Your Space: Indoors Versus Outdoors
Look around your home. Where would a garland look best? Can it hang across a window? Should it stay inside, or could it hang on the porch?
Best Practices for Hanging and Securing Garland
Make sure your garland is safe and won’t fall down. You might need tape, thumbtacks, or even hooks, depending on where you’re hanging it.
Using Garland to Frame Doorways and Windows
Garlands look great around doorways or windows. They act like a frame, making anything inside or outside look special.
Creating a Focal Point in Party Areas
If you’re having a Halloween party, choose a spot where you want everyone to look, like over a food table. Hang your garland there to make it the center of attention.
Dealing with Environmental Factors: Wind and Rain
If you’re hanging your garland outside, make sure it won’t blow away or get ruined by rain. Use stronger materials and check the weather forecast.
Lessons Learned and Next Year’s Plans
After Halloween, think about how making your garland went and what you can do next year to make it even better.
Reflecting on the Crafting Experience
Think about what was fun and what was tricky. Maybe you learned a new way to cut paper that you liked or discovered that you need better scissors.
Notes on What Worked and What Didn’t
Write down what you want to remember for next year, like which glue was the strongest or what color looked the best at night.
Gathering Feedback from Guests and Trick-or-Treaters
Ask people who see your garland what they think. Did they like the lights? Did the paper ghosts make them smile? Their ideas can help you make an even cooler garland next time.
Planning for Future Halloween Crafting
Start thinking about what you want to make for next Halloween. Maybe you’ll go bigger or try a new theme. Dream up all the fun things you can create!
Sharing Your Creations on Social Media
If you took pictures of your garland, you can show them to more people by putting them on places like Facebook or Instagram. It’s a great way to share your hard work and creativity with friends and family, and who knows, you might inspire someone else to make their own!
DIY Halloween Garland Decorations Read More »


