Holiday Crafts

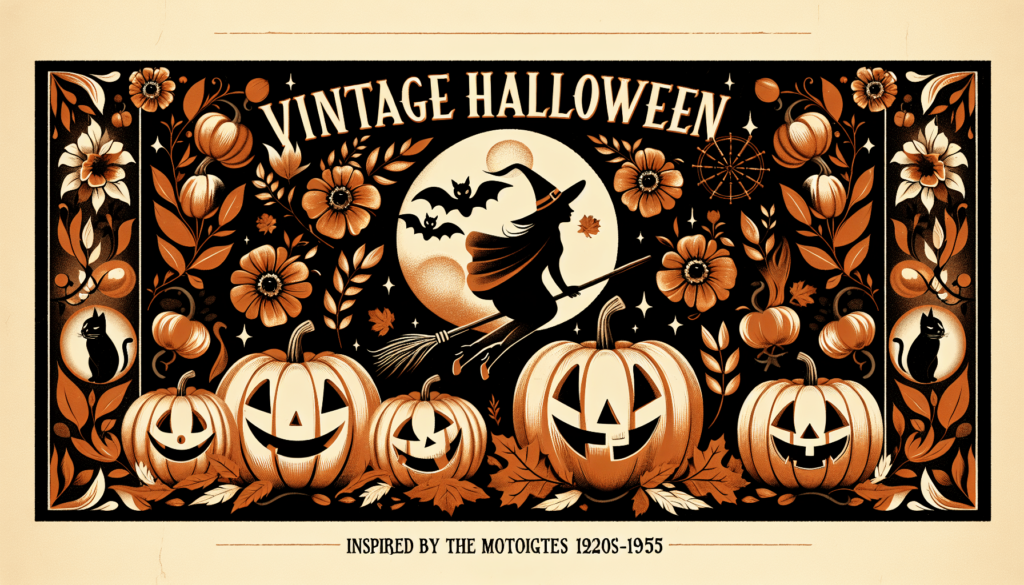
Vintage Halloween Craft Ideas

Get ready to make your Halloween super special and a bit old-timey with some cool vintage Halloween craft ideas! Imagine creating your own spooky decorations and fun crafts that look like they came right out of a storybook from a long time ago. You’ll learn how to make pumpkins that seem like they’ve been carved by wizards and ghosts that could have danced in an enchanted forest. So, grab your scissors, glue, and a sprinkle of imagination because we’re about to have a lot of fun turning your home into a vintage Halloween wonderland!
Vintage Halloween Craft Ideas

This image is property of images.pexels.com.

See the Vintage Halloween Craft Ideas in detail.

Vintage Paper Mâché Pumpkins

Materials needed: old newspapers, glue, balloons, paint

For making your very own vintage paper mâché pumpkins, you’ll need some old newspapers you don’t mind tearing up, glue to hold it all together, a few balloons to shape your pumpkins, and paint to give them that classic Halloween look.

Step-by-step crafting process

First, you’ll need to tear your newspapers into strips. Then, blow up a balloon to the size you want your pumpkin to be. Dip the newspaper strips into glue and place them over the balloon. Keep adding strips, crisscrossing them until the balloon is fully covered. Let it dry completely, then paint it orange with green for the stem. Now, you’ve got a paper mâché pumpkin!

Inspiration from vintage designs

To make your pumpkin look vintage, look at old Halloween decorations for inspiration. They often have softer, less bright colors and more whimsical shapes. Try to mimic these features in your painting and decorating.

Tips for achieving an aged look

To give your pumpkin an aged look, use a mix of orange and brown paint for a muted color. You can also lightly sand the painted surface once it’s dry to make it look worn.

Classic Halloween Garland

Materials: cardstock, vintage Halloween images, string or ribbon

You’ll need cardstock (a thick paper), some printed vintage Halloween images, and either string or ribbon to make a garland. You can find these images online or in old books!

Instructions for cutting and assembling

First, cut your cardstock into the shapes you want, like pumpkins or ghosts. Then, glue your vintage images onto these shapes. Make small holes in the top, and thread your string or ribbon through them to make a garland.

Ideas for incorporating vintage elements

To add that vintage touch, look for images with classic Halloween characters like black cats or witches. The older-looking, the better! You could even use tea to stain your cardstock for an aged effect.

Hanging and display suggestions

You can hang your garland across a mantel, doorway, or even around a Halloween-themed table. If you’re feeling extra crafty, add some old lace or ribbons between each piece for a more detailed look.

Learn more about the Vintage Halloween Craft Ideas here.

Victorian-inspired Ghost Decorations

Materials: cheesecloth, starch, wire, and antique doll faces

You will need some cheesecloth (that thin, gauzy fabric), liquid starch to make it stiff, some wire to create shapes, and antique doll faces for a truly vintage feel. You might find those at thrift stores or online.

Creating the ghost shapes and form

Bend your wire into a ghostly shape, like a head and arms. Dip your cheesecloth in the starch, then drape it over the wire form. Once it dries, it will hold the shape.

Adding vintage touches

Attaching an antique doll face to the head of your ghost will give it a spooky Victorian vibe. You could also dye the cheesecloth with tea before starching it for an old-fashioned look.

Setting up a spooky yet classy display

These ghosts look great in groups. Hang them from the ceiling or place them around your house where guests might not expect to find them for a little Halloween surprise.

Witch Hat Centerpieces

Materials: cardboard, fabric, and embellishments

To make a witch hat centerpiece, gather some cardboard for the structure, fabric to cover it, and any embellishments like vintage lace or ribbons you want to add.

Steps to construct and decorate the hats

Cut your cardboard into a cone and a circle for the brim. Glue these pieces together to form a hat shape, then cover with your fabric. Decorate with your embellishments to give it personality.

Incorporating vintage lace and ribbons

Using vintage lace and ribbons can add a classy, old-timey feel to your witch hats. Drape the lace around the brim or make a bow with the ribbon to decorate.

Styling tips for a Halloween table

Place your witch hat in the center of your Halloween table, perhaps on top of an old book or surrounded by vintage candle holders. It could be a spooky yet stylish centerpiece.
Vintage Halloween Craft Ideas

This image is property of images.pexels.com.

Antique Potion Bottles

Finding and selecting bottles

Look for old bottles at thrift stores or use recycled ones from home. The more unusual the shape, the better. Make sure they’re clean before starting your project.

Creating aged labels and seals

You can make labels look old by soaking them in tea or using brown ink around the edges. Writing mysterious potion names on them will add to the effect. Seal the bottles with wax if you have it, for an authentic look.

Filling ideas for a realistic look

Fill your bottles with colored water or harmless kitchen ingredients to mimic potions. Things like food coloring in water, olive oil, or dry herbs can look interesting and mysterious.

Decorating and display options

Arrange your potion bottles on a shelf or table amongst other vintage Halloween decorations. Adding old books, spider webs, or dried flowers can create a fascinating display.

Retro Halloween Candles

Materials: paraffin wax, vintage molds, wicks, and dyes

To make your candles, you’ll need paraffin wax, vintage-shaped molds (like pumpkins or skulls), wicks to burn, and dyes to color your candles.

Candle making basics

Melt your wax carefully following safety instructions, add your dye, and pour it into the molds with the wick in the center. Let them cool and harden, then remove from the molds.

Adding a vintage flair with molds and colors

Using molds that replicate vintage designs and choosing muted or classic Halloween colors like orange, black, and purple can give your candles a retro feel.

Safety tips and burning instructions

Always be careful when making and burning candles. Never leave them unattended and make sure they’re on a stable, heat-resistant surface away from anything flammable.
Vintage Halloween Craft Ideas

This image is property of images.pexels.com.

Gothic Halloween Wreaths

Material selection: grapevine wreaths, black foliage, and vintage decorations

Start with a grapevine wreath as your base. Look for black foliage or flowers and any spooky vintage decorations like small skulls or faux ravens.

Assembling your wreath

Attach your foliage and decorations to the wreath using wire or hot glue. Arrange them until you’re happy with the look, keeping it as spooky or as classy as you like.

Ideas for a vintage gothic look

Focus on dark colors and vintage elements. Adding an old brooch or lace can bring in that Victorian goth vibe. Think about using less typical Halloween items for a unique twist.

Maintenance and storage advice

To keep your wreath looking nice, dust it occasionally and store it carefully in a dry place where it won’t get squished. That way, you can use it for many Halloweens to come.

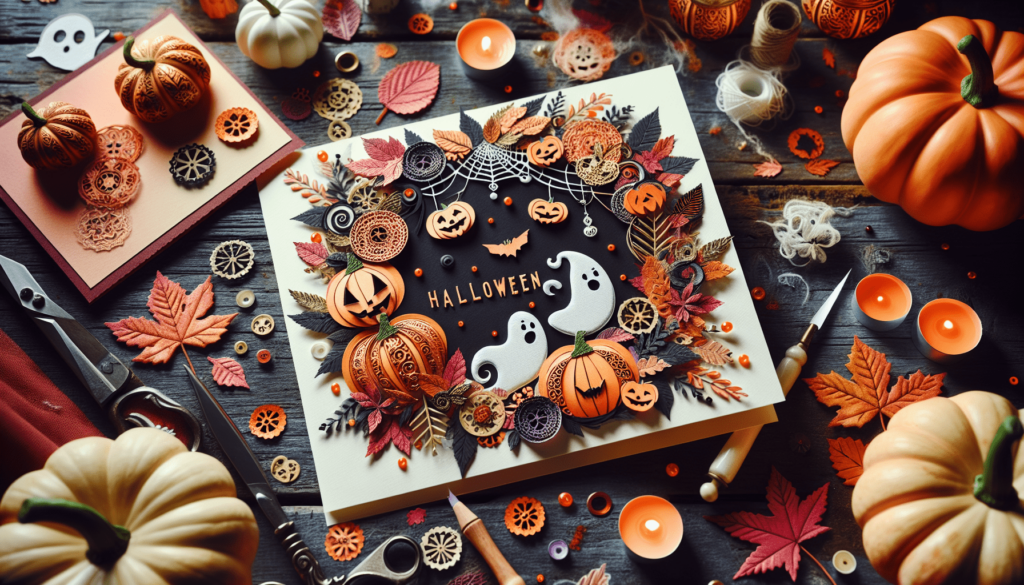
Old-fashioned Halloween Cards

Materials: cardstock, vintage images, and embellishments

Choose thick cardstock as your base. Print or find vintage Halloween images, and gather any embellishments like lace, ribbons, or old buttons.

Card design and construction tips

Fold your cardstock to the size you want, glue your image on the front, and then decorate around it with your embellishments. Remember, don’t overcrowd it; sometimes, simpler is better.

Writing fitting messages for Halloween

Inside your card, write a spooky message or a Halloween greeting. Using an old-fashioned font or handwriting can add to the charm.

Ideas for distressing and aging cards

To make your cards look old, use tea to stain them or a lighter to carefully burn the edges. This will give them an authentic vintage Halloween feel.
Vintage Halloween Craft Ideas

Spooky Vintage Photo Transfers

Choosing the right photos and materials

Look for old family photos or find vintage Halloween images online. You’ll need transfer paper that works with the type of printer you have.

Transfer process step-by-step

Print your image onto the transfer paper, then carefully press it onto the material you’re transferring it to, like fabric or wood. Follow the instructions on the transfer paper package closely.

Incorporating these into decorations

Once transferred, you can frame these images, use them to decorate pillows, or even include them in your garland. They add a personal and spooky touch to your Halloween décor.

Tips for a hauntingly realistic look

Choose images that already have a vintage or eerie feel for the best effect. Playing with the contrast or adding a sepia tone before printing can enhance the old-timey vibe.

Halloween Tin Can Luminaries

Materials needed: tin cans, paint, candles or lights

Clean empty tin cans, some paint (black works well for Halloween), and either candles or small LED lights. You’ll also need a hammer and nail to make holes.

Instructions for creating and spacing holes

Fill the cans with water and freeze them; this makes it easier to hammer in the holes without denting the can. Once frozen, use a nail and hammer to make holes in a design or pattern.

Vintage designs and painting techniques

For a vintage feel, paint your cans in muted Halloween colors, and when painting your designs or patterns, think about old-style Halloween motifs like bats, moons, or silhouettes of witches.

Safety tips and display ideas

Be careful when hammering the holes and handling the candles. When displaying, you can place your luminaries along a path, on steps, or as part of a table centerpiece. They’ll cast a spooky glow perfect for Halloween night.

Get your own Vintage Halloween Craft Ideas today.

Vintage Halloween Craft Ideas Read More »

Halloween DIY Crafts for School Parties

Imagine it’s Halloween, and you’re at school, excited to celebrate with your friends. There’s a special way to make this day even more fun – by creating your very own Halloween decorations and crafts! This article is all about easy and fun crafts that you can make yourself for your school’s Halloween party. You’ll find lots of cool ideas that will turn the celebration into a spooky and exciting adventure. Let’s start crafting and make this Halloween unforgettable!

Halloween DIY Crafts for School Parties

This image is property of images.unsplash.com.

Check out the Halloween DIY Crafts for School Parties here.

Spooky Paper Garland

Materials needed

To make a spooky paper garland, you’ll need colored paper (like black, white, and orange), scissors, a pencil, string or yarn, and some tape or a stapler. These are easy things you can find at home or at any store.

Step-by-step instructions

  1. First, decide what shapes you want, like ghosts or pumpkins.
  2. Draw the shapes on the paper with your pencil. If drawing isn’t easy, you can find shapes in books or online and trace them.
  3. Carefully cut out the shapes with your scissors.
  4. Make little holes in your shapes and thread the string through, or simply tape them to the string.
  5. Hang your garland around the room with tape.

Variety of designs (ghosts, bats, pumpkins)

There are so many fun shapes you can make! Ghosts, bats, and pumpkins are perfect for Halloween. You can make them look happy, scary, or silly. Remember, no two ghosts or bats look alike, so have fun with it!

Decorating ideas for the classroom

Hang your garlands across the ceiling, around the whiteboard, or even in the windows. You can also make a garland-making station where everyone makes one shape to add. This way, your classroom will be filled with spooky decorations that everyone helped make!

Halloween Themed Mason Jars

Materials needed

For this craft, you’ll need mason jars (empty and clean), paint (orange, white, or green are fun colors for Halloween), paintbrushes, and decorations like stickers or markers.

Painting and decorating the jars

  1. Choose a color to paint your jar. Think about what it will be – a pumpkin needs orange, a ghost needs white.
  2. Paint the jar carefully. You might need a few coats!
  3. After the paint dries, decorate your jar. You can draw faces or stick on spooky stickers.

Ideas for jar uses (candy holders, pencil holders)

Your spooky jar can hold pencils on your desk, saving them from disappearing like ghosts! Or, fill it with candy for a sweet treat everyone in class can enjoy. Just make sure to ask your teacher where to put it.

Safety tips for using glass in the classroom

Glass jars can break and be dangerous. Always carry them carefully, and if you see a broken piece, don’t touch it! Tell an adult so they can clean it up safely.

Check out the Halloween DIY Crafts for School Parties here.

Monster Pencil Toppers

Materials needed

To make monster pencil toppers, you’ll need pencils, colored paper or foam, glue, scissors, and some markers for decorating.

Creating different monster designs

You can make all kinds of monsters! Some might have two eyes, while others have three or even just one. Use different colors to make them unique. Maybe add sharp teeth, wiggly arms, or whatever you think a monster might have.

Assembly instructions

  1. Cut out the monster shapes from your colored paper or foam.
  2. Decorate them with markers to add faces, scars, or spots.
  3. Glue the monsters to the top of your pencils. Make sure they are secure!

Ideas for incorporating them into Halloween stories or games

These monster toppers can be characters in a Halloween story you write. Or use them for a guessing game where you describe a monster, and your friends have to pick which pencil topper matches your story.

Witch Hat Making

Materials needed

You’ll need black paper, ribbon, tape or glue, and any decorations like stars or moons.

Step-by-step crafting guide

  1. Cut a large circle for the brim and a cone shape for the top.
  2. Attach the cone to the circle with tape or glue – this is your basic hat!
  3. Decorate your hat with ribbon around where the cone and brim meet, and add any other decorations you like.

Customization ideas (colors, accessories)

Not all witch hats must be black! Use purple, green, or any color you love. Stick on paper stars or moons, or maybe add a paper buckle.

How to organize a witch hat parade

Once everyone has made their hats, line up and take a walk around the classroom or play area, showing off your wonderful creations. You could even have awards for the silliest, spookiest, and most creative hats!

Halloween DIY Crafts for School Parties

This image is property of images.unsplash.com.

Pumpkin Decorating Station

Materials needed for no-carve pumpkins

Gather small pumpkins, markers, stickers, paints, and any other decorations that can stick to a pumpkin, like sequins or googly eyes.

Different decorating techniques (stickers, markers, paint)

You can make a pumpkin look like anything! Use markers to draw faces, or paint them in different colors. Stickers can make patterns, and sequins can add sparkle.

Safety tips

When decorating, make sure you’re in a space where it’s okay to get a little messy. Wear old clothes or a smock. If you’re using glue or paints, ask an adult for the non-toxic kind.

Setting up a classroom pumpkin decorating contest

Once everyone’s done decorating, you can have a contest! Categories can include the scariest pumpkin, the funniest face, or the most colorful. Make sure everyone gets a vote.

Ghostly Lanterns

Materials needed

For these, you’ll need white paper or fabric, balloons, glue, and black markers. You might also want string lights or small flashlights to make them glow.

Instructions for creating ghost shapes

  1. Inflate the balloons a bit.
  2. Cover them with the white paper or fabric and glue it down, leaving a hole at the bottom to remove the balloon and add lights later.
  3. Once dry, pop the balloon and pull it out, leaving a ghost shape.
  4. Draw spooky faces on your ghosts with markers.

Lighting options

You can put string lights inside to make your ghosts glow. Another option is to use a small flashlight or battery-operated tea light. Always ask an adult to help with this part.

Ideas for using the lanterns to decorate the classroom

Hang your ghostly lanterns around the room where everyone can see them. They might look great in a dark corner or near the window to greet visitors. Make sure the lights you use are safe and won’t get hot.

Halloween DIY Crafts for School Parties

This image is property of images.unsplash.com.

DIY Halloween Masks

Materials needed

You’ll need card stock or paper plates, elastic string, markers, paints, and any other decorations like feathers or sequins.

Design ideas (animals, monsters, superheroes)

Think about what you want to be. A fierce lion? A scary monster? Or your favorite superhero? You can make any mask you imagine with just a bit of creativity.

Instructions for making the masks

  1. Cut your card stock or paper plate into the shape of your mask.
  2. Cut out eye holes.
  3. Decorate your mask with paints, markers, and decorations.
  4. Punch holes on the sides and tie the elastic string so you can wear it.

Incorporating mask-making into a Halloween costume contest

After everyone has made their masks, you can have a costume contest. See who makes the scariest, most beautiful, or funniest mask. Remember, it’s all about having fun and being creative, so every mask is a winner!

Creepy Crawly Spider Webs

Materials needed

For spider webs, all you need is white yarn or string, scissors, and tape. If you want to add spiders, you can make those with black paper.

Instructions for making spider webs

  1. Cut your yarn into long pieces.
  2. Tape one end to a surface and start creating a web design by crossing and tying the yarn. Use tape to secure the crossings.
  3. When you’re happy with your web, carefully remove it from the surface and tape it where you want to display it.

Adding spiders for effect

Cut out spider shapes from black paper and glue or tape them to your web. You can make your spiders big or small, scary or silly.

Ideas for spider web placement and games

Hang your webs in doorways, windows, or walls. You can even create a game where you throw small, soft balls (pretend flies) to stick onto the web, seeing who can make the most stick.

Halloween DIY Crafts for School Parties

Haunted House Diorama

Materials needed

Gather a shoebox, paint, scissors, construction paper, glue, and any other decorations you’d like to add, like cotton for cobwebs or small toys for ghosts.

Step-by-step assembly

  1. Paint the inside of your shoebox to look like the inside of a haunted house.
  2. Cut out furniture, ghosts, or other spooky decorations from construction paper and glue them inside.
  3. Add any other decorations to make it look even spookier.

Ideas for customizing the diorama

Think about what makes a house haunted. Maybe add a hidden room, or make a ghost that moves when you shake the box. It’s your haunted house, so you can make it as scary or as fun as you want.

Incorporating storytelling into the diorama project

Create a scary story about your haunted house. Who lived there? Why is it haunted? Share your story with the class, using your diorama to help tell the tale.

Vampire Bookmark Crafting

Materials needed

You’ll need red and black paper, scissors, glue, and a marker to draw your vampire’s face.

Fold and cut instructions

  1. Cut a rectangle out of the black paper for the body.
  2. Fold a smaller piece of red paper in half, cut it into a heart shape for the cape, and glue it to the body.
  3. Cut out a smaller rectangle for the head and glue it on top.
  4. Use the marker to draw a scary or funny vampire face.

Customization tips (colors, faces)

Your vampire doesn’t have to be traditional. Use different colors of paper, or give your vampire a unique face. Maybe it’s a friendly vampire with a big smile!

Using the bookmarks in Halloween-themed books or as party favors

These bookmarks can be a fun addition to your Halloween reading. Use them to keep your place in a spooky story. They also make great party favors for a Halloween party, giving your friends a little monster to take home.

See the Halloween DIY Crafts for School Parties in detail.

Halloween DIY Crafts for School Parties Read More »
DIY Halloween Greeting Cards

Imagine you could make your very own Halloween cards to give to your friends and family. How fun would that be? You can create spooky or funny cards all by yourself using some simple things you might already have at home. In this article, you’ll learn how to make DIY Halloween Greeting Cards. From choosing the perfect spooky decorations to adding your own special message inside, every step will be exciting. Get ready to make this Halloween extra special with your handmade cards!

Discover more about the DIY Halloween Greeting Cards.

Choosing the Right Materials

When you want to make a Halloween card, picking the right stuff to use is like picking the best candy from a candy bowl. Let’s find out what makes your card super special!

Types of paper to use

You can choose from many different types of paper. Some are thin like leaves and others are thick like a book cover. Think about using colorful paper or even paper that looks old for a spooky touch!

Selecting eco-friendly options

It’s nice to take care of our planet, even when we’re making fun cards. You can find paper and decorations that are good for the Earth. Look for things that say they can be recycled or are made from recycled stuff.

Inks and coloring materials

Using lots of colors makes your card pop! You can use markers, crayons, or even paint. Some inks are made to be safe for the Earth, so look out for those too.

Decorative elements: Ribbons, stickers, and glitter

This is where your card gets really fun. You can stick on ribbons, stickers, and even sprinkle some glitter to make your card shine. Just remember, if you want to be friendly to the Earth, look for glitter that’s safe for the planet.

Basic Tools Required

To make your card, you need some tools. Don’t worry, they’re easy to use!

Scissors and cutting tools

Scissors help you cut paper into cool shapes. Always ask an adult for help if cutting gets tricky!

Glue and adhesive options

Glue sticks your decorations on your card. There are lots of types of glue, but a simple stick glue is great for starting.

Measuring tools for precision

Sometimes you want your decorations to be just right. Using a ruler helps you make straight lines and measure where to cut or glue.

Stamps and stencils for easy patterns

Stamps and stencils are super helpers. They let you make neat designs without having to draw them all by yourself.

DIY Halloween Greeting Cards

This image is property of images.pexels.com.

See the DIY Halloween Greeting Cards in detail.

Design Inspiration and Themes

When making your card, think about what makes Halloween fun for you. Here are some ideas to get your creativity bubbling like a witch’s cauldron!

Classic Halloween symbols: Pumpkins, ghosts, and witches

These are the stars of Halloween! Drawing a smiling pumpkin, a friendly ghost, or a silly witch can make anyone smile.

Horror movie themes

If you’re making a card for someone who loves a little scare, why not try a theme from a spooky movie? Just keep it light and fun.

Elegant Gothic designs

Sometimes, a bit of mystery is what you’re after. Dark colors and fancy patterns make your card look like it came from a haunted mansion.

Kid-friendly cute Halloween ideas

Halloween doesn’t have to be scary. Cute cats, happy bats, and smiling pumpkins are perfect for a kid-friendly card.

Card Layout and Structure

Now, let’s figure out how your card will look and open. It’s like planning a secret pathway in a haunted house!

Traditional fold vs. postcard style

You can make a card that opens up or one that’s just a single page. Both are great! It just depends on how much you want to decorate and write.

Creating pop-up elements

Imagine opening a card and a ghost pops up! You can make parts of your card stand up for a fun surprise.

Innovative shapes and cut-outs

Your card doesn’t have to be just square or rectangle. You can cut it into the shape of a bat, a cat, or even a witch’s hat!

Layering techniques for depth

Putting one piece of paper on top of another makes your card look deep, like looking into a forest. It’s a neat trick to make things pop out.

DIY Halloween Greeting Cards

This image is property of images.pexels.com.

Creating the Front Cover

The front of your card is what everyone sees first. Let’s make it super exciting!

Drawing and painting tutorials

You can find simple tutorials to draw anything Halloween-themed. Don’t worry if it’s not perfect. It’s the fun that counts!

Using printables and templates

If drawing isn’t your thing, you can find pictures online to print and stick on your card. There are lots of cool designs out there!

Collage techniques for a unique look

Cutting out pictures from magazines or using different papers to make a picture is called a collage. It’s a fun way to make a one-of-a-kind card.

Incorporating text and calligraphy

Writing “Happy Halloween” in a spooky or fancy way makes your card feel special. You can practice making cool letters that look like they came from a fairy tale.

Inside the Card

The inside of the card is where you put your Halloween message. Let’s make it heartwarming with a pinch of Halloween magic.

Crafting a heartfelt Halloween message

Think about what you love about Halloween and share it with the person you’re giving the card to. A simple “Hope your Halloween is fun and spooky!” is a sweet start.

Interactive elements: Pockets, windows, and pull-tabs

Imagine opening a window on the card to see a cute message or pulling a tab to make a witch fly across the card. These surprises make your card extra fun.

Embellishing with stickers and stamps

Adding a sticker or a stamp is like putting the cherry on top. It’s the finishing touch that makes your card complete.

Adding photo slots for personalized messages

You can make a little pocket to put a photo inside. It’s like giving a piece of a fun memory with your card.

DIY Halloween Greeting Cards

This image is property of images.pexels.com.

Envelopes and Packaging

Putting your card in an envelope is like wrapping a present. Let’s make it look as cool as your card!

DIY envelope tutorials

You can make your own envelope with paper. Decorate it to match your card for that extra wow factor.

Decorating envelopes to match card themes

Drawing spiders, bats, or using stickers can make your envelope stand out. It’s like the envelope is part of the Halloween fun too.

Sealing options: Wax seals and stickers

Sealing your envelope with a sticker or even a wax seal makes it feel like you’re getting a letter from a castle. It’s a cool old-timey touch.

Creating custom labels and tags

Making a label with the person’s name in spooky lettering adds a personal touch. It shows you care and adds to the Halloween spirit.

Eco-Friendly Alternatives

Halloween is fun, but let’s also think about our planet. Here are some ways to keep your card-making green.

Using recycled materials

Look for paper and decorations that have been used before or can be used again. It’s like giving old things a new life for Halloween.

Biodegradable decoration options

Some decorations can go back to the Earth without hurting it. These are great choices for keeping your card Earth-friendly.

Digital Halloween greeting cards

Sending a card through the computer doesn’t use paper at all. You can make it super creative with animations and colors!

Crafting with natural materials

Leaves, twigs, and even petals can make beautiful decorations. Plus, they remind us of the beauty of fall and Halloween.

DIY Halloween Greeting Cards

Tips for Mass Production

If you want to make cards for a lot of people, here are some tricks to make it easier.

Organizing a card-making station

Set up a little area with all your materials ready. It’s like having a mini-factory right in your home.

Batch processing steps for efficiency

Doing the same step on all cards before moving to the next step saves time. It’s like being on a Halloween card assembly line!

Storage and organization of finished cards

Keeping your cards safe and sorted makes sure they’re ready to go when Halloween comes. It’s like storing up treats for the big night.

Time-saving tricks and hacks

Finding little shortcuts, like using pre-made decorations or templates, can help a lot. It’s like having a magic wand for card-making!

Sharing and Displaying Cards

Once your cards are done, it’s time to share the Halloween joy!

Creative ways to display cards at home

You can hang them up like decorations or make a special spot to show all the cards you’ve made or received. It’s like turning your home into a mini-Halloween gallery.

Sharing on social media: Tips and etiquette

Taking a picture of your card and sharing it online is a great way to spread the Halloween spirit. Just make sure you’re okay with everyone seeing your creation.

Gifting guidelines: Hand-delivery vs. mailing

If you can, giving your card in person adds a personal touch. If they’re far away, mailing your card with a nice note is like sending a hug through the mail.

Repurposing cards as decorations

After Halloween, you can keep your cards as decorations for next year. It’s like having memories of Halloween fun to look forward to.

Making your own Halloween greeting cards is a fun project that lets you be creative and share the Halloween spirit with friends and family. Whether you’re drawing spooky ghosts or creating elegant gothic designs, your cards are sure to bring smiles and a touch of magic to everyone’s Halloween. Remember, it’s not just about the card itself but the care and thought you put into it. So grab your materials, and let’s start crafting some Halloween cheer!

See the DIY Halloween Greeting Cards in detail.

DIY Halloween Greeting Cards Read More »
Cute Halloween DIY Crafting for Kids

Imagine making your own Halloween decorations and crafts that are super cute and just for you! In this article, you’ll learn how to create fun Halloween projects that you can do by yourself or with friends and family. From spooky ghosts to adorable pumpkins, these crafts are perfect for adding a bit of Halloween spirit to your home. Let’s get your creative juices flowing and start crafting some amazing Halloween decorations!

See the Cute Halloween DIY Crafting for Kids in detail.

Spooky Paper Plate Ghosts

Getting ready for Halloween can be a lot of fun, especially when you make your very own decorations. Let’s start with something simple and super fun: Spooky Paper Plate Ghosts!

Materials needed: paper plates, white paint, black marker, yarn for hanging

You’ll need some paper plates, white paint, a black marker, and some yarn. That’s everything you need to make your ghost!

Step-by-step instructions

First, paint your paper plate all white and let it dry. Make sure you cover it well so it looks like a real ghost. After the paint dries, use the black marker to draw a spooky or funny face on your ghost. Lastly, poke a hole at the top, tie some yarn through it, and now you’ve got yourself a ghost ready to hang!

Decorating ideas

You can get really creative here. Try using colorful markers, stickers, or even glitter to make your ghost extra special. If you want to try something different, you can cut the bottom of the plate to make it look like your ghost has wavy edges!

Safety tips for young children

When you’re painting and cutting, always have an adult to help you. Make sure not to put small decorations like stickers in your mouth. Safety first!

Creepy Crawly Spider Rings

Do you like creepy crawlies? Let’s make some spider rings you can wear to scare your friends!

Materials needed: black pipe cleaners, small black pom poms, googly eyes, glue

For these scary spiders, grab some black pipe cleaners, small black pom poms, googly eyes, and some glue.

How to twist pipe cleaners into spider legs

Take four pipe cleaners and twist them together in the middle. This twist becomes the spider’s body where you will attach the pom pom. Bend each end to look like spooky spider legs.

Attaching the pom pom to create the body

Glue the small black pom pom onto the twisted middle part of your pipe cleaners. This pom pom is your spider’s body.

Adding googly eyes for the final touch

Glue two googly eyes on the pom pom to give your spider a silly or spooky look. Wait for the glue to dry, and your spider ring is ready to wear!

Cute Halloween DIY Crafting for Kids

Get your own Cute Halloween DIY Crafting for Kids today.

Haunted Pumpkin Mason Jars

Let’s make some Halloween lights with a pumpkin twist!

Materials needed: mason jars, orange and green paint, paintbrushes, LED tea lights

You’ll need mason jars, orange and green paint, paintbrushes, and some LED tea lights to make your jars glow.

Painting your jar to look like a pumpkin

Paint the outside of your mason jar orange. You might need a few coats to make it nice and bright. Let the paint dry completely.

Using green paint for the lid to mimic leaves

Now, paint the lid green to look like the pumpkin’s leaves. Once the paint dries, you can place the LED tea light inside the jar to make it shine like a pumpkin.

Safety advice for using LED lights inside the jars

Remember to use LED tea lights instead of real candles, especially if you are putting the lid on the jar. LED lights are much safer and won’t get hot.

Witches’ Hat Origami

How about making a witch’s hat out of paper? It’s magic time!

Materials needed: black paper, optional decorations (stickers, glitter)

All you need is some black paper and whatever decorations you like, such as stickers or glitter.

Basic folds for creating a witch’s hat

Fold your black paper into a triangle, then bend the top down to look like a hat. You can ask an adult to help with the folds.

Ideas for customizing your hat

Now it’s time to decorate! Add some stickers or glitter to make your witch’s hat sparkle. Be as creative as you want.

Incorporating these into a Halloween display

You can make a few hats and display them around the house. They can be decorations on the table or you can even hang them up!

Cute Halloween DIY Crafting for Kids

Monster Rock Painting

Creating scary monsters or fun creatures on rocks can be a great outdoor decoration.

Materials needed: smooth rocks, acrylic paint, brushes, sealant spray

You’ll need smooth rocks, acrylic paint in various colors, brushes, and sealant spray to protect your painted rocks.

Preparation of rocks for painting

First, clean your rocks with water and let them dry. This helps the paint stick better.

Design ideas for cute monster faces

Use your imagination to paint cute or scary monster faces. Bright colors and big eyes usually look great!

Sealing your painted rocks for outdoor decoration

After the paint dries, spray your rocks with sealant. This protects the paint from rain and sun, so you can decorate your garden with them.

Ghoulish Lantern Jars

These lanterns will add a spooky touch to any room or porch.

Materials needed: glass jars, tissue paper (various colors), glue, LED candles

You’ll need glass jars, colored tissue paper, glue, and LED candles to create your lanterns.

Instructions for layering tissue paper on jars

Cut the tissue paper into small pieces. Then glue them all over the jar in a patchy pattern. You can overlap colors for a cool effect.

Creating faces for your ghouls

Once the glue is dry, draw spooky faces on your jars with markers. You can make them as scary or as silly as you like.

Lighting your lanterns safely with LED candles

Place an LED candle inside your jar to light up your spooky creation. Remember, LED candles are much safer than real ones.

Bewitched Halloween Wands

Wave your magic wand and let the Halloween fun begin!

Materials needed: sticks or dowels, paint, ribbons, glitter

For these magical wands, you’ll need sticks or dowels, paint, ribbons, and glitter.

Painting and decorating your wand

Paint your stick any color you like. Once it’s dry, decorate it with glitter, stickers, or whatever you wish to make it magical.

Attaching ribbons for a magical effect

Glue some ribbons at the top of your wand. They’ll look amazing when you wave your wand around.

Themes and inspiration for your wands

Think about what kind of magic your wand has. Is it for casting spells, turning things into chocolate, or maybe making things float? Decorate it based on its magical powers!

Felt Vampire Bookmarks

Keep your place in your favorite Halloween story with a cute vampire bookmark.

Materials needed: felt in various colors, scissors, glue, googly eyes

You’ll need different colors of felt, scissors to cut out shapes, glue, and googly eyes for your vampire’s face.

Cutting felt into vampire shapes

Cut your felt into a basic vampire shape. Don’t forget his cape!

Assembling your bookmark

Glue the pieces together to form your vampire. Add the googly eyes and any other details like a mouth or fangs.

Customization options for your vampire characters

You can make your vampire bookmark unique by choosing different colors for its cape or adding accessories like a bow tie or a hat.

Eerie Eyeball Slime

Slime is fun, but have you ever made it spooky?

Materials needed: clear glue, borax, water, plastic eyeballs

To make this eerie slime, you need clear glue, borax, water, and some plastic eyeballs for the spooky effect.

Mixing your slime ingredients

Mix the clear glue with water. In another bowl, dissolve a small amount of borax in water. Slowly add the borax solution to the glue mixture until it becomes slime.

Incorporating eyeballs into your slime

Once your slime is ready, mix in the plastic eyeballs. Now, as you play with your slime, you’ll find eyeballs looking back at you!

Storage and safety tips

Keep your slime in an airtight container so it doesn’t dry out. Remember, never eat the slime or the eyeballs, and always wash your hands after playing with it.

Ghostly Garlands

Decorate your room with a string of spooky ghosts.

Materials needed: white fabric or paper, string or yarn, markers, scissors

You’ll need white fabric or paper, string or yarn to hang them on, markers to draw faces, and scissors to cut them out.

Cutting ghost shapes

Cut out ghost shapes from your fabric or paper. You can draw a ghost on paper first and use it as a template.

Decorating faces on your ghosts

Using a marker, draw spooky or funny faces on your ghosts. Make each one unique!

Stringing ghosts to create a garland

Make a small hole at the top of each ghost and thread your string or yarn through it. Now you can hang your ghostly garland anywhere you like for a spooky decoration.

Check out the Cute Halloween DIY Crafting for Kids here.

Cute Halloween DIY Crafting for Kids Read More »
Personalized Halloween DIY Gifts

Imagine making your own special Halloween gifts that have your touch on them – they’re called Personalized Halloween DIY Gifts! This isn’t just any regular spooky Halloween decor; it’s stuff that you make all by yourself, and you can put your name on it or anyone else’s name to make it extra special for them. You might use paint, glue, and even some sparkly bits to create wonderful crafts that can be for decorating your room or giving to your friends as a super cool Halloween present. Keep reading to learn how you can make these one-of-a-kind Halloween treasures that will make everyone smile!

Find your new Personalized Halloween DIY Gifts on this page.

The Magic of Personalization

Understanding the Importance of Personal Touch

Imagine finding something that is just for you, with your name on it or a picture that you really love. It feels special, right? That’s the magic of personalization! When you create something for someone else and make it just for them, it’s like giving a piece of your heart. It shows you took the time to think about what they like, and that can make them smile big.

Why Halloween Gifts Matter

You know how on Halloween, everyone dresses up and gets treats? Well, giving a Halloween gift is kind of like giving a very special treat that’s different from all the rest. It’s not just candy; it’s something that you’ve made thinking about what the other person likes. It makes Halloween even more fun and shows that you care about making it a special day for them.

Customization Vs. Personalization

Customization is when you change something to make it the way you like it. Like when you build a scarecrow and decide to put a purple hat on it instead of a black one. Personalization is when you make something with someone specific in mind. Like if you made a scarecrow and put your friend’s name on it to show it’s just for them. Both are great, but personalizing makes it feel extra special.

Planning Your DIY Halloween Gift Project

Choosing the Right Theme

Thinking about a theme is like picking your Halloween costume. You choose what you like best, right? For your gift, think about what the person you’re making it for really likes. Do they love witches or maybe silly ghosts? Pick a theme that you think will make them the happiest.

Gathering Materials and Tools

Now that you’ve picked a theme, it’s time to collect everything you need to make your gift. It’s like getting all the parts of your costume ready. You might need things like paper, scissors, glue, and maybe some glitter to make your project extra sparkly. Make a list, so you don’t forget anything!

Timing Your Crafting Perfectly

Making your gift takes time, just like carving a pumpkin. Start early so you’re not rushing at the last minute. Plan your time like it’s a treasure map. Say, “I’ll spend this much time each day crafting,” so your gift is ready for Halloween without needing to race against the clock.

Personalized Halloween DIY Gifts

Discover more about the Personalized Halloween DIY Gifts.

Personalized Halloween Baskets

Selecting the Right Basket

First, pick a basket that’s the right size for all the goodies you want to put inside. It’s like selecting the right pumpkin to carve. You want it not too big and not too small, but just right. Plus, it’s fun to choose a basket that matches your theme!

Themed Fillers and Goodies

Fill up the basket with treats that fit your theme. If you chose witches, you might add things like candy wands and little toy broomsticks. It’s like filling up your trick-or-treat bag with the best candy from the neighborhood.

Custom Tags and Messages

Make your gift super special with a tag that has a friendly message or the person’s name on it. It’s kind of like when you find a Halloween card in your trick-or-treat bag. Write something that will make them laugh, like a joke, or something sweet to show you care.

DIY Spooky Mason Jars

Craft Materials Needed

What do you need to make a spooky Mason jar? Think about things like paint, stickers, and maybe some ribbon. These jars are like little glass homes you can decorate for tiny Halloween creatures.

Step-by-Step Creation Process

Start by painting or decorating the outside of your Mason jar. It’s like painting a face on a pumpkin. Take your time and make it look great. Then, let it dry. You don’t want smudgy ghosts or smears on your spooky scene, do you?

Ideas for Filling Mason Jars

Once your jar looks fantastic, fill it with treats! You can add candy corn, little toys, or maybe some homemade slime. It’s like your jar is dressing up in its Halloween costume, and the treats are the exciting surprises inside.

Personalized Halloween DIY Gifts

Handmade Halloween Jewelry

Creating Spook-tacular Earrings

Earrings can be as fun as dangling spiders or as cute as tiny pumpkins. You make them by putting beads or charms on special hooks. It’s like making a mini mobile to wear on your ears, and they dance every time you move!

Designing Custom Bracelets

When you make a bracelet, you get to string together beads and charms that match your Halloween theme. It’s like making a friendship bracelet that whispers, “Happy Halloween!” every time your friend looks at it.

Assembling Unique Necklaces

Necklaces can have all kinds of fun things on them. You can put a spooky pendant like a ghost or a bat in the middle. It’s like hanging a Halloween decoration around your neck that says, “This is my costume, and it’s just for me!”

Customized Halloween Apparel

T-Shirts with Personal Messages

Imagine having a T-shirt that says something fun like “Boo-tiful” or “Fang-tastic,” and it’s in your favorite colors! You can make T-shirts with special messages or pictures using paint or special paper that you can iron on.

Creating Halloween-themed Face Masks

Face masks can be part of your Halloween look too. You can decorate them to match your costume or make them look like a vampire’s smile. It’s like playing dress-up for your face!

DIY Halloween Socks and Accessories

Your feet can celebrate Halloween too! Paint or sew fun designs onto socks, like cauldrons or black cats. It’s like each foot is going to its own little costume party.

Personalized Pumpkin Carvings

Selecting the Perfect Pumpkin

Finding the right pumpkin is a bit like finding the best spot to trick-or-treat. You look for one that’s smooth and the right size for your design. You want it to be just perfect so your carving will look amazing.

Transfer Techniques for Designs

Transferring your design onto a pumpkin is like drawing your own map to a haunted house. You can draw it freehand, or use a stencil to trace it onto the pumpkin. That way, you know exactly where to carve.

Preservation Tips for Pumpkin Art

You want your pumpkin to last as long as your Halloween candy stash, right? To keep it from getting yucky, you can use special sprays or Vaseline on the cut edges. It’s like putting on a coat so your pumpkin doesn’t catch a cold.

DIY Halloween Scented Candles

Choosing Seasonal Scents

Picking a scent for your candle is like picking your favorite Halloween candy. You can choose smells like pumpkin spice or apple cinnamon that remind everyone of Halloween and all the fun that comes with it.

Customizable Container Ideas

The container for your candle can be as unique as a costume. You can use jars, tins, or even hollowed-out pumpkins. It’s like your candle is playing dress-up too!

Adding Personal Touches with Decorations

Decorate your candle container with stickers, paint, or ribbons. It’s like putting the final touches on your Jack-o’-lantern. This way, when someone lights the candle, it’s not just the scent that makes them think of you but how it looks too.

Halloween Recipe Booklets

Compiling Favorite Spooky Recipes

Gather all the recipes for cookies, cupcakes, and treats that you love during Halloween. It’s like making a list of all the best treats you want to get when you go trick-or-treating.

Designing and Binding the Booklet

Put your recipes together in a little book. You can draw pictures or use stickers to make it fun to look at. It’s like creating a magic book of spells, but for yummy things!

Adding Personal Notes or Stories

Write little notes or stories next to the recipes. Maybe tell about the time you tried to make ghost cookies and they all looked like fluffy clouds instead. It makes the recipe book special because it’s filled with your own little stories.

Packaging and Presentation

Creative Wrapping Ideas

Wrap your gift like it’s a mummy, using strips of cloth or paper. Or make it look like a bat with black wrapping and little wings. It’s like giving your present its own Halloween costume.

Incorporating the Halloween Theme

Use Halloween colors like orange and black, or add stickers of ghosts and witches. It’s like decorating your house for Halloween, but you’re decorating the gift instead!

Adding the Final Personal Touches

Lastly, put on a card or a note that says something kind like, “Made just for you!” or “Happy Halloween!” It’s the last little sparkle on your gift, like the candle in a Jack-o’-lantern that makes it glow.

When you make personalized Halloween gifts, you’re doing something really special. You’re telling someone that you’ve thought about what makes them happy, and you’ve put effort into creating a one-of-a-kind gift that can only come from you. It’s like sharing a piece of your Halloween spirit with them. And that’s a kind of magic all on its own.

Learn more about the Personalized Halloween DIY Gifts here.

Personalized Halloween DIY Gifts Read More »
Creating Frightful 3D Scenes: DIY Halloween Shadow Boxes

Are you ready to spook up your space with frightful 3D Halloween scenes? This article is a treat for you that shares how to make spooky Halloween shadow boxes right at home. Imagine tiny, eerie 3D scenes, like a mini haunted house or a creepy graveyard, carefully placed inside a box. You can light them up in the night, casting shadows that give you chills. This fun craft project can really add an extra special touch to your Halloween decorations. Now, get your creative witch’s hat on and let’s bend our broomsticks towards the unhallowed secrets of creating these spooky scenery boxes.

Importance of Halloween Decorations

Halloween is a special spooky time of the year. Did you know that the decorations play a really important role during this time? Let’s look at how.

Excitement and atmosphere

Firstly, when you see pumpkins, witches, and ghosts hanging everywhere, it gets you really excited about Halloween. These decorations help set a spooky, fun atmosphere. Just like how twinkling lights tell us that Christmas is near, these Halloween decorations make us all geared up for trick or treating!

Unleashing creativity

Secondly, Halloween decorations are a fantastic way for you to show off your creativity. You can make your decorations, like shadow boxes or lanterns! There are no rules – you can use whatever colors, shapes or scary characters you like. It’s your chance to create something truly unique.

Celebration tradition and culture

Lastly, Halloween decorations are a part of tradition and culture. These decorations symbolize superstitions and tell tales of Halloween’s history. People all over the world have different ways of decorating, and it’s fascinating to learn about them.

What are Halloween Shadow Boxes

Now, let’s understand what Halloween shadow boxes are.

Definition of Halloween Shadow Box

A Halloween Shadow Box is a deep frame that is filled with artistic and spooky items which create a 3D (or three-dimensional) effect. When you look at the box, it feels like you are peeping into a mini-Halloween world!

Usage of Halloween Shadow Boxes

You can place these Halloween Shadow Boxes anywhere in your home to add to your Halloween decorations. You can even give them as gifts to your friends! They can be small and simple, or big and complex, depending on how you like it.

Benefits of homemade Halloween Shadow Boxes

Making your Halloween Shadow Boxes is a lot of fun! It’s not just an art project, but also an adventure. You get to decide what goes into your mini Halloween world, and see it come to life!

Creating Frightful 3D Scenes: DIY Halloween Shadow Boxes

This image is property of images.unsplash.com.

Materials Required

Let’s get started on how to make your Halloween Shadow Box.

Identifying suitable box

First, you need to find a box. This could be an old shoe box, a gift box, or you can even buy a new one. The best box is one which is not too shallow, and not too deep.

Required paints and brushes

Next, you need paints to color your box. Halloween colors like black, orange, and purple might be fun. Don’t forget the brushes, too!

Sourcing ghoulish decorations

Then comes the best part – finding the spooky decorations. These could be things like fake spiders, small witches or paper bats. You can buy them, find them around your house or even make them.

Additional craft supplies needed

You’ll also need craft things like glue, scissors, and tape to stick your decorations into the box. Some crafts might need extra things like paper, wire, or string.

Choosing a Theme

Before you start decorating, it’s a good idea to decide on a theme for your Halloween Shadow Box.

Popular Halloween themes

Some popular themes are haunted houses, witch’s lair, or zombie graveyard. You can take inspiration from your favorite scary movie or book too!

Factors to consider when selecting a theme

While selecting a theme, think about the size of your box, what materials you have and who will see your box. It’s best to choose a theme you will enjoy creating.

Incorporating personal touches in your theme

Remember, your box should reflect YOU. Add your favorite Halloween elements and colors, and make it unique.

Creating Frightful 3D Scenes: DIY Halloween Shadow Boxes

This image is property of images.unsplash.com.

Painting and Preparing the Box

Once you have decided on a theme, it’s time to prepare your box.

Choosing the right paint

Pick paints that match your theme and Halloween spirit. Black can be a great base color, but touches of sparkly purple or ghostly white can add character too.

Procedure for painting the box

Start by painting the inside of your box. You can paint it all one color, or get creative with different sections. Just make sure you cover all the corners and sides.

Importance of drying time

After painting, wait! Let the paint dry completely before adding decorations. This will make sure that everything sticks properly.

Creating the 3D Effect

Let’s move on to Creating that enchanting 3D effect in your box.

Layering items for depth

The secret to a 3D effect is layering. Place some items at the back of the box, some in the middle, and some in the front.

Using considerations of scale and perspective

To make things look real, remember that items which are farther away should look smaller. So, place smaller items at the back, and bigger ones at the front.

Effective utilization of lighting

Adding lights to your box can make it look even more spooky and real. Battery-operated fairy lights could work well.

Creating Frightful 3D Scenes: DIY Halloween Shadow Boxes

This image is property of images.unsplash.com.

Addition of Halloween Elements

It’s time to fill your box with the Halloween decorations.

Placement of ghoulish decorations

Start with the biggest items, and then add the smaller ones. Try not to clutter your box – each item should be clearly visible.

Creating a nightmare scene

Based on your theme, arrange your items to tell a story. A witch cooking a potion, or zombies rising from graves could be some ideas.

Incorporating lights for a spooky effect

Remember the lights we talked about? Now is the time to add them. They can shine behind a ghost, or light up a witch’s lair.

Finishing Touches

Almost done! Your box just needs some final touches.

Adding background details

You can add details like stars in the sky, or trees in the background. These details help your box look more complete.

Securing elements properly

Make sure everything in your box is stuck properly and won’t move. You don’t want your witch to fall over!

Cleaning and presentation

Give your box a final clean and make sure it looks as fantastic as you imagined.

Safety Precactions

While having fun, it’s important to be safe too.

Using craft materials safely

remember to use your scissors, glue, and paint safely. Keep your work area clean and tidy.

Handling of electric components

If you are using lights, be careful. Ask an adult for help.

Storage and maintenance of the shadow box

When Halloween is over, you can store your box carefully to use next year. Keep it cool and dry.

The Halloween Junkie Take

Great job in creating your very own Halloween Shadow Box! This homemade Halloween decoration not only adds character to your home, it also reflects your creativity and talent. Who knew a spooky box could bring so much fun, right?

During this magical time of year, we hope you’ve discovered a new love for Halloween crafts. After all, a child with a paintbrush can conjure up the most ghoulish of ghouls and the most delightful of frights.

So, go on and paint your Halloween any color you like. So long as it brings you joy, as you’ve just learned, there’s no decoration quite like the one you paint yourself! Happy Halloween!

Creating Frightful 3D Scenes: DIY Halloween Shadow Boxes Read More »
Ghostly Glory: Spectral Ornaments DIY for your Halloween Tree

You are about to step into the magical world of Ghostly Glory! This spellbinding guide will help you create your very own Spectral Ornaments. It’s a fun do-it-yourself project for your Halloween Tree. You’ll use simple tools and materials, transforming them into eerie ghostly figures that will captivate everyone’s attention. So, gather your craft supplies, put on your creative hat, and let’s get started on filling your Halloween tree with ghostly glory!

Understand the Halloween Tree Concept

Just like we decorate trees for Christmas, we can also make trees for Halloween! These trees are filled with ornaments that match the Halloween theme. Instead of angels and stars, we use bats, pumpkins, and ghosts. Now, let’s explore more about Halloween trees.

Halloween Tree Basics

Think of a Halloween tree as the spooky cousin of your Christmas tree. It’s a lot of fun! It can be as tall or as short as you like, and you can decorate it with fun and scary decorations. The more festive, the better.

Decorating Ideas for a Halloween Tree

How you choose to decorate your Halloween tree is entirely up to you! You can use traditional Halloween colors like black, orange, and purple. You can also use ornaments shaped like bats, ghosts, pumpkins, and witches. Even better, you can show off your creativity and make these ornaments by yourself.

Why Adorn a Halloween Tree with Spectral Ornaments

Spectral ornaments are ghostly decorations that you can hang on your Halloween tree. They are perfect for this occasion because they make your tree look extra spooky and fun.

Assembling Basic Materials

Now that you understand the concept of a Halloween tree, it’s time to gather all the materials you need to make your spectral ornaments.

Choosing the Right Equipment

Some of the basic tools that you would need include scissors, glue, craft paper, ribbons, and paint. Having these materials ready will make your crafting process smooth and enjoyable.

Locating Your Material Spots

You probably have many of the materials you need right at home. Check your drawers and cupboards for leftover holiday decorations, craft supplies, and even old clothes that can be repurposed.

Budget-Friendly DIY Options

Creating your Halloween tree and ornaments doesn’t have to be expensive. You can use recyclable materials like cardboard, old clothes, and natural materials like twigs and leaves to make your ornaments.

Ghostly Glory: Spectral Ornaments DIY for your Halloween Tree

This image is property of pixabay.com.

Creating Spectral Ghost Figure Ornaments

There’s nothing spookier than ghosts hanging from your Halloween tree. Now, let’s learn how to create them.

Material Requirements

To create ghost figure ornaments, you will need white fabric, black markers, and strings.

Step-by-step guide to create a ghost figure

Cut the fabric into a small square. With your black marker, draw two eyes and a mouth on the fabric. Attach a string to the top of your ghost, and voila, your ghost is ready to haunt your tree!

Different Ways to Decorate Your Ghost Figure Ornaments

For an extra creepy effect, you can use glow-in-the-dark paint in your ghost. Or, you can add glitter or sparkly ribbons to make your ghost shine in the party light.

Making Spooky Bat Ornaments

Bats are synonymous with Halloween. Therefore, let’s learn how to create bat ornaments.

Material Necessities

To create bat ornaments, you will need black craft paper, glue, and eyes made from white paper or googly eyes.

The Making Process Delineated

To create a bat, fold the black paper in half and cut out a bat shape. Glue the eyes onto the bat, and your bat ornament is ready to fly in your Halloween tree.

Decoration Variants of Bat Ornaments

You can add some glitter or use shiny black paper to make your bat stand out. Also, use different sizes to create a more dynamic look on your Halloween tree.

Ghostly Glory: Spectral Ornaments DIY for your Halloween Tree

This image is property of pixabay.com.

Crafting Spine-Chilling Pumpkin Ornaments

Pumpkins are the poster child of Halloween. It wouldn’t be a Halloween tree without some pumpkin ornaments.

Pumpkin Ornament Material Checklist

You will need orange and green paper, a black marker, and some string to hang your pumpkins.

How to Create a DIY Homemade Pumpkin Ornament

Cut out a pumpkin shape from the orange paper and draw on the face with a black marker. Attach a small piece of green paper on the top as a stem, and your pumpkin ornament is ready!

Thoughts on Decorating your Pumpkin Ornaments

Consider adding some sparkly glitter on your pumpkins or use different shades of orange to create depth on your Halloween tree.

Designing an Eerie Witch Hat

What’s Halloween without witches? Let’s make some hats to add a hint of witchery to our Halloween tree.

What You’ll Need

For witch hats, you’ll require black paper, glue, and some ribbon.

Crafting Process for Witch Hat

Cut out a cone shape and a circle from the black paper. Glue them together, and add some ribbon for extra flare to create witch hats.

Decoration Options for Your DIY Witch Hat

You can paint some silver stars on your hats or use some shiny black paper for a magical effect.

Ghostly Glory: Spectral Ornaments DIY for your Halloween Tree

This image is property of pixabay.com.

Procedure to Create a Skull Ornament

Skulls are another staple of Halloween decorations. They’ll add a ghoulish touch to your Halloween tree.

Materials for Creating a Skull Ornament

To make skull ornaments, you’ll need white paper, a black marker, and string for hanging.

Steps to Make a Skull Ornament

Just draw a skull shape on the white paper and cut it out. Draw on the details like eyes, nose, and mouth with a black marker, and your skull is ready to decorate your tree!

Decoration Tips for the Skull Ornament

Make sure to create different sizes and angles of skulls. This will help your tree look more visually interesting.

Strategies for Fantasy Ornament Creation

Making fantastical ornaments is all about using your creativity and imagination. Let’s create some unique decorations for your Halloween tree.

Materials and Tools for Fantasy Ornaments

You can use a variety of materials such as sequins, beads, and ribbons.

Crafting Your Unique Fantasy Ornament

Think outside the box. You can create ornaments shaped like spider webs, monsters, or even Halloween cauldrons.

Ideas for Decorating Your Fantasy Ornament

Try using glow-in-the-dark paints for some of your ornaments. When the lights are turned down, your tree will glow with a supernatural spirit.

Personally Handmade Ornament Placement

After all your hard work in creating the ornaments, it’s time to put them in their rightful place on the Halloween tree.

Factors that Influence Where to Place Your Ornaments

Think about where you put each ornament. Make sure to spread out the colors and sizes evenly throughout the tree. A mixture of small and large decorations can make your Halloween tree look balanced and creative.

Creating a Pleasing Aesthetic with Ornament Placement

Try to hang larger ornaments towards the bottom of the tree and smaller ones towards the top. This can make your tree look more natural.

Important Tips for Hanging Your Spectral Ornaments

Be sure to hang your ornaments securely to the tree. You don’t want your handmade creations to fall off and get damaged!

The Halloween Junkie Take

Making your Halloween tree together with your ghostly, batty, pumpkiny, witchy, and skull-tastic ornaments is a lot of fun. When you look at your finished tree, you’ll feel a sense of achievement and Halloween spirit.

Reflecting Back on the DIY Experience

This may seem like a lot of work, but it’s actually a fun and creative way to celebrate Halloween. You got to play with different materials and markers, and your imagination had the best workout ever!

Engagement and Reactions from Visitors

Your friends and family will be amazed at your incredible Halloween tree. Little children will be thrilled with your spooky decorations, and even adults will be impressed by your creativity.

How to Elevate Your Game Next Halloween

Next year, you can step up your game by adding some light to your Halloween tree. You can buy some Halloween-themed string lights that can make your tree look even spookier. Remember, Halloween is all about having fun!

Ghostly Glory: Spectral Ornaments DIY for your Halloween Tree Read More »