DIY Projects

Crafting a DIY Halloween Village

Imagine turning your home into a little village full of spooky Halloween fun—that’s exactly what you’ll learn to do today! You’ll find out how to create your very own Halloween village with crafts and decorations you make all by yourself. It’s like becoming a magician, but instead of pulling rabbits out of hats, you’ll be crafting ghosts, pumpkins, and haunted houses right at your kitchen table. Let’s get started on this exciting adventure and make this Halloween extra special with your handmade village!

Get your own Crafting a DIY Halloween Village today.

Choosing Your Halloween Village Theme

When you start creating your own Halloween village, the first exciting step is picking a theme. Imagine a little world of your very own, filled with spooky fun. Here are some ideas to get your imagination going!

Classic Haunted Village

Think of old, crooked houses, a spooky cemetery, and maybe even a haunted castle. Ghosts might be peeking out of windows, and a mysterious fog covers the ground. It’s like stepping into a story where every corner holds a secret!

Witch’s Lair

Imagine a place where a witch brews her potions. There might be a small cottage deep in the woods with bubbling cauldrons and magical ingredients. Black cats roam around, and you might even spot a broomstick leaning against a tree.

Zombie Apocalypse

What if your village was taken over by zombies? You could have abandoned cars, broken fences, and zombies wandering the streets. It’s a little bit scary and a lot exciting to think about creating such a world.

Famous Horror Movie Scenes

Do you have a favorite spooky movie? You can recreate scenes from it in miniature form. Whether it’s a creepy mansion or a spooky street, you can bring those famous moments to life right on your display table.

Ghostly Graveyard

Imagine a graveyard with old tombstones, skeletons, and ghosts floating around. Maybe there’s an old church nearby with a broken bell. It’s a classic spooky setting that’s perfect for a Halloween village.

Planning Your Village Layout

Before you start building, it’s a good idea to think about how you want your village to look. Here’s how to plan it out:

Sketching a Basic Layout

Grab some paper and pencils and start drawing. You don’t have to be a great artist; this is just to help you imagine where everything might go.

Selecting a Display Area

Find a spot in your house where your village can stay. Maybe it’s on a table or a shelf. Make sure there’s enough space for all your ideas!

Creating Zones or Districts

Think about having different areas in your village, like a spooky forest zone or a town square. This makes your village more interesting.

Incorporating Landscape Features

Hills, rivers, and bridges can make your village look more real. You can use cardboard or foam to create these shapes.

Thinking About Lighting and Shadows

Lights can make your village spooky in a fun way. Imagine where you might want lights, like in windows or streetlights, to create spooky shadows.
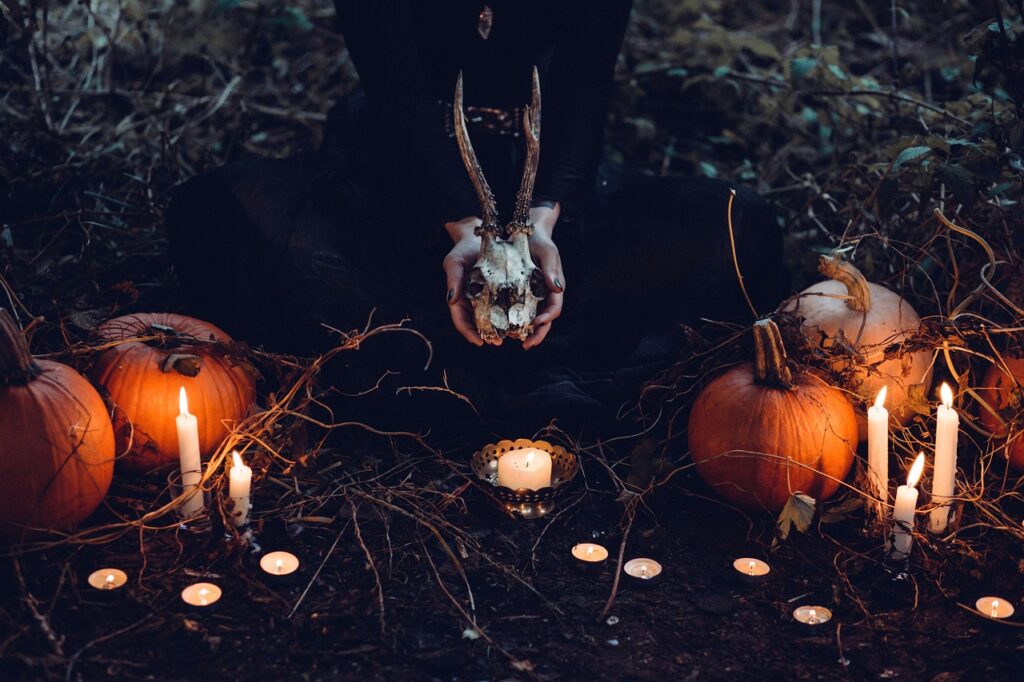
Crafting a DIY Halloween Village

This image is property of pixabay.com.

Check out the Crafting a DIY Halloween Village here.

Gathering Materials

Now, you need some supplies to start building. Here’s what you might look for:

Recyclable Materials

Old boxes, toilet paper rolls, and plastic containers can be turned into houses, trees, and more. It’s fun to recycle and create at the same time!

Craft Supplies

You’ll want things like paint, glue, and scissors. Craft stores have lots of exciting supplies you can use to decorate your village.

Natural Elements

Sticks, leaves, and rocks can make your village look more outdoor and realistic. Next time you’re on a walk, keep an eye out for things you can use.

Miniature Components

Little furniture, people, and animals can be found at craft stores. They help make your village feel alive.

Lighting and Special Effects

Small LED lights or even flashlight beams can create spooky effects. Bubble wrap can look like water, and cotton balls can look like fog!

Constructing Buildings and Structures

Now, it’s time to start building your village pieces. Here’s how to begin:

Designing Paper Templates

Drawing the shapes of your buildings on paper first can help you cut out the correct shapes from cardboard.

Building with Cardboard and Foam Board

You can cut and glue these to make the walls and floors of your buildings. It’s like putting together a puzzle!

Adding Texture and Details

You can use sand, small stones, or even crumpled paper to add texture to your buildings. It makes them look more real.

Painting Techniques for Realism

Mixing different colors can give your buildings an old and spooky look. Remember, it doesn’t have to be perfect to be fun!

Creating Roofs and Architectural Details

You can use cardboard cut into shapes for roof tiles or use straws for pipes. It’s all about being creative!
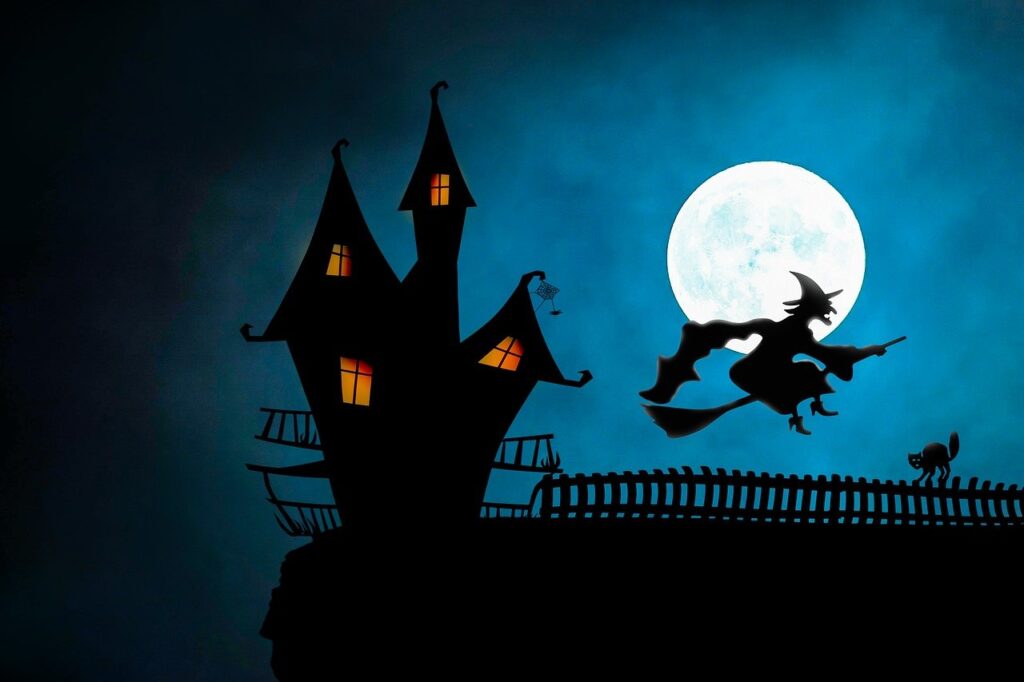
Crafting a DIY Halloween Village

This image is property of pixabay.com.

Creating Spooky Landscapes

A cool landscape can make your village even more special. Check these out:

Making Miniature Trees and Bushes

You can use real branches or clump up some moss to make trees and bushes. Adding these can make your village look more outdoorsy.

Crafting Tombstones and Graveyards

With some cardboard cut into shapes and a little paint, you can create spooky tombstones. Arranging them into a graveyard scene is super fun.

Simulating Water and Fog Effects

Saran wrap can look like water, and cotton balls can look like fog. Experiment to see what looks best in your village!

Using Moss and Ground Cover

Green moss can look like grass, and sand can look like dirt paths. It’s all about using what you have to create different looks.

Incorporating Seasonal Elements

Pumpkins, fallen leaves, and even miniature scarecrows can make your village feel like it’s part of Halloween.

Assembling Miniature Figures and Characters

Characters bring your village to life. Here’s how to create them:

Customizing Store-bought Miniatures

You can paint store-bought figures to fit your theme better. Maybe you add a cape or paint them to look like zombies!

Molding Characters with Polymer Clay

If you like sculpting, you can make your own figures. It’s a fun craft to get just the look you want.

Painting Techniques for Lifelike Details

Using tiny brushes, you can add details like eyes or spooky patterns to your characters. Take your time and have fun with it.

Creating Posable Figures

Wire can help make your figures posable. This way, you can have them standing, sitting, or even waving!

Dressing Figures with Fabric and Accessories

Little pieces of fabric can make capes or gowns, and beads can be turned into mini lanterns or pots. Get creative with your decorations!
Crafting a DIY Halloween Village

This image is property of pixabay.com.

Innovative Lighting Solutions

Lighting can make your village truly magical. Here are some ideas:

LEDs for Buildings and Streetlights

Small LED lights can be used to light up your buildings or as streetlights. They make your village look charming at night.

Fiber Optics for Fairy Lights

Fiber optics can create tiny lights that look like fairy lights or magical spells. They’re perfect for adding a touch of magic.

Creating Illusions with Light and Shadow

Placing lights behind or below your structures can create spooky shadows. Experiment to see what looks the most mysterious.

Battery vs. Plug-in Lighting

Battery lights are safer and easier to place anywhere, but plug-in lights are brighter. Think about what works best for your village.

Safety Tips for Lighting

Always be careful with lights. Ask an adult for help with anything that plugs in, and make sure nothing gets too hot.

Adding Animated Elements

Movement can make your village extra special. Here’s how to add motion:

Simple Motorized Props

Small motors can make things like windmills turn or zombies walk. It’s a bit more advanced but very cool.

Using Arduino for Custom Effects

Arduino boards can control lights and motors for custom effects. It’s like being a wizard with electronics!

Incorporating Sound Effects

Spooky sounds or music can make your village feel alive. You can find small sound devices to hide in your village.

Water Features and Smoke Machines

Little pumps can create water effects, and mini smoke machines can make fog. These are advanced but make your village amazing.

Animating Characters and Scenes

With a bit of practice, you can make characters move or create scenes that change. It’s like making your own Halloween movie!
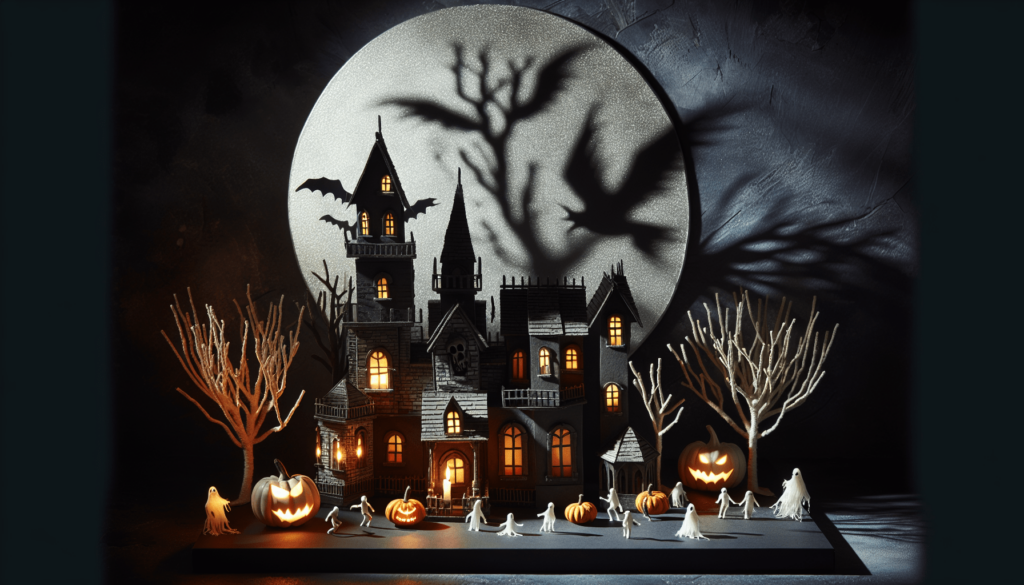
Crafting a DIY Halloween Village

Detailing and Finishing Touches

Details make your village unique. Here’s what you can add:

Weathering Techniques for Realism

Using paint and sandpaper, you can make buildings look old and worn. It adds so much character!

Adding Miniature Accessories

Little things like books, pots, or tools make your village feel real. You can make these or find them in stores.

Creating Signs and Labels

Small signs can say things like “Beware!” or “Witch’s Cottage.” You can write them yourself or print them out tiny.

Fine Painting and Detailing Tips

Using very small brushes, you can add incredible details. Take your time and enjoy adding these special touches.

Securing Loose Components

A little glue can keep everything in place. You don’t want parts of your village to move unless they’re supposed to!

Maintenance and Storage

Once Halloween is over, you’ll need to take care of your village. Here’s how:

Cleaning Your Displays

A soft brush can dust off your village. It’s good to keep it clean so it looks great next year.

Disassembly Tips

Taking apart your village carefully means you can use it again. Labeling pieces as you take them down can help you remember where they go.

Storing Fragile Pieces

Wrap up anything delicate in tissue paper or bubble wrap. You want to make sure nothing breaks while it’s put away.

Organizing Supplies for Next Year

Keeping your leftover supplies together means you’re ready to start crafting again next Halloween. It’s exciting to think about what you’ll add!

Making Repairs and Updates for Future Displays

If anything breaks or you think of new ideas, you can always add to your village. It’s a project that grows with you!

Creating your own Halloween village is a fun and creative way to celebrate. You can make it exactly how you imagine, and every year, it can get bigger and better. Start with a theme, plan it out, gather materials, and then start building. Before you know it, you’ll have a spooky little world of your own!

Find your new Crafting a DIY Halloween Village on this page.

Crafting a DIY Halloween Village Read More »

DIY Halloween Themed Knitting Projects

Imagine you can make your own Halloween decorations with just some yarn and knitting needles. You can create spooky ghosts, adorable pumpkins, or even a witch’s hat to wear! This article will show you how to make these amazing Halloween-themed knitting projects. So, grab your knitting tools, and let’s turn your home into a Halloween haven with your very own creations!

Get your own DIY Halloween Themed Knitting Projects today.

Overview of Halloween Knitting Projects

Importance of Handmade Decorations

Imagine being able to make your own Halloween decorations. You can make things like spooky spiders, ghostly garlands, and even pumpkin hats! Making things by hand is special because you get to decide exactly how they look, and you can feel proud that you made them. Handmade decorations also make your home feel cozy and unique for Halloween.

Benefits of Knitting Your Own Halloween Items

When you knit your own Halloween items, it’s like creating magic with yarn! You can make decorations and costumes that fit perfectly and look exactly how you want. Plus, knitting is a fun activity you can do while watching TV or hanging out with family. It’s also a great way to relax and make cool things at the same time.

Understanding Basic Knitting Techniques for Beginners

Knitting might seem tricky at first, but with a little practice, anyone can do it! There are two main stitches you need to know: the knit stitch and the purl stitch. Once you’ve got those down, you’ll be able to start making spooky and adorable Halloween projects. Remember, it’s okay to make mistakes. Every knitter starts as a beginner!

Creepy Crawly Knitted Spider

Materials Needed

To make a knitted spider, you’ll need some black yarn, two small googly eyes, a knitting needle, and some stuffing material. You’ll also want a pair of scissors and a needle to sew everything together.

Step-by-Step Instructions

  1. Start by knitting a small ball for the spider’s body. This is like knitting a tiny hat but closing it all the way.
  2. Knit eight skinny legs. These are just like tiny scarves!
  3. Sew the legs onto the spider’s body.
  4. Glue the googly eyes on the front.
  5. Stuff the body with stuffing material to make it chubby and cute.

Styling Tips for Display

Your spooky spider can hang out anywhere in your house. You could make a whole bunch and have them climbing up a wall or hanging from the ceiling with some thread. They also make cute decorations sitting on shelves or guarding your candy bowl!

DIY Halloween Themed Knitting Projects

This image is property of pixabay.com.

Check out the DIY Halloween Themed Knitting Projects here.

Ghostly Garland

Choosing the Right Yarn for Your Garland

For a ghostly garland, you want to pick a white or light gray yarn that’s soft and fluffy. This will make your ghosts look like they’re floating in the air.

Knitting Individual Ghosts

To knit a ghost, start by making a small triangle for the head and then a bigger, round shape for the body. You don’t have to worry about making them perfect; ghosts come in all shapes and sizes!

Assembling Your Garland

Once you have all your ghosts knitted, string them together with a strong piece of thread or yarn. You can space them out however you like. Some people even add little beads in between for extra decoration.

Ideas for Garland Placement

Your ghostly garland can decorate many places. It could hang in your window, across your fireplace, or even around your front door to greet trick-or-treaters. It’s a fun way to add a spooky touch to your home.

Pumpkin Patch Beanies

Selecting Colors and Materials

For pumpkin patch beanies, you’ll want to choose yarn in shades of orange, green for the stem, and maybe even a little brown for a cute vine or leaf. Make sure the yarn is soft and comfy, especially if you’re making it for a little one.

Pattern Instructions for Different Sizes

Beanies can be made in all sizes, from tiny ones for babies to bigger ones for adults. The pattern starts the same for all sizes, making a circle for the top and then knitting down to the size you need. Adding more rows will make the beanie bigger.

Adding Personal Touches with Facial Features

To make your pumpkin beanie extra special, you can add a face! Use black yarn to stitch on a jack-o’-lantern smile and triangle eyes. You could also make it goofy or surprised – whatever you like best.

Caring for Your Pumpkin Beanie

To keep your beanie looking great, wash it gently by hand in cool water and let it air dry. This will help it stay in shape and keep its colors bright.

DIY Halloween Themed Knitting Projects

This image is property of pixabay.com.

Witchy Kitchen Towels

Determining Towel Size and Yarn Type

For witchy kitchen towels, you want a yarn that’s absorbent and easy to wash, like cotton. Think about how big you want your towels – maybe you want them big enough to hang over your oven door or just small enough to use as hand towels.

Incorporating Witchy Designs and Patterns

You can knit in patterns like little brooms, cauldrons, or even cats. If you’re feeling really creative, you could try making a pattern that looks like a witch flying across the moon!

Finishing Touches and Hang Loops

Adding a loop to your towel makes it easy to hang up. You can make a simple knitted loop and sew it to the corner of your towel. This is also a good place to add a little extra decoration, like a small bow or a button.

Maintenance and Cleaning Tips

Since these towels will be used in the kitchen, they’ll need to be washed often. Luckily, if you chose a good cotton yarn, they can just be tossed in the washing machine. They’ll actually get softer and more absorbent with each wash.

Haunted House Scene Wall Hanging

Sourcing Materials and Tools

For a haunted house scene, you’ll need a variety of yarn colors, knitting needles, and maybe even some fabric for backing. You might also want tools like a frame to stretch the finished piece for display.

Sketching Your Design

Before you start knitting, sketch out your design. Think about including a spooky house, a full moon, and maybe even a witch or ghost flying in the sky. This will be your guide as you knit.

Knitting the Components of the Haunted House

Knit each part of your haunted house scene separately. You might knit a square for the house, a circle for the moon, and then small shapes for trees or creatures. You can make each piece as simple or as detailed as you want.

Assembly and Display Suggestions

Once all your pieces are knitted, sew them together according to your sketch. If you’re using a backing fabric, attach your knitted pieces to it now. Finally, frame your masterpiece or simply hang it up as is. It’s sure to be a conversation starter!

DIY Halloween Themed Knitting Projects

This image is property of pixabay.com.

Spooky Sweater Customizations

Design Ideas for Halloween Themes

To make a spooky sweater, think about what Halloween means to you. You could add pumpkins, ghosts, bats, or even candy corn designs to a plain sweater to make it perfect for Halloween.

Adding Halloween Elements to an Existing Sweater

You don’t have to knit a whole new sweater. You can add knitted patches or embroider directly onto an existing sweater. This is a great way to breathe new life into an old piece of clothing.

Knitting Hints for Intarsia or Colorwork

If you’re adding designs with different colors, you might use techniques like intarsia or colorwork. Remember to keep your yarns untangled and to follow your pattern carefully to get the best results.

Care Guidelines for Your Customized Sweater

Since your spooky sweater might have lots of different yarns and patches, it’s best to wash it gently by hand. This will help keep your designs looking sharp and your sweater in good shape.

Monster Mittens

Material Selection for Warmth and Comfort

For monster mittens, pick a yarn that’s warm and soft. Wool or a wool blend is great for keeping fingers toasty on chilly nights.

Pattern Adjustments for Various Sizes

Mittens can be a bit tricky because they need to fit well. You’ll find patterns for all sizes, and you can adjust the length of the cuff or the width of the mitten body to get a perfect fit.

Creative Ideas for Monster Features

This is where you can get really creative! Add big googly eyes, felt teeth, or even knitted spikes down the side to turn a simple mitten into a friendly monster.

Wearable Test: Ensuring Comfort and Mobility

Once you’ve finished your mittens, try them on. Make sure you can move your fingers comfortably and that the mittens aren’t too tight or too loose. This way you’ll stay comfortable and warm while you’re out trick-or-treating.

DIY Halloween Themed Knitting Projects

Ghoulish Gift Holders

Choosing Yarn and Colors

Pick spooky colors like black, orange, purple, and green for your ghoulish gift holders. You’ll want a sturdy yarn that can hold its shape, especially if you’re filling the holders with treats.

Patterns for Miniature Halloween Icons

You can knit tiny pumpkins, ghosts, or even little bats to decorate your gift holders. These small projects are a great way to practice your knitting skills and add a personal touch to each holder.

Assembly Instructions

Once you’ve knitted your holders and decorations, sew the decorations onto the holders. Then, sew up any sides if needed, and add a loop of yarn at the top so they can be hung up or carried easily.

Ideas for Filling and Presenting the Gift Holders

Fill your ghoulish gift holders with candy, small toys, or even a little note. They make perfect party favors or a special treat for friends and family.

Halloween Themed Throw Blankets

Selecting a Size and Yarn Type

Think about how big you want your throw blanket – something to snuggle under while watching scary movies, perhaps? Choose a yarn that’s soft and cozy, and that comes in the colors you need for your Halloween design.

Patterns and Designs

You can make your blanket with blocks of color that form a Halloween picture, like a giant pumpkin or a ghostly scene. Or, you could knit a simple blanket and add knitted decorations on top.

Knitting Methods for Larger Projects

Big projects like throw blankets take more time, so be patient with yourself. You might use circular knitting needles to help handle the large number of stitches. Taking it one row at a time, you’ll see your spooky design come to life.

Care Instructions for Your Halloween Blanket

Wash your blanket gently, especially if you’ve added decorations. A gentle cycle in the washing machine or hand washing in cool water can help keep your spooky creation looking its best for many Halloweens to come.

Click to view the DIY Halloween Themed Knitting Projects.

DIY Halloween Themed Knitting Projects Read More »

DIY Halloween Costume Accessories

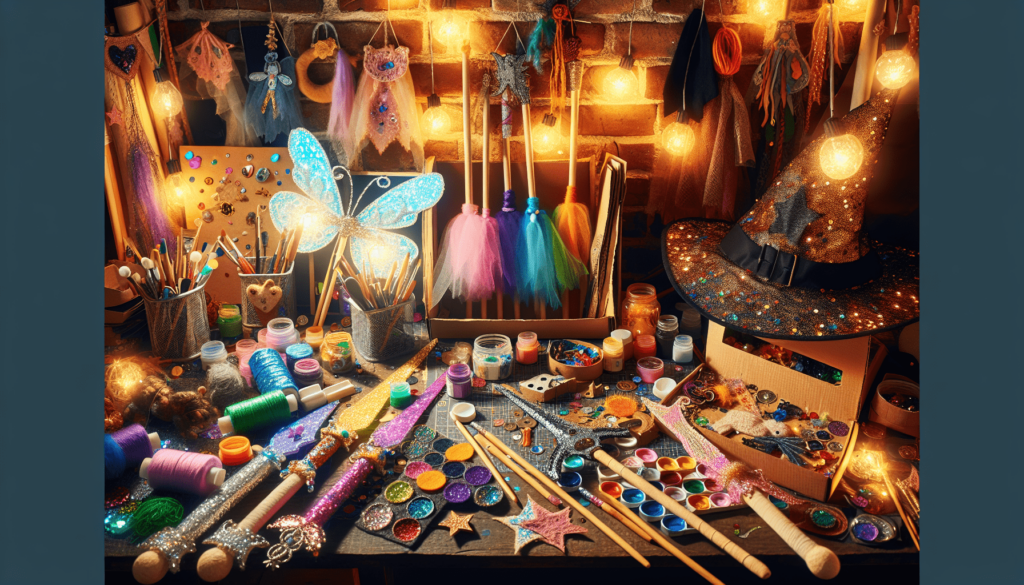
Imagine you can make your own spooky accessories for Halloween! This article will show you fun ways to create things like ghostly necklaces, magic wands, and witch hats using stuff you might already have at home. It’s all about using your imagination and having a great time while you get ready for trick-or-treating. So, let’s find out how to turn everyday items into amazing Halloween costume accessories! Halloween is a fun time of year when you can dress up as anything you like! Sometimes, making your own costume accessories can make your costume even more special. Here are some ideas for DIY Halloween costume accessories that you can make yourself!

Check out the DIY Halloween Costume Accessories here.

Creepy Crawly Spider Headband

For this fun accessory, you’ll need a headband, some black pipe cleaners, and small black pom-poms to make your very own spider friends.

Materials needed: headband, black pipe cleaners, small black pom-poms

First, gather your materials. You’ll need a plain headband that goes over your head, some black pipe cleaners, which are like bendy sticks, and little black pom-poms for the spider bodies.

Instructions for crafting spider legs and attaching them

To make your spider, take four pipe cleaners and twist them around the middle of the headband to make eight spider legs. You can bend them to look like they’re moving! Then, glue a small black pom-pom in the middle of the twisted pipe cleaners on the headband. This pom-pom is the spider’s body.

Ways to customize your spider headband for different looks

You can make your spiders in different colors or add tiny googly eyes to your pom-pom spiders for a cute or spooky look. Maybe even add some glitter to make your spiders sparkle!

Magical Witch’s Broom

Every witch needs a broom to fly on Halloween night. You can make your own with just a few materials.

Choosing the right stick or dowel for your broom handle

Look for a stick in your backyard that is straight and tall enough for your broom handle, or you can use a wooden dowel from the craft store. This will be what you hold when you pretend to fly.

Selecting materials for the broom bristles, such as straw or twine

For the bristles, you can use straw, which looks very authentic, or twine for a simpler version. Gather lots of it because brooms have thick bristles.

Assembling your broom with detailed step-by-step instructions

Tie your straw or twine tightly around one end of your stick or dowel. You might need an adult to help you. If you’re using twine, you can unravel the ends to make it look more like broom bristles.

DIY Halloween Costume Accessories

This image is property of images.pexels.com.

Learn more about the DIY Halloween Costume Accessories here.

Spooky Ghost Earrings

These adorable earrings are perfect for adding a little Halloween spirit to your outfit.

Materials list including white felt, embroidery thread, and earring hooks

You will need white felt for the ghost shapes, embroidery thread to sew them together, and earring hooks so you can wear them.

Cutting and sewing your ghost shapes

Cut two ghost shapes from your white felt. They can look however you like – happy, spooky, or silly! Then, using your embroidery thread, sew the edges together, leaving a spot to fill with a little stuffing to make them puffy.

Adding facial features and attaching to earring hooks

Draw on some cute or spooky faces with a fabric marker. Then, carefully attach your ghost to the earring hooks with a little loop of thread at the top of their heads.

Enchanted Fairy Wings

Believe in magic as you create your very own fairy wings to flutter around in.

Selecting the right wire for your wing frame

Find some wire that is flexible but strong enough to hold the shape of your wings. Bend it into the shape of fairy wings.

Covering your wings with sheer fabric or tights

You can use sheer fabric or even tights to cover your wing frame. Stretch it tightly over the wire and secure it with glue or sewing.

Decorating your wings with glitter, paints, and faux flowers

Now for the fun part – decorating! Use glitter, paint, and even fake flowers to make your wings unique and magical.

DIY Halloween Costume Accessories

This image is property of images.pexels.com.

Pirate’s Treasure Map

Create your very own treasure map to lead you to hidden treasures!

Materials you’ll need: brown paper, pens, and coffee for aging

You will need some brown paper for your map, pens to draw it, and some coffee to make it look old and authentic.

Techniques for drawing your map and aging the paper

Draw your map with the pens, adding X marks the spot where the treasure is hidden. To age it, dip your paper into coffee and let it dry. It will look like an old pirate map!

Ideas for making your treasure map more authentic

You can burn the edges of your paper carefully with an adult’s help or crumble it up and flatten it again to make it look even older.

Vampire Fang Necklace

Fangs are a must for any vampire costume, and making a necklace is a fun twist!

Materials needed: fake fangs, red beads, and necklace chord

Get some plastic vampire fangs and red beads to look like drops of blood. You’ll also need some chord for the necklace part.

Step-by-step guide to assembling your necklace

String your fangs and beads onto the chord in a pattern you like. You can have one fang or several, depending on how you want it to look.

Customization options for your vampire fang necklace

You can add different colored beads or even use glow-in-the-dark beads for a spooky effect.

DIY Halloween Costume Accessories

This image is property of images.pexels.com.

Zombie Apocalypse Belt

Prepare for the zombie invasion with your very own survival belt!

Gathering materials like old belts, toy weapons, and fake blood

Find an old belt, some toy weapons like knives or guns, and get some fake blood to make them look used.

Attaching your zombie-fighting tools to your belt

Attach your toy weapons securely to your belt with loops of fabric or strong tape. Make sure they’re easy to grab in case of a zombie attack!

Adding details to sell the zombie apocalypse survivor look

Splatter some fake blood on your weapons and belt to look like you’ve been fighting zombies.

Superhero Mask

Every superhero needs a mask to hide their true identity.

Selecting the perfect fabric or felt for your mask

Choose a fabric or felt in a color that matches your superhero costume. It should be comfortable to wear.

Cutting out your mask and adding details such as logos or patterns

Cut out your mask shape and add any details like logos, patterns, or glitter to make it unique.

Fastening options for keeping your mask in place

You can use elastic bands, ribbons, or even string to tie your mask on. Make sure it’s snug but comfortable.

DIY Halloween Costume Accessories

Wizard’s Staff

Every wizard needs a staff to channel their magical powers.

Materials: finding the perfect stick, paints, and embellishments

Look for a strong, straight stick that feels right in your hands. Gather some paints and any embellishments like crystals or fake vines.

How to carve and paint your staff for an authentic wizard look

You can carve designs into your staff with a knife (ask an adult for help) and paint it in colors that match your wizard outfit.

Adding magical details like crystals, vines, or runes

Glue on crystals, wrap it with fake vines, or paint runes along the staff for an extra magical touch.

Glowing Potion Bottles

Create mystical potions that glow in the dark and complete your magical costume.

Choosing bottles and glowing materials

Find small bottles and glowing materials like glow sticks or glow-in-the-dark paint.

Safe methods for creating glowing effects

You can fill your bottles with the liquid from glow sticks (be careful and ask an adult for help) or paint the insides with glow-in-the-dark paint.

Ideas for labels and potion names to enhance your costume

Think of fun names for your potions and create labels for the bottles. You can use names like “Witch’s Brew” or “Liquid Magic” to make them sound mysterious.

With these craft ideas, you can make your Halloween costume extra special this year. Remember, the best part about DIY is you can always add your own creative twists to make your accessories uniquely yours. Happy crafting!

See the DIY Halloween Costume Accessories in detail.

DIY Halloween Costume Accessories Read More »
Crafting Your Own Halloween Window Decals

Today, we’re going to talk about how you can make your very own Halloween window decals right at home! Imagine filling your windows with spooky ghosts, silly pumpkins, and cute bats to show everyone how excited you are for Halloween. It’s like making your bedroom window into a mini storybook of Halloween fun, using your creativity and some simple things you probably have around the house. Get ready to transform your windows into a Halloween adventure that everyone walking by can enjoy!

Check out the Crafting Your Own Halloween Window Decals here.

Understanding the Basics of Window Decals

Definition and Types of Window Decals

Window decals are fun stickers you can put on your windows. They can show pictures, words, or patterns. There are different kinds of window decals. Some are like clingy jelly that can stick without glue, and others need a little bit of sticky help to stay on the window. For Halloween, you can find decals that look like pumpkins, ghosts, or even friendly witches!

Benefits of DIY Halloween Window Decals

Making your own Halloween window decals is super cool because you can make whatever you want! It’s like bringing your spooky drawings to life on your windows. This way, your home can look unique for Halloween, and it’s a fun activity to do with your family or friends.

Materials Needed for DIY Window Decals

To make your decals, you’ll need some special papers or films that sticks to windows, something to draw your designs with, and scissors to cut them out. If you want your decals to stick without glue, look for “static cling” paper at the store.

Designing Your Halloween Window Decals

Choosing a Theme

First, think about what Halloween theme you love the most. Do you like cute things like smiling pumpkins, or spooky stuff like haunted houses? Picking a theme will make your decorations look super cool together.

Sketching Your Designs

Next, grab a pencil and start drawing your Halloween ideas on paper. Don’t worry if it’s not perfect! This is just to get your awesome ideas out.

Sizing Your Decals for Windows

Think about where you want to put your decals. Measure that space so you know how big or small to make your stickers. This way, they’ll fit just right and look great!

Crafting Your Own Halloween Window Decals

This image is property of pixabay.com.

See the Crafting Your Own Halloween Window Decals in detail.

Selecting the Right Materials

Types of Papers and Films

There are different kinds of papers and films you can use. Some are clear and others are not. Clear ones can look really cool because it seems like the designs are floating on the window!

Adhesives Suitable for Glass

You’ll need to think about how to make your decals stick. Some papers come with a sticky back that’s perfect for glass, but make sure it won’t leave a mess when you take it off.

Tools for Cutting and Applying Decals

To make your decals, you’ll need scissors to cut them out. If you have shapes that are tricky, a craft knife might help (but ask an adult for help). You’ll also need something like a credit card to smooth out bubbles when you stick them on.

Creating Your Halloween Window Decal Designs

Using Design Software

If you like using a computer, there are programs that can help you make your designs. You can play with different Halloween shapes and colors until you find something you really like.

Drawing and Cutting by Hand

If you prefer drawing by hand, get your colored markers or pencils out and have fun! After you’re happy with your drawings, you’ll need to carefully cut them out.

Incorporating Colors and Details

Adding lots of colors and small details will make your decals stand out. Think about using Halloween colors like orange, black, green, and purple to make your designs pop!

Crafting Your Own Halloween Window Decals

This image is property of pixabay.com.

Printing Your Decals

Choosing the Right Printer

If you’re printing your decals, you need a printer that can handle the special paper or film you’re using. Ask an adult to help you with this part.

Selecting Printing Settings

Make sure you pick the right settings on your printer. This helps your decals look their best with bright colors and sharp edges.

Testing Prints on Regular Paper

Before you print on the special paper, try printing on regular paper to see how it looks. This way, you can make any changes without wasting the good stuff.

Cutting and Preparing the Decals

Using Cutting Machines

Some people have machines that can cut out shapes perfectly. If you have one, you can use it to cut your decals. But remember, this part is usually for adults.

Hand Cutting Techniques

If you’re cutting by hand, take your time and follow the lines as best you can. If you make a mistake, it’s okay. It’s all part of the fun of making something yourself.

Prepping Decals for Application

Once your decals are cut out, you might need to peel off a backing or use a little water to help them stick. Follow the instructions for your paper or film.

Crafting Your Own Halloween Window Decals

This image is property of pixabay.com.

Applying Your Halloween Window Decals

Cleaning the Window Surface

Before you stick your decals on, clean the window with a bit of water or glass cleaner. This helps your decals stick better and look clearer.

The Wet and Dry Application Methods

For some decals, you can use a tiny bit of water on the back to help slide them into place. Others you just stick on dry. See what works best for your kind of decal.

Removing Bubbles and Wrinkles

If you see bubbles or wrinkles, gently use something like a credit card to push them out to the edges. This will make your decals look super smooth and neat.

Maintenance and Removal

Cleaning Around the Decals

You can still clean your windows with the decals on. Just be gentle around the edges so you don’t peel them off.

Removing Decals Without Damage

When it’s time to take down your decals, peel them off carefully. If they’re stubborn, a little bit of warm water can help loosen them up.

Storing Decals for Future Use

If you want to use your decals again next year, you can stick them onto wax paper and keep them flat in a cool, dry place.

Crafting Your Own Halloween Window Decals

Safety Tips and Considerations

Non-Toxic Materials

Make sure all your materials are safe and non-toxic, especially if you’re working with younger brothers or sisters.

Keeping Decals Out of Reach of Young Children

Some small decals could be a choking hazard for little ones, so keep them out of reach.

Window Safety

Always make sure your windows are safe to use. Don’t lean on or open windows too much while decorating.

Showcasing Your Decals

Lighting for Nighttime Display

Your decals will look extra spooky with the right lighting. Think about putting a light behind them or shining a flashlight to make cool shadows.

Arranging Decals for Maximum Effect

Play around with where you put your decals. Putting some higher and some lower can make your windows look full of Halloween fun.

Combining Decals with Other Halloween Decorations

Mix your decals with other Halloween decorations like fake cobwebs or plastic spiders. This will make your house the spookiest on the block!

Making your own Halloween window decals is a fun project that lets you be super creative. Just remember to take your time, be safe, and have a spooky good time!

Learn more about the Crafting Your Own Halloween Window Decals here.

Crafting Your Own Halloween Window Decals Read More »
Halloween DIY Candle Holders

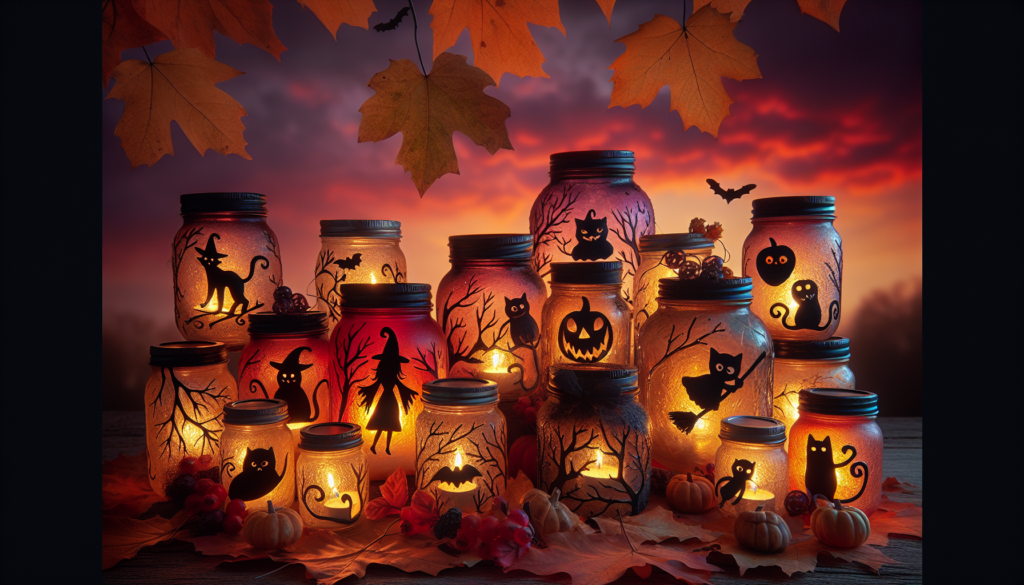
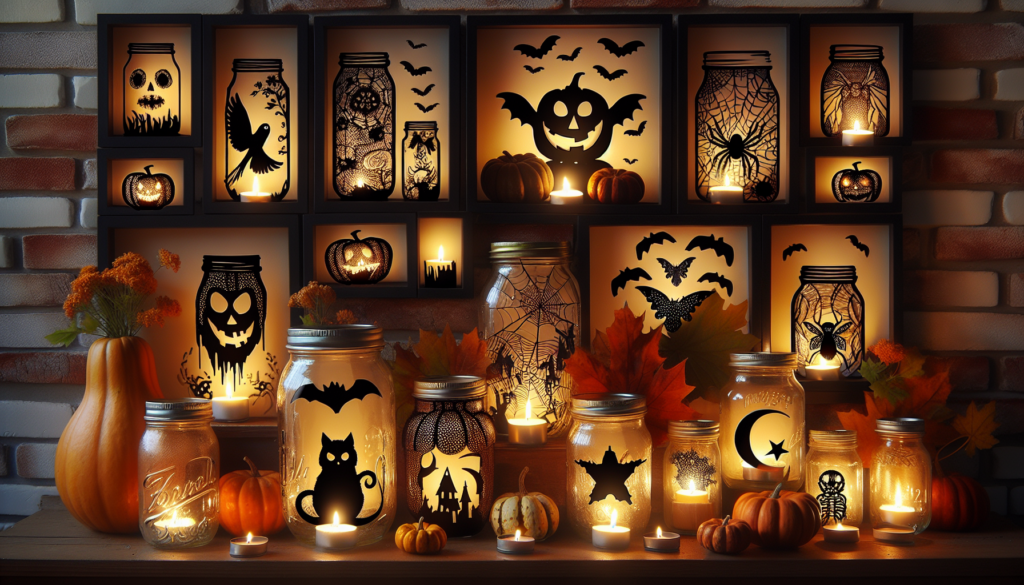
Imagine it’s spooky season and you want to add some creepy candles to your room to make it look just right for Halloween. Well, you can make your very own Halloween candle holders at home! All you need are a few simple things like jars, paint, and maybe some scary faces to stick on them. These candle holders will light up your space with a ghostly glow and give your friends a little fright when they come to visit. It’s a fun craft that you can do by yourself or with your family to get everyone excited for trick-or-treating and all the Halloween fun!

Learn more about the Halloween DIY Candle Holders here.

Choosing The Right Materials

Types of Containers Suitable for Candle Holders

When you’re picking out what to use for your spooky candle holders, you want to look for containers that are just the right size to fit a candle. Things like small glass jars, tin cans, and even ceramic cups can work great! You want to make sure that whatever you pick won’t catch on fire and is okay to have a little heat around it, because candles can get pretty warm, you know!

Selecting Safe and Durable Materials

It’s super important to choose materials that are safe and won’t break easily, especially since you’ll be working with heat. Glass jars are good because they are strong and you can see the pretty candlelight through them. Metal cans are also a good choice because they don’t break and they protect the candle from the wind if you put them outside.

Considering The Halloween Theme when Choosing Colors and Textures

Now, think about Halloween colors like orange, black, purple, and green when you’re picking out materials. Maybe you find a container that has a bumpy texture like a gourd, or something smooth like a glass jar that you can paint on. Textures and colors can help make your candle holders look extra spooky and fun for Halloween!

Planning Your Design

Sketching Your Ideas

Before you start making your candle holders, grab some paper and crayons or pencils to sketch your ideas. Draw all the ghosts, bats, and pumpkins that you can think of! This will help you figure out what you want your candle holders to look like. Remember, it doesn’t have to be perfect. It’s okay to be as wild and imaginative as you want!

Finalizing The Design for Functionality and Safety

Now that you’ve got some ideas down, let’s make sure they’ll work. Your candle holders need to be safe—so no designs that could catch fire or tip over easily. Make sure any decorations are on the outside and far away from where the flame will be.

Incorporating Classic Halloween Elements

Ghosts, witches, spiders, and all those creepy crawlies can make your designs super cool for Halloween. You can draw them, use stickers, or even cut shapes out and stick them on your containers to make them look like Halloween has truly arrived!

Halloween DIY Candle Holders

This image is property of pixabay.com.

Learn more about the Halloween DIY Candle Holders here.

Creating Spooky Silhouettes

Cutting Out Halloween Shapes

Silhouettes are like shadows of shapes. You can make these by cutting out shapes from black paper. Think of things like a cat’s arched back, the wiggly shape of a ghost, or a witch’s pointy hat. These will look really spooky when you put light behind them!

Attaching Silhouettes to Candle Holders

After cutting out the shapes, you can glue or tape them onto your containers. Be careful where you put them because you don’t want them too close to the candle. If you’re using glass jars, you can stick them on the inside so the flame is still safely away from this paper.

Lighting Effects with Silhouettes

When you light the candle inside the holder, it will shine through the shapes and cast big shadows on the wall. It’s like the shapes come to life in the dark!

Using Natural Materials

Incorporating Pumpkins and Gourds

You can use little pumpkins or gourds as candle holders! You might need an adult to help you carve a hole in the top, so you can put the candle inside. They look super cool and are perfect for Halloween.

Decorating with Fall Leaves and Twigs

You can find pretty leaves that have fallen off the trees and twigs from the yard to decorate your candle holders. Use these to make a pretty autumn scene. Just remember to keep them away from the flame, okay?

Preserving Natural Materials for Longevity

If you want your pretty leaves and twigs to last a long time, you can press them in a big book to dry them out, or an adult can help you use a spray to keep them from getting too dry and crumbly.

Halloween DIY Candle Holders

This image is property of pixabay.com.

Repurposing Common Household Items

Transforming Jars and Cans into Candle Holders

You can turn old jars and cans from the kitchen into amazing candle holders! Clean them out, take off any labels, and they are ready to be part of your Halloween decoration project.

Creative Use of Wine Glasses

Ask an adult if they have any wine glasses that you can turn upside down to make candle holders. You can put Halloween stickers on the glass, and then sit the candle on the bottom (which is now the top!). It looks fancy and fun!

Upcycling Old Dishware

Old cups, plates, or bowls can become special candle holders, too. You can paint them or tie ribbons around them to make them festive for your Halloween celebration.

Adding Colors and Textures

Selecting Appropriate Paints and Finishes

Choose paints that are safe for your containers. If you’re using glass or metal, ask for paint that works on those materials. You can also look for stickers and markers if painting isn’t your thing. Make sure the finishes aren’t near the candle’s flame.

Embellishing with Ribbons and Fabric

Tying ribbons or wrapping fabrics like lace around containers can add color and texture. You might make a bow or glue a pretty piece of fabric to a jar, but keep it low towards the bottom, away from where the candle will be burning.

Creating a Rustic Look with Burlap

Burlap is a kind of fabric that looks a bit rough and scratchy. It’s great for making things look old and rustic, like something from a spooky, old haunted house. You can use it to cover containers or make decorations that hang from the side. Just be careful with its placement in relation to the candle.

Halloween DIY Candle Holders

This image is property of pixabay.com.

Enhancing with Light Effects

Choosing the Right Candles or LED Lights

For the safest Halloween candle holders, LED lights are a great choice. They look like real candles but don’t have real flames, so they’re not going to cause a fire. But if you use real candles, make sure they fit nicely into your holders.

Flickering Effect for a Creepy Atmosphere

Flickering or dancing light makes candle holders feel even more spooky and like Halloween. Some LED candles have a flickering effect, or if you’re using real candles, the way you cut your shapes can make the shadows move in creepy ways.

Colored Lights for a Mysterious Vibe

Did you know you can find candles in different colors or even small lights that change colors? Using purples, greens, or oranges can make your candle holders look extra cool and mysterious for Halloween night.

Safety Considerations

Ensuring Stability to Prevent Fires

We want to make sure everything is super safe, so make sure your candle holders can stand up without tipping over. They should be on a flat surface and somewhere they can’t get knocked down by pets or people.

Using Non-Flammable Decorations

Non-flammable means stuff that doesn’t burn. Use decorations like metal, glass, or special Halloween ornaments that are safe around flames. Stay away from using anything that burns easily like paper or dry leaves too close to a candle’s flame.

Monitoring Candles During Use

Always remember, you should never leave candles burning without an adult around to keep an eye on them. When the candles are lit, they should be in a place where they won’t get knocked over and someone is always looking at them to keep everything safe.

Getting Creative with Themes

Themed Candle Holders: Vampires, Ghosts, Witches

You can make your candle holders all about one thing, like only vampires or only witches. You could draw a vampire’s castle, make a ghost fly around, or have a witch flying on her broom across the sky!

Integrating Characters and Scene Settings

Think of all the cool scenes you could make. Maybe a witch’s bubbling cauldron in front of her, or a vampire’s spooky castle window. Using your imagination, the scenes around your candles can tell a whole story!

Fusing Different Themes for Original Designs

If you’re feeling really adventurous, mix things up! Put a ghost in a witch’s hat or have a vampire holding a jack-o-lantern. When you mix different Halloween things together, you can create a unique design that’s all your own.

Hosting a Crafting Party

Planning a DIY Crafting Session

Throw a crafting party with your friends! Plan what kind of candle holders you all want to make, gather enough materials, and get ready to have a lot of fun creating together.

Prepping Materials for Guests

Cut up shapes beforehand, lay out all the different jars and cans, and make sure there’s plenty of paint and brushes for everyone. When your friends arrive, everything’s ready for them to start making their own spooky candle holders.

Incorporating Games and Fun into The Crafting Experience

While you’re all making your candle holders, you can play Halloween music or tell each other spooky stories. You can even make a game like who can make the scariest or the funniest candle holder. It’s all about having a great time while being creative!

Get your own Halloween DIY Candle Holders today.

Halloween DIY Candle Holders Read More »
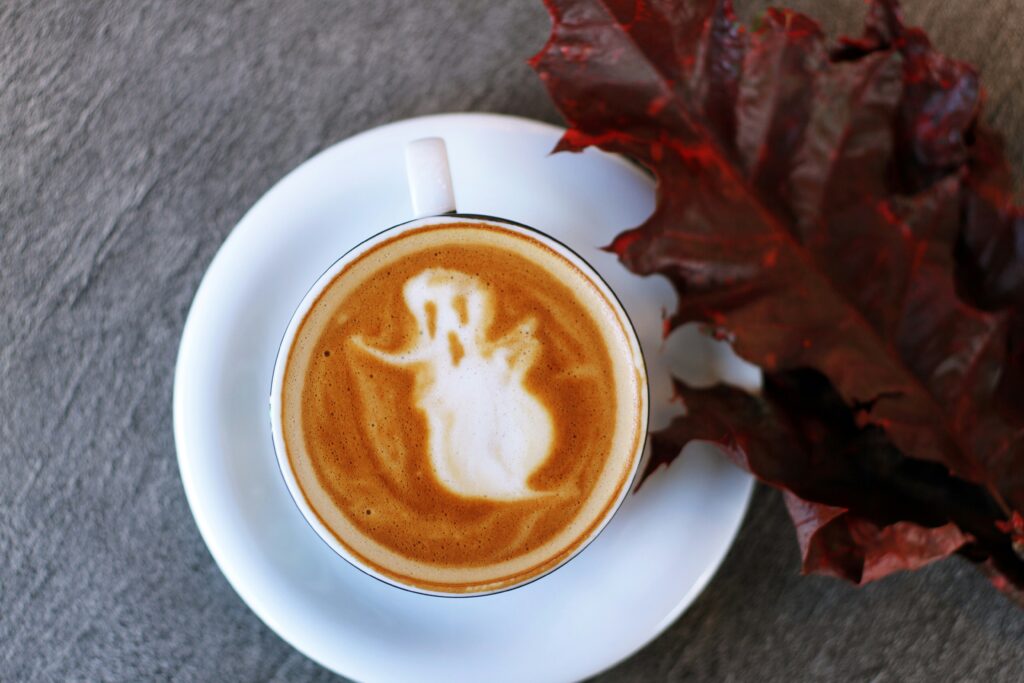
Eco-Friendly Halloween Crafts

Imagine making your own spooky decorations for Halloween, and even better, using things from around your house to help the planet at the same time! Your article, “Eco-Friendly Halloween crafts,” will show you how to create fun Halloween DIY projects and crafts that are good for the Earth. You’ll find out ways to turn old boxes, used bottles, and scraps of paper into creepy-cute spiders, ghostly lanterns, and all sorts of Halloween magic without hurting the environment. Get ready to have a blast making your home look wonderfully spooky while you give Mother Nature a big high-five!

Eco-Friendly Halloween Crafts

This image is property of images.unsplash.com.

Discover more about the Eco-Friendly Halloween Crafts.

Understanding Eco-Friendly Halloween Crafts

The importance of sustainable materials

When you’re making things, it’s great to use stuff that helps the Earth. Sustainable materials are things that don’t hurt the planet. These materials can be used again and again or come from nature, like leaves and sticks.

Reducing waste during Halloween

During Halloween, lots of pumpkins, costumes, and decorations get thrown away. You can help by making less waste. Try to use things you already have or can use more than once. This way, there’s less trash, and it’s better for the Earth.

Benefits of homemade decorations

Making your own decorations is really fun! It’s also good because you can use materials that are safe for the Earth. Plus, when you make things yourself, they are special and can be used every year, which is great for saving money and the planet.

Planning Your Eco-Friendly Halloween

Selecting the right materials

When you’re planning to make Halloween crafts, choose materials that don’t hurt the Earth. You can use paper, cardboard, fabric, or things from nature. It’s like going on a treasure hunt to see what you can find and use.

Designing for reusability

When you make something, think about how you can use it again. Make decorations that can last a long time and won’t break easily. You can even make them a part of a game or a toy to play with after Halloween is over.

Incorporating natural elements

Nature is full of amazing things you can use in your crafts. Leaves, pine cones, and twigs can all be a part of your decorations. They look nice and are good for the Earth because they come from outside.

See the Eco-Friendly Halloween Crafts in detail.

Homemade Halloween Decorations

Creepy paper mache decorations

Paper mache is a craft where you use paper and glue to make shapes. You can make ghosts, pumpkins, or monsters. When Halloween is over, you can recycle the paper or keep your decorations for next year.

Eco-friendly pumpkin carving alternatives

Instead of carving a pumpkin, you can decorate it on the outside with paint or markers. This way, when Halloween is over, the pumpkin can be used for food or given to animals to eat.

Using recycled materials for spooky accents

Look in your recycling bin for things like egg cartons and toilet paper rolls. With a little bit of imagination, you can make them into bats, cats, and other spooky things for Halloween.

Spooky Sustainable Lighting

LED candles and fairy lights

Little lights like LED candles and fairy lights are good because they don’t use a lot of energy. They’re safe to use and can make your house look spooky.

Solar-powered Jack-O’-Lanterns

You can find solar-powered lights that can charge during the day and light up your Jack-O’-Lantern at night. This is a cool way to light up your pumpkin without needing batteries or electricity.

DIY lanterns from upcycled jars

Old glass jars can turn into lanterns. Decorate them with paint or stickers and put a little light inside. You can use these lanterns every year, and they look very pretty.

Eco-Friendly Halloween Crafts

This image is property of images.unsplash.com.

DIY Halloween Party Supplies

Creating reusable dishware

Instead of using plastic plates and cups, use ones that you can wash and use again. They come in fun colors and designs. They’re much better for the Earth because you’re not throwing them away after just one use.

Fabric tablecloths and napkins

Using fabric for tablecloths and napkins is a great idea. They can be washed and saved for next year. Plus, they can be made into different things like costumes or banners.

Biodegradable party favor ideas

If you give party favors, pick things that can break down and go back to the Earth. You can give seeds to plant flowers or little toys made of wood.

Upcycled Halloween Costumes

Repurposing old clothes

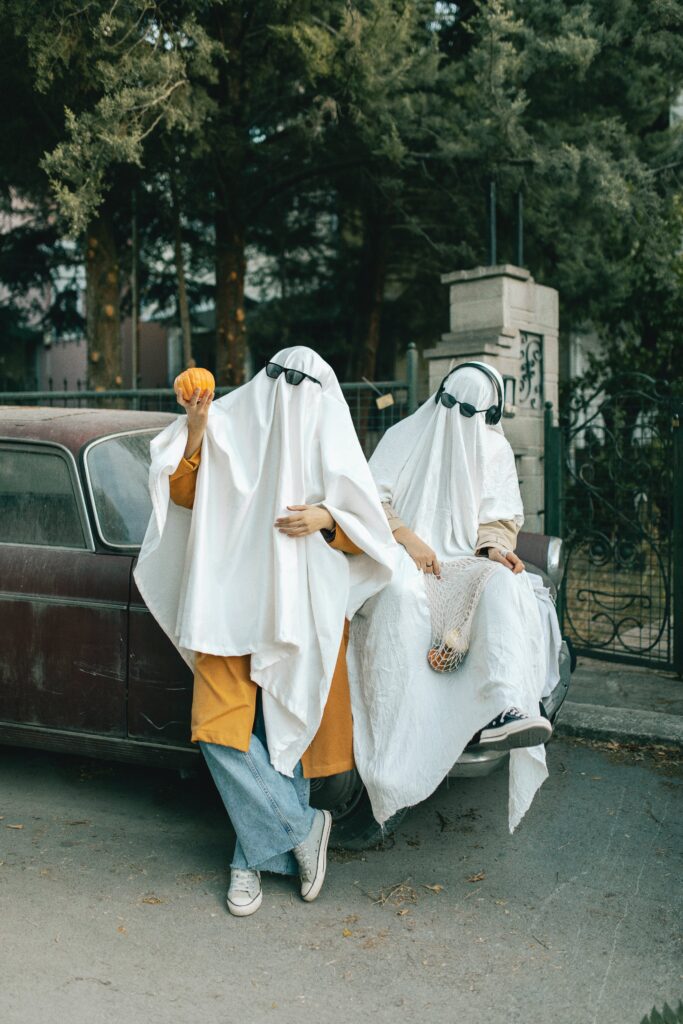
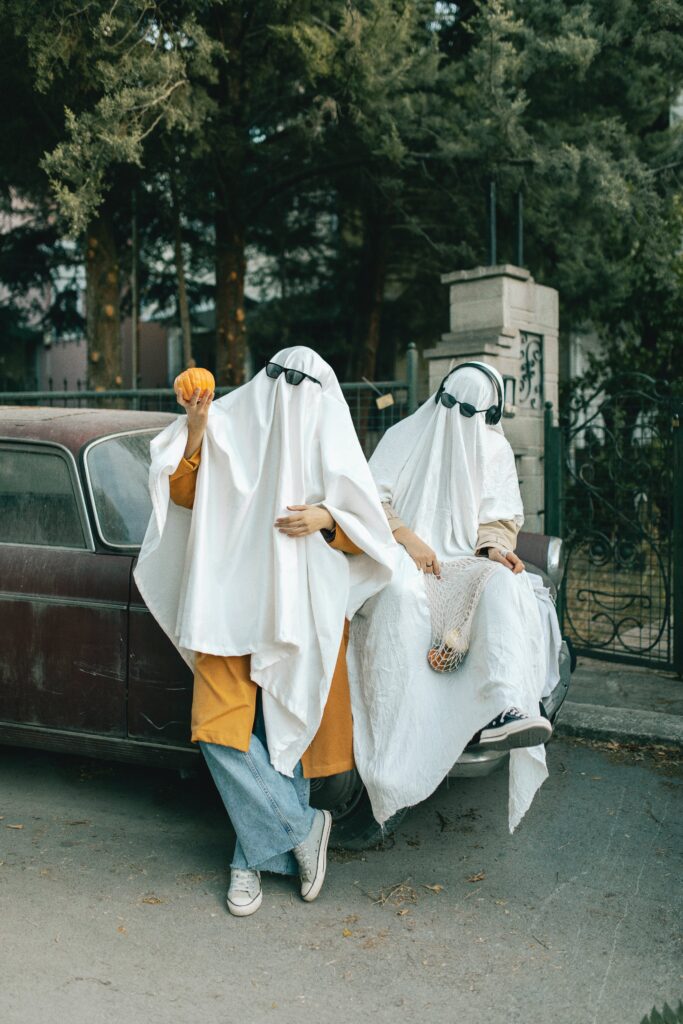
Old clothes can turn into amazing costumes! A white shirt can become a ghost, and brown pants can be part of a tree costume. It’s like playing dress-up with your closet.

Natural fabric dyes for costume coloring

If you want to change the color of fabric, you can use natural dyes. These dyes come from foods like beets for red or spinach for green. It’s a fun way to change colors without using chemicals.

Thrifting for unique costume pieces

Going to a thrift store is like a treasure hunt for costumes. You can find cool clothes and accessories that nobody else has. It’s cheaper and good for the Earth to reuse clothes instead of buying new ones.

Eco-Friendly Halloween Crafts

This image is property of images.unsplash.com.

Green Halloween Activities for Kids

Crafting with recyclable materials

Making crafts from recyclable materials is a great way to have fun and help the Earth. Cardboard boxes can become a haunted house, and plastic bottles can be turned into spooky ghosts.

Nature-inspired scavenger hunts

Halloween is a great time to explore nature. You can have a scavenger hunt and look for things like colorful leaves, acorns, and interesting rocks. It’s an adventure that can teach you about the world around you.

DIY face paints from natural ingredients

Making your own face paint is fun and safe. You can use things like cornstarch and natural food coloring. This way, you know what’s on your skin, and it’s gentle on the planet.

Eco-friendly Treats and Snacks

Healthy, package-free treat options

Instead of candy in wrappers, you can give out fruits or homemade treats. You can even make little bags of popcorn. It’s delicious and doesn’t make a lot of trash.

Homemade Halloween-themed snacks

You can make yummy snacks that look like Halloween things. Cookies can be shaped like pumpkins, and fruit can be arranged to look like a monster. It’s tasty and creative!

Using organic and locally sourced ingredients

When you use ingredients that are grown nearby and without chemicals, it’s much better for the Earth. The food doesn’t travel far, which means less pollution, and it’s healthier for you.

Eco-Friendly Halloween Crafts

Sustainable Trick-or-Treat Options

Non-plastic treat bags and containers

Instead of plastic bags, you can use a cloth bag or a bucket that you already have for trick-or-treating. These options can be reused every year, which is great for the planet.

Eco alternatives to traditional candy

You can give out things that aren’t candy, like puzzles or stickers. They last longer and don’t create waste. People will think it’s fun to get something different.

Community initiatives for a green Halloween

Sometimes, your town or school will have special projects to make Halloween greener. You can join in by helping with recycling or sharing eco-friendly tricks and treats.

Repurposing Halloween Crafts

Converting crafts into everyday decor

Some of your Halloween crafts can be changed a little to be used all year. A leaf garland can just be a pretty decoration, not just for Halloween.

Ideas for storing and reusing crafts

After Halloween, you can keep your crafts safe in a box to use for next year. Wrap them gently, and they’ll be perfect when it’s time to decorate again.

Transforming Halloween crafts for other holidays

Some things you make for Halloween can be used for other holidays too. You might turn a decoration into something for Thanksgiving or Christmas. It’s like giving your crafts a new life for different celebrations.

Check out the Eco-Friendly Halloween Crafts here.

Eco-Friendly Halloween Crafts Read More »
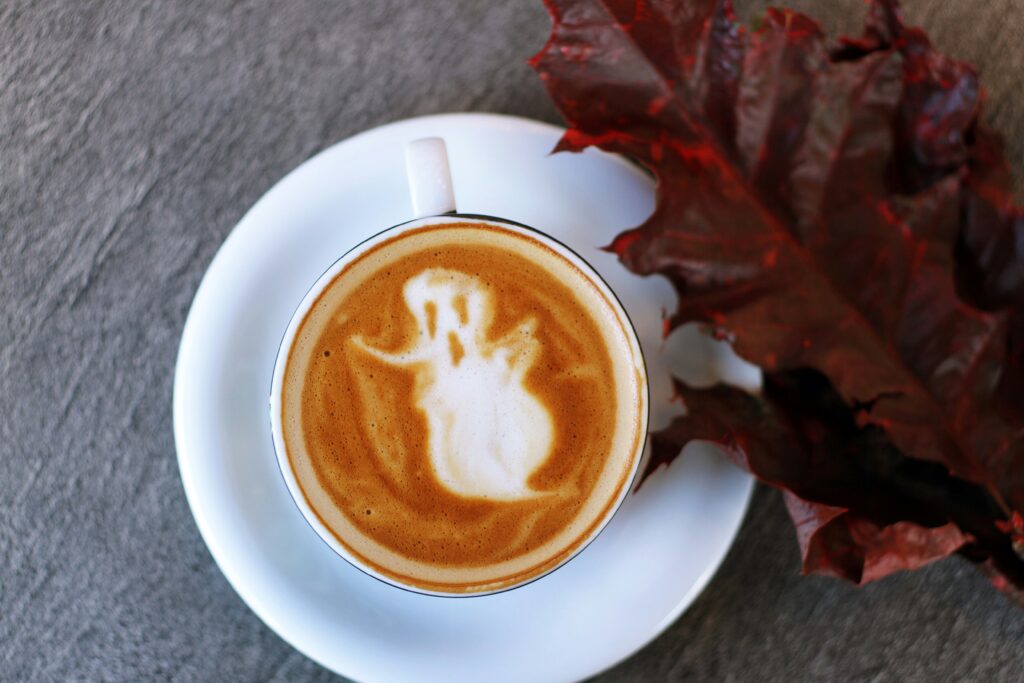
Halloween Crafting with Mason Jars

Get ready to make your Halloween extra spooky and fun with mason jars! You can turn these simple glass jars into amazing Halloween decorations with a bit of creativity. Paint them with ghostly faces, fill them with colorful candy, or light them up with glow sticks. Whether you’re a crafting beginner or a DIY expert, mason jars are the perfect way to add some handmade magic to your Halloween. Let’s grab some jars and get ready to create some boo-tiful crafts that will be the talk of the neighborhood!

Get your own Halloween Crafting with Mason Jars today.

Understanding Mason Jar Craft Basics

Choosing the Right Mason Jars

Before you start making crafts, you need to pick the right mason jars. Mason jars come in different sizes and shapes. Some are small and cute, and others are big and can hold lots of things. They can be clear or have a little color. When you choose a jar, think about what you want to make. If you want to fill your jar with lots of candy, a bigger jar might be better. Or, if you want to make a tiny fairy house, a small jar could be just right.

Gathering Essential Crafting Supplies

Now, it’s time to collect all the things you’ll need to make your crafts. You’ll need glue to stick things on your jars, paint to decorate them, and maybe some sparkly glitter. Also, if you want to make your jars light up, you’ll need little lights, like the kind you can take out of a small flashlight. Remember to ask an adult to help you find all your supplies.

Safety Tips for Crafting with Glass

Before you start crafting, there are some important safety tips you should know because you’re working with glass. Always be gentle with mason jars, as they can break and cause sharp edges. If one does break, tell an adult right away so they can clean it up. When you’re using glue or paint, cover your working space with newspapers or an old sheet to keep it clean. Always wear clothes that you don’t mind getting messy.

Illuminated Mason Jar Creations

Creating Mason Jar Jack-o’-Lanterns

One super fun craft is making mason jar jack-o’-lanterns. You paint the entire jar orange, just like a pumpkin, and when it’s dry, draw a jack-o’-lantern face on it with black paint. Once that’s dry, place a little light inside. At night, it will glow and look just like a mini pumpkin, but it’s actually a jar!

DIY Mason Jar Ghost Lanterns

For a spooky ghost lantern, you’ll need a clear mason jar. Paint it white and draw a ghost face on it with a black marker. When you place a light inside the jar, your ghost will light up in the dark. It’s a simple and fun way to make something a little spooky.

Spooky Mason Jar Light Strands

If you want to make something really cool, try creating light strands with mason jars. You’ll need a few jars and some light strands, like the ones used for Christmas trees. Carefully place the lights inside the jars, and you can even paint the jars with spooky colors or designs. When you turn the lights on, you’ll have a glowing decoration that’s perfect for Halloween.

Halloween Crafting with Mason Jars

This image is property of images.unsplash.com.

Check out the Halloween Crafting with Mason Jars here.

Mason Jar as Halloween Party Favors

Fillable Mason Jar Treat Containers

Mason jars are perfect for holding treats. You can fill them with candy corn, chocolate, or other goodies. To make them festive, decorate the outside with Halloween stickers or draw your own designs. Then, give them to friends as party favors, so they have something special to take home.

Personalized Mason Jar Mementos

You can also make personalized mason jars as party favors. Use paint to write your friends’ names on the jars and decorate them with Halloween-themed drawings or stickers. Fill the jars with tiny toys or more treats. Your friends will love having a jar that’s just for them.

Halloween Themed Jar Decorations

Get creative with your jars and turn them into scary monsters or cute Halloween characters. You can add googly eyes, draw on faces, or use pipe cleaners to make arms and legs. These decorated jars can hold candy or just be fun decorations for a Halloween party.

Eerie Mason Jar Terrariums

Assembling a Miniature Graveyard Scene

You can make a little graveyard inside a mason jar. Start by putting in some dirt or sand at the bottom. Then add small toy skeletons, fake tombstones made of cardboard, and maybe even a tiny fake tree. When you look into the jar, it will be like peeping into a tiny, eerie graveyard.

Haunted House Terrarium

For a haunted house terrarium, you can create a spooky scene inside your jar using small craft items. Make a little haunted house out of paper or find a toy one, and place it inside on top of some dirt or sand. Add in some fake spider webs and tiny ghosts to complete your haunted scene.

Creating a Creepy Forest Ecosystem

If you love the idea of a creepy forest, you can make one inside a jar too. Put some real or fake moss on the bottom to look like forest ground. Then, add small trees (you can make these from twigs and leaves) and maybe a tiny owl or wolf figurine. With a little dark paint around the edges, your forest will look super mysterious.

Halloween Crafting with Mason Jars

This image is property of images.unsplash.com.

Halloween Mason Jar Vases

Design Ideas for Spooky Floral Arrangements

Turn your mason jars into spooky vases by painting them with Halloween colors like black, orange, and purple. You can draw spider webs, bats, or ghosts on them too. Once you’re done, fill your jar with pretty flowers. Choose darker colors or even fake flowers that look a bit spooky, like black roses.

Incorporating Halloween Colors and Themes

Remember to use lots of fun Halloween colors when you’re decorating your vases. Besides black, orange, and purple, you can add green for a witch’s brew look, or red for something a little scarier. You can even stick on Halloween-themed ribbons or stickers to make your vase extra special.

Upcycling Mason Jars into Unique Vases

If you have old mason jars at home, you can turn them into something new! Clean them up and get ready to decorate. It’s a great way to reuse jars, and it’s better for the Earth too because you’re recycling. Plus, each jar will be unique, just like a piece of art that you made all by yourself.

Candy Corn Inspired Mason Jar Crafts

Candy Corn Color Layering Techniques

Candy corn is a yummy Halloween treat, and you can use its colors to decorate a jar. Start at the bottom with yellow paint, add a layer of orange in the middle, and then white on top, just like the layers of a candy corn. When it’s dry, it will look just like the candy but much bigger!

Incorporating Candy Corn into Mason Jar Designs

Besides painting your jar to look like candy corn, you can glue actual pieces of candy corn onto the jar in fun patterns. Just remember, this jar is for looking, not eating! You can also fill the jar with candy corn for a colorful decoration.

Making a Candy Corn Mason Jar Luminary

To make a luminary, you’ll need those candy corn colors again. Paint the outside of a clear mason jar with yellow on the bottom, orange in the middle, and white on top. After the paint dries, put a light inside. The jar will glow with candy corn colors, and that’s really cool for Halloween night!

Halloween Crafting with Mason Jars

This image is property of images.unsplash.com.

Ghoulish Mason Jar Drinkware

Spooky Labeling and Presentation Ideas

If you’re having a Halloween party, you can turn mason jars into spooky cups for drinks. You can draw or paint creepy creatures on the jars or stick on labels that say silly things like “Witch’s Brew” or “Zombie Juice.” It’s lots of fun, and everyone will know which drink is supposed to be spooky.

Creating Washable and Reusable Drinkware

To make sure you can use your jars again and not just for one party, use washable paint or stickers. That way, after the party, you can clean them, and they will be ready for your next fun event. Remember, if a jar ever looks cracked or chipped, tell an adult so they can check if it’s still safe to use.

Safe Sealing Techniques for Beverages

If you want to put lids on your drink jars to keep bugs out or to shake up a spooky concoction, you need to make sure the lids close tight. Use the flat metal lids that come with the jars and screw on the ring part tightly. If you’re using straws, make a small hole in the lid so the straw can fit through, but liquids won’t splash out.

Mason Jar Witch’s Apothecary Jars

Designing Labels for Your Potion Jars

Turn your mason jars into a witch’s collection of potion ingredients. You can make labels out of paper and draw things like “Dragon Scales” or “Fairy Dust” on them. Stick the labels on your jars and fill them with fun things that match the names, like shiny glitter or colored water.

Selecting Contents for a Witches’ Brew Display

You can fill your jars with lots of different things to look like potion ingredients. Dried herbs, colored water, plastic bugs, or cotton balls that look like fog are all good ideas. Arrange your jars together, and you’ll have a whole witches’ brew display.

Assembly and Presentation Tips

When you’re setting up your witches’ apothecary jars, put them at different levels so people can see all of them. You can use books or boxes to make some jars higher. Remember to keep these jars away from little kids or pets, especially if you put things inside that shouldn’t be eaten.

Halloween Crafting with Mason Jars

Halloween Countdown Mason Jar Calendar

Daily Treat-Filled Jars Concept

You can make a countdown to Halloween with mason jars. Get enough jars for each day leading up to Halloween—one jar for each day. Fill each jar with a little treat or a note with something fun to do. Then each day, you can open one jar and get a surprise!

Designing and Arranging the Countdown Display

Decorate each jar with numbers for the days of the countdown. You can use stickers or paint them on. Then, line up your jars in order or make a fun design with them. Each day, you get to find the right jar with the number that matches the day and see what’s inside.

Creative Labeling and Numbering

Get creative with how you write the numbers on your jars. You can make them look spooky with drips like blood, or cute with Halloween stickers around the numbers. Each jar will look fun, and it’s like a tiny party every day when you open one.

Crafting a Mason Jar Pumpkin Patch

Painting Techniques for Realistic Pumpkins

To make your jars look like pumpkins, you’ll need orange paint. Paint your whole jar orange and add lines from top to bottom to make it look like a pumpkin’s ridges. You can even add a little brown stem on top by gluing on some felt or painted cork.

Assembling a Mason Jar Pumpkin Display

Once you’ve made a bunch of pumpkin jars, you can set them up to look like a little pumpkin patch. You can put them on a table or line them up on some green fabric or paper that looks like grass. It’s like having your own pumpkin farm, but indoors.

Ideas for Group Crafting and Family Activities

Making mason jar pumpkins is more fun with others. You can have a crafting day with your family or invite some friends over for a pumpkin-making party. Everyone can paint and decorate their own jars. In the end, you’ll have lots of different pumpkins, and every one will be special.

Find your new Halloween Crafting with Mason Jars on this page.

Halloween Crafting with Mason Jars Read More »

Creepy DIY Halloween Props

Imagine being the star of your very own spooky Halloween story with some awesome homemade props that can make everyone go “wow” and maybe a little “yikes”! Your hands can create magical and super scary things for Halloween all by yourself. This article is all about cool and creepy do-it-yourself Halloween props that are fun to make. You’ll learn how to turn simple things around your house into ghosts, witches, and monsters that will make your friends and family think your home is the best haunted house ever! Let’s get your place ready for a frightfully fun time.

Find your new Creepy DIY Halloween Props on this page.

Planning Your Haunted House

Planning your very own haunted house is a super fun way to get into the spooky spirit of Halloween. You’ll get to create a place that can make your friends and family feel excited, a little bit scared, and most importantly, have a great time. Let’s go through how you can do that.

Choosing a Theme

When you start planning your haunted house, the first thing you should think about is choosing a theme. Maybe you love the idea of a creepy circus or a ghostly mansion. Pick something you think is really scary and fun. Remember, your theme will help you decide how everything in your haunted house will look, feel, and sound.

Setting the Scene

After you’ve chosen a theme, it’s time to set the scene. This means you’ll decorate each room to match your spooky theme. Use your imagination to make the rooms look old, abandoned, or super scary. You can hang up curtains that look like spider webs or put up pictures that seem to watch you as you walk by.

Safety Considerations

The most important thing about your haunted house is that it’s safe for everyone. Make sure all the walkways are clear so no one trips, that all the decorations are secure and can’t fall down, and that all the lights are bright enough so people can see where they’re going. Safety always comes first!

Timeline and Budget

You’ll also need to think about how much time you have to get your haunted house ready and how much money you can spend. Plan out what you need to make or buy and decide when you need to start setting everything up to be ready for Halloween.

Sinister Silhouettes

Creating sinister silhouettes is a cool way to spook people out. Place them around your haunted house to surprise visitors.

Materials Needed

To make creepy silhouettes, you’ll need some black paper or cardboard, scissors, tape, and a flashlight or some other kind of light. If you want to go really big, you may need bigger sheets or even paint to cover larger areas.

Creating Human Shapes

You can make shapes that look like people or other scary things. Think about what makes you jump when you see a shadow—maybe a witch with a pointy hat or a tall figure with spooky hands. Draw these shapes on your paper or cardboard and then cut them out.

Positioning for Maximum Scare

To scare your friends, place your silhouettes in unexpected places. Behind a curtain, in a dark corner, or halfway up the stairs can be perfect spots. When they walk by, the shapes will look like something scary is waiting to jump out.

Lighting to Enhance Spookiness

Shine a light from behind the silhouette to make a shadow on the wall. This makes it look more like there’s a real creepy creature standing in the room. Move the light around until the shadow looks just right.

Creepy DIY Halloween Props

This image is property of images.pexels.com.

Get your own Creepy DIY Halloween Props today.

Ghoulish Graveyard

A ghoulish graveyard can be really spooky to walk through. You can make it look like the ghosts and ghouls are about to rise from their graves.

Tombstone Crafting Techniques

Making tombstones is easy and fun. You can cut them out of cardboard or foam, then paint them to look like old, cracked stones. Write funny or creepy names on them, and add the dates if you want to.

Aged Effects for Authenticity

To make the tombstones look like they’ve been in your graveyard for a long time, use dark paint to add cracks and weathering. You can also rub some dirt on them to make them look like they’ve been there forever.

Layout Design Ideas

Design your graveyard so that it has narrow paths for people to walk through, with your tombstones on either side. Think about where you could hide a skeleton or two, or where a ghost might suddenly appear.

Adding Fog for Eerie Atmosphere

To make your graveyard look super spooky, add some fog. You can use a fog machine if you have one, or you can make your own fog by mixing dry ice with water. Remember to be very careful and ask an adult to help with this because dry ice can be dangerous.

Creepy Crawly Components

Adding bugs and spiders can give everyone the creeps. Let’s turn your haunted house into a home for all kinds of creepy crawlies.

Spider Web Construction

Use cotton or special spider web decoration from the store to create realistic webs. Stretch out the cotton until it’s thin and wispy, then drape it around furniture and corners to make it look like spiders live there.

DIY Giant Spiders

To make giant spiders, you can use black balloons for the body and then add legs made from foam or sticks. Don’t forget to give your spider some scary red eyes. Place it in the middle of your web to guard its home.

Animating Your Insects

Make your insects move to really scare your visitors. You can hang small plastic bugs on strings and pull them to make them wiggle, or use electric fans to make the wings of bigger bugs move.

Placement for Startling Effects

Think about putting bugs and spiders where people won’t expect them: on door handles, inside cabinets, or dangling right above people’s heads. The more surprising, the better!

Creepy DIY Halloween Props

This image is property of images.pexels.com.

Horrifying Hangings

Hanging decorations can make your haunted house feel full of ghosts and other scary creatures.

Ghostly Figures from Sheets

Make simple ghosts by draping white sheets over balloons or foam balls. You can even draw faces on them with a marker. Then, hang them from the ceiling so they float in the air.

Creating Nooses and Gallows

For a more spooky hangings, you can make pretend nooses from rope and stick them on gallows made of wood or cardboard. Remember, these are just for pretend and should always be up high where no one can reach them.

Suspension Tricks for Floating Illusions

Use fishing line to hang decorations because it’s almost invisible. This makes things look like they’re floating all by themselves! It’s a really neat trick to make everything feel more ghostly.

Sound Effects to Elevate Fear

Add scary sounds like ghostly whispers or creaking noises that play when someone walks by your hanging decorations. This will make it seem like the ghosts are really alive.

Eerie Illuminations

To set the perfect spooky mood, you need eerie lights and shadows.

Homemade Lanterns and Luminaries

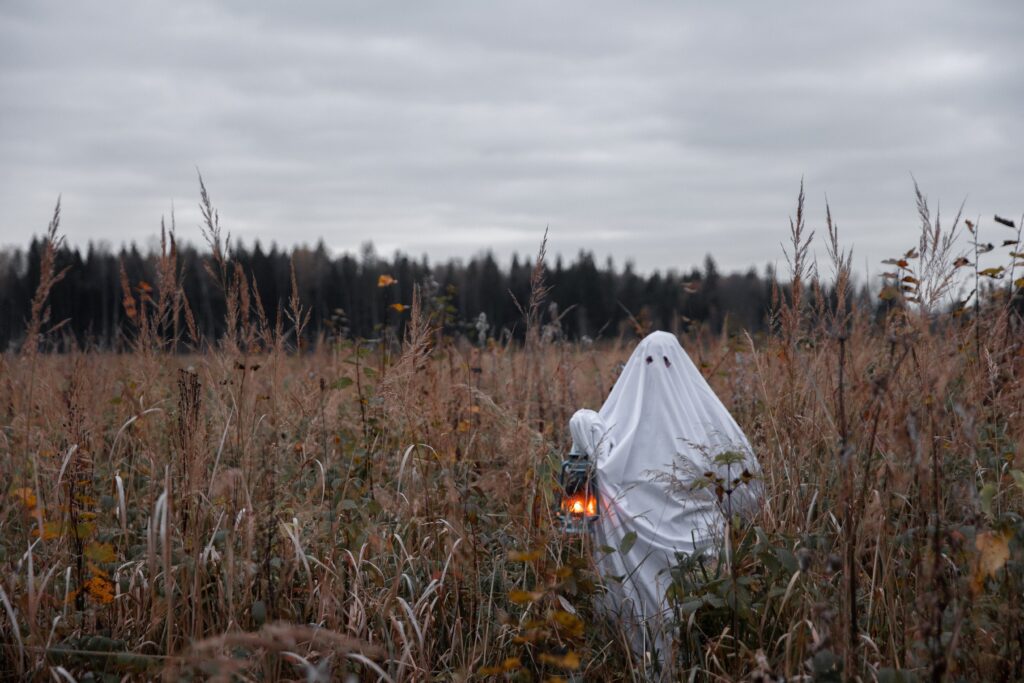
Create lanterns using jars and tea lights, or make luminaries by cutting spooky shapes out of paper bags and putting lights inside them. These will give off a creepy glow that looks amazing at night.

Using Black Light for Glow-in-the-Dark

Put up some black lights to make white things glow in the dark. You can also use glow-in-the-dark paint to draw scary pictures or handprints that only show up under the black light.

Shadow Play with Candles

Use candles (or fake LED candles for safety) to create flickering shadows. Place them behind decorations to cast scary shapes on the walls or ceiling.

Circuit Hacks for Flickering Lights

Learn a little bit about circuits and you can make lights that flicker on and off. This makes the whole room feel spooky like in an old haunted house. Ask an adult to help with this, because electricity can be dangerous.

Creepy DIY Halloween Props

This image is property of images.pexels.com.

Menacing Motion Props

Things that move are sure to get a scream out of your haunted house guests!

Motorizing Objects for Movement

You can make objects move by connecting them to a small motor. Imagine a skeleton that raises its arm when someone walks by!

Trigger Mechanisms for Surprises

Set up some triggers that make things happen when someone passes by. It can be simple, like a string that someone pulls when they step on a mat, to start a motor or play a sound.

Using Wind for Natural Motion

Open a window slightly or use a fan to make things move as if by magic. A curtain that flutters or a ghost that rocks can be very spooky.

Programming Simple Animatronics

If you know about programming, you can make your own animatronics with little computers like Raspberry Pi or Arduino. You could program a pumpkin to laugh when someone walks past!

Terrifying Tableaus

A tableau is like a frozen scene that tells a story. Create some scary ones in your haunted house!

Setting Up Macabre Scenes

Make a scene where it looks like something scary just happened. This could be a dinner table where all the guests turned into skeletons or a witch’s kitchen with a bubbling cauldron.

DIY Body Parts

You can make body parts from things around your house. Stuff some gloves to make hands, or fill a stocking with cotton to look like a leg. Add some red paint for blood if you want to.

Blood and Guts with Household Items

For guts, you can use cooked spaghetti or gelatin. Layer on some red food coloring and it’ll look just like the real thing. But remember, it’s all fake and just for fun.

Realistic Treatment for Shock Value

Add little details to your scenes to make them look real. Things like old-looking bottles, fake spiders, and dim lights will make your tableau very shocking and even a little gross!

Creepy DIY Halloween Props

Frightening Soundscapes

Sounds can make your haunted house even more spooky. Let’s learn how to do that.

Sound Effect Sources

You can find spooky sounds online or make your own. Howls, screams, and creepy music are just a few ideas that you can use.

Creating a Looping Audio Track

Loop your sound effects so they play over and over. This means they’ll keep going the whole time your haunted house is open.

Speaker Placement for Ambiance

Put speakers in hidden places so it’s hard for people to tell where the sounds are coming from. This makes everything feel more mysterious and scary.

Synchronizing Sound with Visuals

Try to match your sounds with what people are seeing. If there’s a thunderstorm in your haunted house, have a sound of thunder play when the lightning flashes!

Ghastly Gastronomy

No haunted house is complete without some ghastly snacks and drinks to enjoy.

Themed Halloween Snacks and Drinks

Make foods and drinks that fit your haunted house theme. You could make punch that looks like witches’ brew or cookies shaped like bats and ghosts.

Creepy Edible Decorations

Use edible decorations to make your food look scary. Things like gummy worms in the punch or plastic spiders on the cookies can be fun and creepy.

Food Presentation Ideas

Think about how you’ll show off your spooky snacks. Maybe you’ll have a bowl shaped like a cauldron or use a fake hand to hold the candy.

Recipes for Revolting Delicacies

Make some recipes that look gross but taste great. How about a cake that looks like a brain or pudding that looks like mud? They’ll be a big hit with everyone who’s brave enough to try them!

Happy haunting and have a safe and fun Halloween!

See the Creepy DIY Halloween Props in detail.

Creepy DIY Halloween Props Read More »
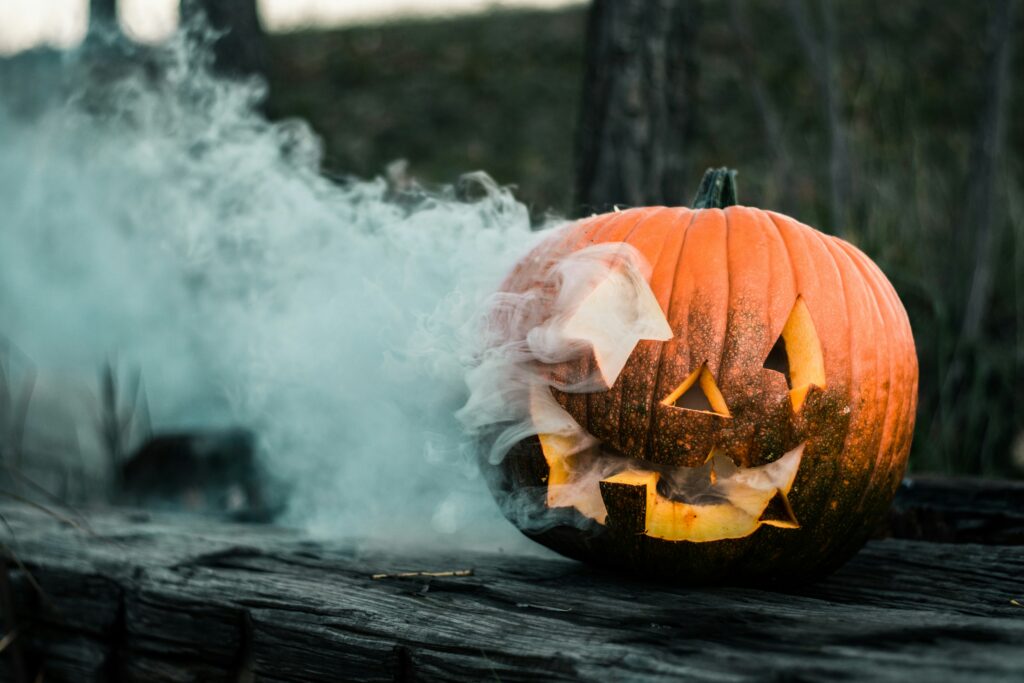
DIY Halloween Wreaths for Your Front Door

Imagine your front door with a spooky, fun wreath that you made all by yourself! Halloween is a great time to get crafty and show your festive spirit. With some simple supplies and a bit of creativity, you can make a Halloween wreath that will make all your neighbors say “Wow!” In this article, you’ll learn how to make your own Halloween wreaths that are perfect for your door, and you’ll see how easy it can be to add a touch of holiday fun to your home. So grab some glue, scissors, and let’s get started on a crafting adventure that will make your house the spookiest on the block!

DIY Halloween Wreaths for Your Front Door

Discover more about the DIY Halloween Wreaths for Your Front Door.

Understanding the Basics of Wreath Making

Making a wreath is like putting together a big, round puzzle. You start with something called a wreath base, which is what you attach all the pretty or spooky things onto to make it look nice.

Selecting Your Wreath Base

Your wreath base can be made of lots of different stuff. It can be a circle made of stiff wire, straw, or something called grapevine. Imagine it’s like the skeleton of your wreath – it holds everything in place.

Gathering the Right Supplies

To make a wreath, you need to get all your supplies ready. You might use leaves, flowers, ribbons, or even toys! You’ll also need something called floral wire to tie things onto your wreath, and scissors to cut stuff.

Tips for Wreath Longevity

To make sure your wreath stays looking good for a long time, keep it out of bad weather and don’t let it get too hot. Sometimes spraying it with water helps keep it fresh, like giving a thirsty plant a drink.

Choosing a Theme for Your Halloween Wreath

When you make a Halloween wreath, you get to decide what it should look like. Do you want it to be scary, or just fun and Halloween-y? Let’s think about some cool ideas!

Classic Autumn Harvest

A Classic Autumn Harvest theme might make you think of jumping in leaves. You can use things like orange flowers, yellow ribbon, and even little pumpkins to make it look like fall.

Spooky and Scary Motifs

If you like to be a little bit scared, you might want to make your wreath spooky. You can hang fake spiders, ghosts, or bones on your wreath to give a fright!

Iconic Halloween Characters

Maybe you want to show off your favorite Halloween characters on your wreath. You could use witches, vampires, or even a friendly Frankenstein’s monster.

Elegant Gothic Styles

If you like things to look fancy and a little bit dark, you could make an elegant gothic wreath. You might use black lace, fancy letters, and dark flowers to make it look really cool.

Learn more about the DIY Halloween Wreaths for Your Front Door here.

The Classic Black and Orange Wreath

Orange and black are the colors that might make you think of Halloween the most. They look great together, especially on a wreath!

Materials Needed

For this wreath, gather up some orange and black items like ribbons, fake flowers, and maybe some fun Halloween toys.

Step-by-Step Crafting Instructions

Start by wrapping your black and orange ribbons around the base, mixing them up to look nice. Then, add your flowers and toys by tying them on with your floral wire.

Customization Ideas

To make your wreath extra special, maybe add a little sign that says “Happy Halloween,” or some sparkly orange lights to make it shine. You can choose whatever makes you smile!

Glow-in-the-Dark Spooky Wreath

A glow-in-the-dark wreath can make night time extra exciting, lighting up when it gets dark outside.

Choosing Glow-in-the-Dark Elements

When you go to the store or look in your craft box, try to find things that glow, like paint, stickers, or even little toys.

Assembling Your Wreath

Put together your wreath by using the glowing items you found. You could paint parts of the wreath with glow-in-the-dark paint or stick on glowing stickers.

Safety Tips for Using Glow-in-the-Dark Materials

Just make sure that all your glow items are safe. They should be okay for kids to be around and not have any sharp edges or toxic stuff.

DIY Halloween Wreaths for Your Front Door

Witch-Themed Door Wreath

Witches are a big part of Halloween! They can be spooky or fun, and they make a great theme for a wreath.

Incorporating Witchy Accessories

You could add things like a little broom, a pointy hat, or even a fake cauldron to your wreath. Try to find items that make you think of a witch’s magical world.

Color Scheme and Design

Witches love the color purple, green, and black. You can make your wreath using these colors, maybe with a big purple bow or some green sparkles.

Final Touches for a Bewitching Appeal

For the final touch, you might want to add a pretend spider or a tiny potion bottle. These details will make your wreath look truly bewitching!

Eco-Friendly and Sustainable Wreath Options

Choosing to be kind to our Earth can be part of your Halloween fun, too. You can make a wreath without hurting the planet.

Using Natural and Recyclable Materials

Try to use things that come from nature, like pinecones, dried flowers, or fallen leaves. You can also use things that can be recycled like paper or cardboard.

Ideas for a Green Halloween

Your Halloween can be green in more ways than one. Besides using eco-friendly materials, you could even decorate your wreath with a nature theme.

Maintaining an Eco-Friendly Wreath

To take care of your eco-friendly wreath, don’t use things that can’t be recycled or reused. Also, try not to waste materials when you’re crafting.

Creepy Crawly Wreath with Insects and Spiders

Bugs and spiders might give you the heebie-jeebies, which is perfect for a Halloween wreath!

Selecting Insects and Arachnids Replicas

Find some plastic or rubber bugs and spiders to add to your wreath. You can find ones that look kind of real, or just go for ones that are cute but creepy.

Arranging Your Bugs for Maximum Creepiness

Put your bugs on the wreath like they’re crawling all around. You can have them climbing up the sides or hanging out in the middle.

Material Suggestions for an Authentic Look

If you want your wreath to look super real, use things like fake webs and dark colors to make it feel like a real bug hangout.

Haunted House Themed Wreath for a Spooky Entrance

Imagine a teeny, tiny haunted house right on your wreath—it’s like a spooky welcome sign for your home!

Crafting Miniature Haunted Houses

You might need a grown-up’s help to make a little haunted house out of cardboard or paper. Then you paint it to look scary and haunted.

Layout and Composition Techniques

Think about where you want to put your haunted house on the wreath. You can have it right in the middle, or maybe off to the side with other spooky things around it.

Illuminating Your Wreath for a Haunted Glow

To make your haunted house really stand out, you can add some tiny lights to it, or even use glow-in-the-dark paint, so it’s extra eerie.

Interactive Wreaths with Sound or Motion

Your wreath can do more than just look good—it can make sounds or move, too!

Incorporating Battery-Operated Devices

You can use little battery-powered things that make noise or move. Maybe a fake bat that flaps its wings, or a little box that makes spooky sounds when someone comes close.

Ensuring Safety and Weather Resistance

Make sure that any electronics you use are safe for outside and won’t get broken in the rain or wind.

Ideas for Interactive Elements

You can have lots of fun with this. What about a witch that cackles when you walk by, or a ghost that starts to dance? There’s no limit to your imagination!

Repurposing Household Items for Unique Wreaths

You can make a one-of-a-kind wreath using things you find around your house.

Finding Potential in Everyday Objects

Look around your home for stuff you’re not using, like old clothes, toys, or kitchen things. What can you turn into wreath decorations?

Creative Ideas for Upcycling

Turn your old stuff into new decorations. A sock could become a ghost, or a spoon might be turned into a spooky mirror.

Blending Function with Festivity

Your wreath can be pretty and useful, too. Maybe it holds candy for visitors, or has a little chalkboard for writing Halloween messages.

Remember, whether you like it spooky, sparkly, or silly, your Halloween wreath can be whatever you dream up. So grab your supplies and let your imagination run wild!

Check out the DIY Halloween Wreaths for Your Front Door here.

DIY Halloween Wreaths for Your Front Door Read More »
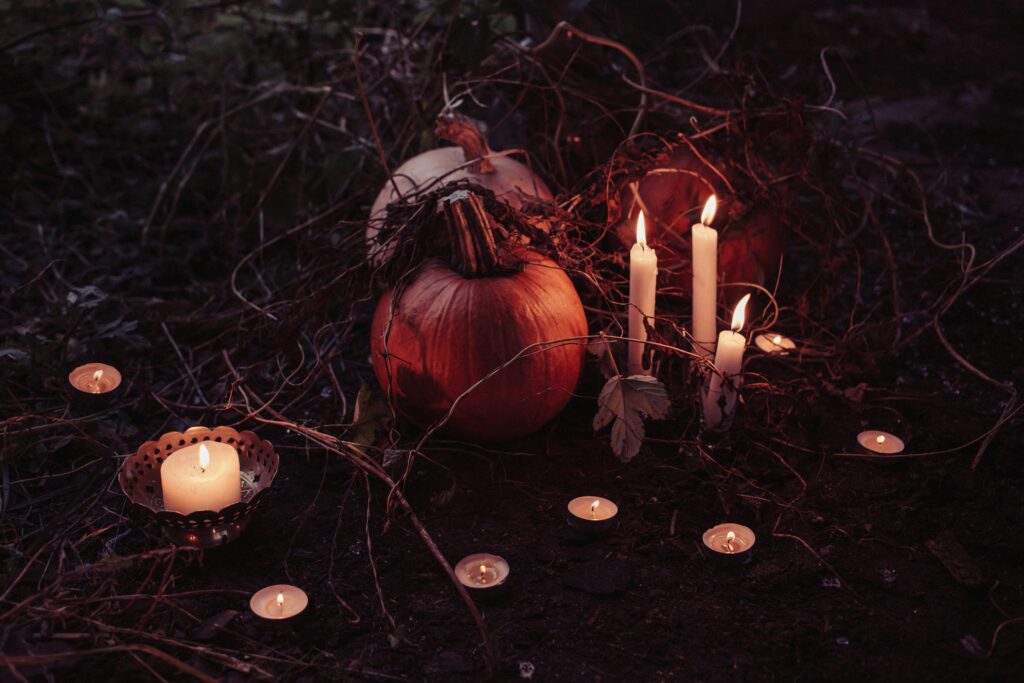
DIY Spooky Halloween Decorations

Imagine your house transformed into a spooky, ghostly place, filled with bats, cobwebs, and jack-o’-lanterns that make everyone’s eyes grow wide with excitement and a tiny bit of fear. You can make this happen by creating your very own Halloween decorations! This article is all about how to turn ordinary things around your house into fun and scary decorations that will make your friends and family say, “Wow!” It’s time to grab some glue, paint, and paper, and get ready to make some magic for the spookiest time of the year with your DIY spooky Halloween decorations.

DIY Spooky Halloween Decorations

This image is property of images.unsplash.com.

Discover more about the DIY Spooky Halloween Decorations.

DIY Spooky Halloween Decorations

Halloween is a fun time to dress up in costumes and decorate your home with spooky things. To make your place look like a haunted house, you can create your decorations. It’s not only fun, but you can also make them just how you like. Let’s find out how you can make your own spooky Halloween decorations!

Understanding the Theme

To start, think about what makes Halloween spooky for you. Is it ghosts, pumpkins, spiders, or something else? Halloween usually includes dark colors like black and orange, and things that are related to the night, like bats and witches. Once you have an idea of what you find spooky, you can start making your decorations.

Planning Your Decoration Strategy

You should have a plan before you start. Think about where you want to put your decorations. Maybe you want to decorate your room, the living room, or even outside in your yard. Decide which spooky things you want to make and where they would look best.

Gathering Materials

Now it’s time to gather your materials. You will need things like paper, paint, cardboard, and maybe some old clothes. You can find many of these things around your house. If you need to buy something, make sure you have an adult to help you.

Safety First: Preparing for Craft Time

Safety is very important. Make sure you have scissors that are safe for you to use. If you’re working with materials that could be sharp or hot, ask an adult for help. It’s also a good idea to cover the table with newspapers or an old cloth so you don’t make a mess.

Incorporating Lighting for a Spooky Effect

Lighting can make your decorations scary. You can use small lights to make shadows or to light up your decorations. Always remember to be safe with lights and ask an adult to help you with any electrical decorations.

Ghostly Figures

Creating Floating Ghosts

You can make ghosts that look like they are floating in the air. Use a white balloon for the ghost’s head and cover it with a white cloth or tissue. Draw spooky eyes and a mouth, and hang it from the ceiling with string.

Animated Ghosts with Simple Mechanics

You might want to make a ghost that moves! You can do this by attaching the bottom of your ghost to a piece of string and then pulling it to make it fly around. Remember to ask an adult to help you if it gets tricky.

Using Cheesecloth for Transparency

Cheesecloth is a light and see-through fabric. If you drape it over something, it can look like a ghostly shape. You can also make it stiffer with glue to keep the shape. Once dry, you can place it around your house for a spooky effect.

Eerie Ghost Sounds

What’s a ghost without a spooky sound? You can make ghost sounds by recording yourself saying “Boo!” or making a ghostly noise and playing it back. Hide the speaker so people don’t know where the sound is coming from.

Click to view the DIY Spooky Halloween Decorations.

Pumpkin Carving and Decorating

Choosing the Right Pumpkin

When picking a pumpkin to carve, look for one that is big enough and doesn’t have any bruises. It should also sit flat so it doesn’t roll away when you’re trying to carve it.

Carving Techniques

Ask an adult to help you with carving. You can draw a face on your pumpkin with a marker and then have an adult help you cut out the pieces. Always be careful with sharp tools.

Painting and Decorating Alternative

If you don’t want to carve, you can paint your pumpkin. Use paint to make a face or any design you like. You could even use stickers or glue things to your pumpkin to decorate it.

Preserving Your Pumpkin Creations

To keep your pumpkin looking good, you can put some petroleum jelly on the cut edges to keep it from getting soft. Remember to put your pumpkin in a cool place so it lasts longer.

Creepy Crawly Companions

Spider Webs from Cotton Wool

You can make spider webs from cotton wool by pulling it apart until it looks thin and web-like. Then, put it in the corners of your room like real spider webs.

DIY Spiders from Household Items

Make your own spiders by using things like black pipe cleaners for legs and a small black ball for the body. You can use googly eyes to make it look even spookier.

Insect Silhouettes on Windows

Cut out shapes of insects from black paper to stick on your windows. When it’s dark and the lights are on inside, they will look like real bug shadows.

Moving Bugs with Magnet Tricks

You can make bugs that move on their own! Stick a magnet on a plastic bug and use another magnet underneath your table to pull it along. It will look like the bug is crawling on its own.

DIY Spooky Halloween Decorations

This image is property of images.unsplash.com.

DIY Tombstones for Your Yard

Crafting with Cardboard or Foam

Make tombstones for your yard using cardboard or foam. Cut out a tombstone shape and paint it gray. You can even use markers to write funny or spooky names on them.

Realistic Aging Effects

To make your tombstone look old, you can dab some black or brown paint on it to make it look dirty or aged. You can also make cracks with a marker.

Adding Spooky Epitaphs

Think of a short spooky saying or a funny joke to write on your tombstone. It will make people laugh or give them a little scare!

Securing Tombstones for Outdoor Use

If your tombstones will be outside, you need to make sure they won’t tip over. You can stick a wood stick to the bottom and push it into the ground to keep it up.

Hanging Bats and Flying Critters

Paper Bats: Folding and Cutting Techniques

Paper bats are easy to make. Fold a piece of black paper and cut out the shape of a bat. When you unfold it, you will have a symmetrical bat.

Using Elastic Bands for Flapping Wings

To make the wings flap, you can attach them to the bat’s body with elastic bands. When you pull and let go, the wings will move like a real bat.

Mounting to the Ceiling

To hang your bats, you will need some string or fishing line. Stick them to the ceiling and watch them fly!

Creating Shadows and Movement

With the lights off, shine a flashlight on the bats to make their shadows look big and scary on the wall. You can also make them move with a little push.

DIY Spooky Halloween Decorations

This image is property of images.unsplash.com.

Wicked Witches and Wizards

Handmade Witch Hats

Make a witch hat with black paper. Cut a big circle for the brim and a triangle for the cone. Tape or glue them together, and you have a hat!

Creating a Witch Broom

Sweep up some spooky fun with a broom made from a stick and some twigs or pieces of straw. Tie them all together, and your witch can ride away.

Dressing a Witch’s Cauldron

A big pot can be your cauldron. You can put some dry ice in water to make it look like it’s bubbling. Remember never to touch dry ice, and ask an adult for help.

DIY Wizard’s Wands

For a wizard’s wand, you just need a stick. You can decorate it with paint, ribbons, or anything else you think a wizard would like.

Horrifying Portraits and Haunted Mirrors

Altering Thrift Store Art

Find an old picture and change it to make it look spooky. You can draw on it or glue things like spiders or fake eyes.

DIY Antique Frames

Make a picture frame look old and spooky by painting it black and then scratching some of the paint off to make it look worn.

Creating Mirror Illusions

Use reflective paper to turn a picture into a mirror. When someone looks at it, they will see themselves and get a little scare!

Adding Sound and Movement

Make your haunted mirror even scarier by hiding a small device that makes noise near it. Whenever someone comes near, they will hear spooky sounds!

DIY Spooky Halloween Decorations

Zombie Apocalypse Scenario

Clothing and Body Parts

Dress up some old clothes with red paint or ketchup to make them look like they’ve belonged to zombies. You can also make body parts from clothing stuffed with newspaper.

Fake Blood Recipes and Application

Mix red food coloring with corn syrup to make fake blood. You can put it on your zombie clothes or your body parts to look even scarier.

Building a Graveyard Setting

Arrange your tombstones and body parts to make your yard look like a cemetery. Add some dirt and leaves to make it look even more real.

Zombie Sounds and Special Effects

Make or find recordings of groaning and growling sounds to play. It will sound like there are real zombies around!

Safety Measures and Considerations

Avoiding Fire Hazards

Don’t put real candles in your decorations. Use LED lights instead. They’re much safer, especially around paper and fabric.

Non-Toxic Materials and Paints

Make sure the materials you use are safe. Don’t use paints or glues that could make you sick if you touch or smell them too much.

Ensuring Decor Stability

Make sure everything is securely set up so nothing can fall over or break. Use tape or weights to keep your decorations where they should be.

Preparing for Weather Conditions

If your decorations will be outside, think about the weather. Make sure they won’t be ruined by rain and that they’re not in places where they could blow away with the wind.

Now that you’ve learned how to make your spooky Halloween decorations, have fun getting creative! Remember, safety first, and always ask for help if you need it. Happy haunting!

Click to view the DIY Spooky Halloween Decorations.

DIY Spooky Halloween Decorations Read More »