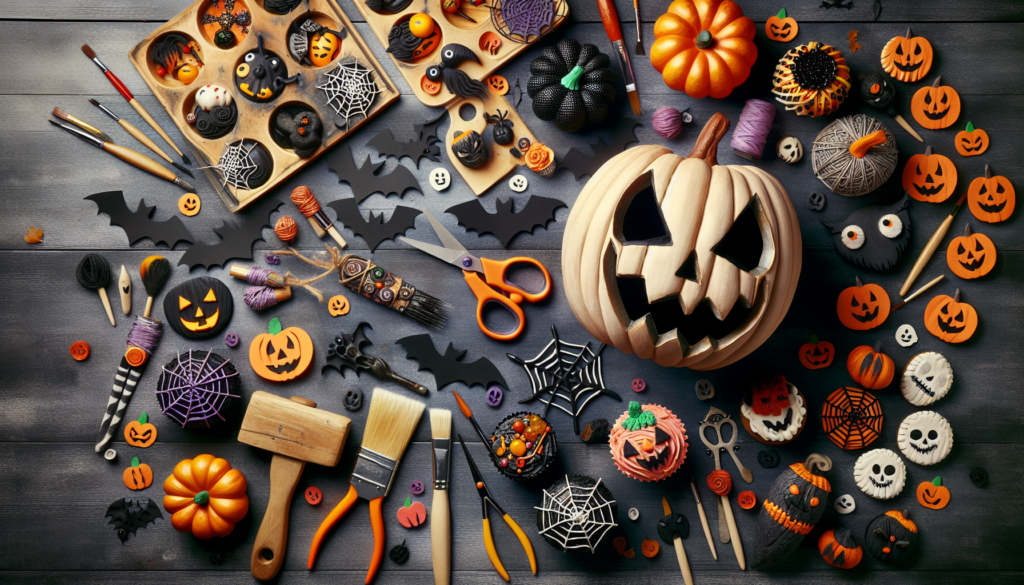
DIY Tricks for a Halloween Treat
Imagine creating your own spooky decorations and fun treats for Halloween all by yourself! With some easy do-it-yourself tricks, you can make this Halloween extra special. You’ll learn how to craft ghostly decorations and whip up yummy goodies right at home. It’s like magic, but you’ll be the magician making all the Halloween fun appear! So get ready to have your fingers sprinkled with a little bit of craft dust and your kitchen filled with the sweet smell of homemade treats. This is “DIY Tricks for a Halloween Treat” where the magic of Halloween comes to life with your own hands!


Choosing Your Halloween Theme
When you start thinking about Halloween, one of the first things you get to decide is what kind of spooky theme you want. A theme is like a big idea that all your decorations, costumes, and even snacks can match. It’s like picking your adventure in a storybook!
Popular Themes and Color Palettes
Some really popular themes you might like are haunted houses, creepy graveyards, or magical forests filled with fairies and goblins. And what colors come to mind when you think of Halloween? That’s right – orange and black are classic Halloween colors. You can also add in purples, greens, and reds to make things extra spooky and fun.
Incorporating Seasonal Trends
Every year, there might be something new that is really popular. Maybe there’s a new superhero movie out, and everyone wants to have a superhero Halloween. Or perhaps unicorns are all the rage. You can add these trendy ideas into your Halloween to make it feel super current and cool.
Focusing on Sustainability
You also want to think about the planet, right? It’s important to use things that don’t hurt the earth. You can reuse decorations from last year, swap costumes with your friends, or make your own out of things you find around the house. That way, you’re having fun and taking care of our world at the same time.
Edible Haunted House
An edible haunted house is like a gingerbread house, but spookier and made with treats you can eat after Halloween!
Assembling a Gingerbread Skeleton
First, you build the skeleton of your house with pieces of gingerbread. Think of it like a puzzle where every piece needs to fit together, standing up to make walls and a roof.
Spooky Candies as Decor
Use spooky candies to decorate your house. Gummy worms can be wriggly vines, and candy corn can be used as lights or to make a fence. Be as creative as you want – it’s your haunted house!
Holding it Together with Marshmallow Cement
Marshmallow fluff works like cement to keep your house from falling down. You can spread it between the pieces of gingerbread to stick them together, just like glue. But unlike glue, this cement is super tasty!

Monster Munch Popcorn
monster munch popcorn is a yummy snack that looks like it’s made for monsters but is perfect for kids!
Dyeing Popcorn Ghastly Colors
You can make your popcorn into ghastly colors by adding food coloring. Imagine having a bowl of green, purple, and orange popcorn – how monster-like!
Mixing in Edible Bugs and Worms
What’s a monster’s favorite snack? Edible bugs and worms, of course! Mix in some gummy bugs into your colored popcorn for a creepy-crawly treat.
Packaging Tips for Gifting
If you want to share your monster munch with friends, put it in clear plastic bags and tie them with twisty ties. You can even add a tag to say something funny like, “Worms and bugs inside, eat if you dare!”
Witch’s Potion
A witch’s potion is a fun drink that you can make to surprise everyone with how it bubbles and smokes!
Creating Bubbling Brews
To make your potion bubble, you can use baking soda and vinegar for a fizzy effect. Add in some food coloring to make it look even more magical.
Using Dry Ice Safely
To make your brew smoke like a real potion, you can use dry ice. But dry ice can be very cold and dangerous, so you must ask an adult for help when using it. Never touch it with your bare hands.
DIY Potion Bottles Labels
You can make your potion bottles extra cool by making labels with a homemade name. Take a piece of paper, write something like “Dragon’s Breath” or “Witch’s Whirlwind” on it, and stick it to your bottle.

Vampire Bite Cupcakes
vampire bite cupcakes are yummy treats that look like a vampire has had a little snack on them!
Red Velvet Base for a Bloody Look
The cupcake is made with red velvet cake mix, which gives it a deep red color, just like blood – don’t worry, though, it’s really just cake!
Injecting Edible ‘Blood’
You can use a little squeeze bottle to inject some red jam inside your cupcake so that when someone takes a bite, it oozes out like vampire blood.
Fang Decorations
To make them look even more like they’re part of a vampire’s diet, you can add small white candies or frosting shaped like fangs on the top of your cupcakes.
Mummy Pie Pops
Mummy pie pops are little pies on sticks wrapped up to look like mummies.
Choosing a Frightening Filling
Your pie pops can be filled with anything from pumpkin to apple filling. Choose something that screams “Halloween” to you.
Wrap-Around Pastry Technique
Use strips of pastry to wrap around your pie pops, leaving little gaps to look like a mummy’s bandages. This makes them look like they’ve just stumbled out of a tomb.
Edible Eye Decorations
Add a pair of edible eyes peeking from the bandages to give your mummy pie pops some personality.
Zombie Brain Jello
Zombie brain jello is a wiggly, jiggly snack that looks like a zombie’s brain!
Brain Mold Usage
To make your jello shaped like a brain, you’ll use a mold – it’s like a special bowl that shapes your jello when it cools and gets firm.
Flavor Combinations for Creepy Appeal
Mix up flavors that look gross but taste great. Lime jello can look like icky zombie stuff, but it tastes sweet and tangy.
Layering for a Rotten Effect
If you put different colors of jello in layers, it gives it a rotten look that’s perfect for a zombie brain. Let each layer cool before you add the next one so they don’t mix together.
Ghostly Marshmallow Pops
Ghostly marshmallow pops are simple, cute, and fun to make.
Shaping Marshmallows into Ghosts
You can shape your marshmallows into ghost shapes by pulling and twisting them gently. Or just use them as they are because marshmallows already look a bit like fluffy ghosts!
Using Chocolate for Ghostly Faces
Melting a little bit of chocolate and using a small brush or toothpick lets you paint faces on your marshmallow ghosts. Each one can be different – some can be happy, and others can look scared.
Stick Selection for Holding
Put your ghostly marshmallows on sticks so they’re easy to hold. You can use lollipop sticks or even clean twigs for a more natural look.
DIY Halloween Candy
Making your own Halloween candy is a fun activity, and you know exactly what’s in it because you made it yourself!
Homemade Gummy Worms
You can make gummy worms by using gelatin, flavored liquid like juice, and a worm-shaped mold. Wiggle them into your monster munch or eat them on their own!
Pumpkin Spice Truffles
Mixing up some pumpkin spice with chocolate and cream gives you a delicious truffle that tastes like fall. Roll them in some crushed cookies for an extra crunch.
Peppermint Patties in Halloween Shapes
Making peppermint patties can be like playing with clay. You make the minty filling and then roll it out and cut it with cookie cutters into pumpkins, ghosts, or bats.
Bewitched Beverage Station
Your bewitched beverage station is where your friends can come to get a magical drink at your Halloween party.
Homemade Rootbeer or Punch
You can make a big batch of homemade rootbeer or punch for everyone to share. Mix it up with your favorite flavors so it’ll be a big hit.
Decorating Drink Dispensers
Make your drink dispensers spooky by adding things like fake spiders or drawing drippy goo around the edges.
Glow-in-the-dark Straws and Cups
Using glow-in-the-dark straws and cups not only looks cool but also helps your friends see where their drinks are in the dark!
Remember that the most important part of all these treats and decorations is to have fun making and sharing them. When you put your heart into creating something, it’s always much more special. So enjoy getting ready for Halloween, and don’t forget to share your spooky snacks and crafts with your friends!

DIY Tricks for a Halloween Treat Read More »