DIY

Inviting Halloween Crafts for Porch Decor

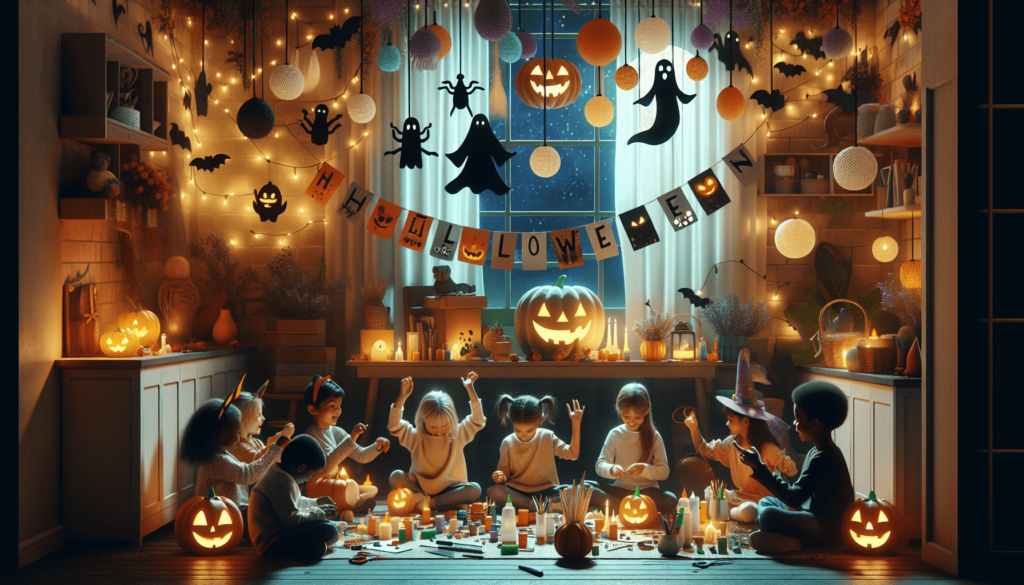
Imagine transforming your porch into a spooky yet inviting space where every trick-or-treater would love to visit! This article is all about creating magical Halloween crafts that you can make yourself to decorate your porch. From friendly ghosts to smiling pumpkins, you’ll learn how to make decorations that will make your home the talk of the neighborhood. Get ready to craft your way into the most memorable Halloween ever!
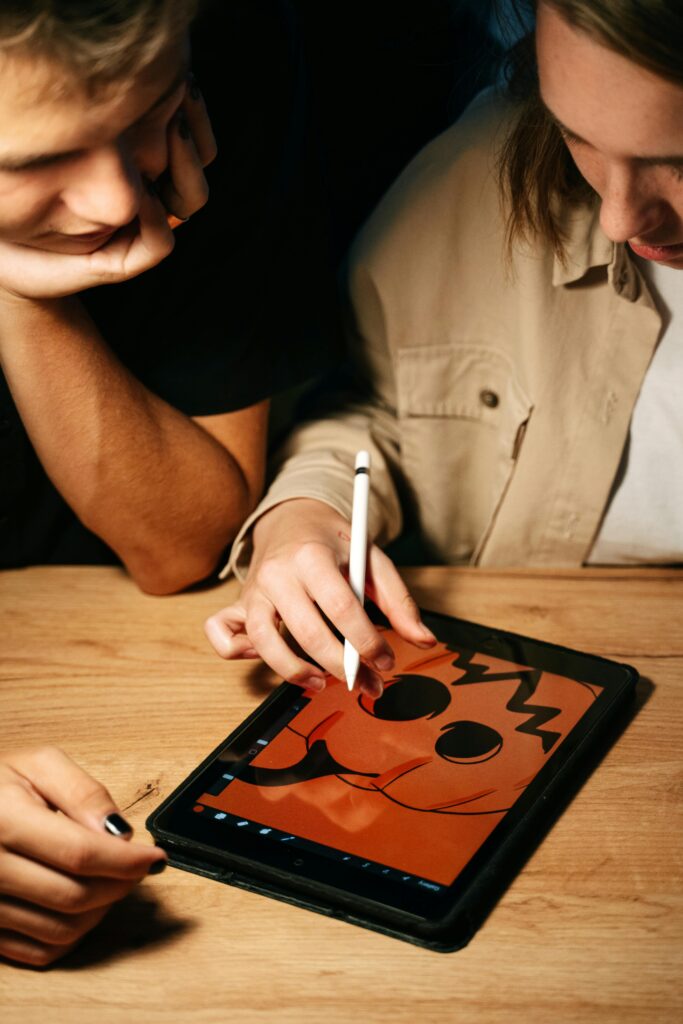
Inviting Halloween Crafts for Porch Decor

This image is property of images.pexels.com.

See the Inviting Halloween Crafts for Porch Decor in detail.

Spooky Halloween Lanterns

Materials needed for DIY lanterns

To make your own spooky Halloween lanterns, you’re going to need a few things. First, you’ll need some jars – they can be any size, just whatever you have around the house is perfect. Then, you’ll need paint (black, orange, and white work well), paintbrushes, and some battery-operated candles or small flashlights. If you like, you can also grab some Halloween-themed stickers or stencils to make your lanterns extra spooky.

Step-by-step instructions for creating lanterns

First, make sure your jars are clean and dry. Then, you can paint your jars in Halloween colors. Orange is great for a pumpkin look, black for a witchy vibe, and white if you want to make a ghost lantern. If you’re using stickers or stencils, stick them on your jars before or after painting, depending on the look you’re going for. Once everything’s dry, pop a battery-operated candle or a flashlight inside the jar. Ta-da! You’ve made a spooky lantern.

Variations for different skill levels

If you’re a little one, painting the jars in one solid color and sticking on some Halloween stickers can be a really fun and easy project. For those who are a bit older and want to try something more challenging, using stencils to paint designs like spider webs, bats, or ghosts on the jars can be a neat idea.

Ideas for displaying lanterns on your porch

You can line up your spooky lanterns along your porch stairs or place them on tables. Hanging them from small hooks is also a really fun way to create a floating lantern effect. If you made a bunch, you could even create a pathway leading to your front door for trick-or-treaters to follow.

Creepy Crawly Spider Web Decor

Materials for homemade spider webs

For spider webs that look real and creepy, you’ll need some white yarn or cotton batting. Cotton batting stretches really well, which makes it perfect for making your web look spooky. You’ll also need some tape or pins to secure your web in place.

Instructions for weaving your web

Start by cutting lengths of yarn or pulling apart pieces of cotton batting. Then, choose a starting point like a corner of your porch. Stretch the yarn across to another point and secure it with tape or a pin. Keep crisscrossing and connecting your lines of yarn to make it look like a spider web. Remember, spider webs are not perfect so your web shouldn’t be either.

Adding realistic spiders to enhance the creepy effect

You can buy some plastic spiders or even make your own out of black pipe cleaners. If you’re making them, twist the pipe cleaners into a spider shape with eight legs. Then, tuck them into your web. Adding a big spider in the center can make it look like the boss of the web.

Tips for placement and securing webs outdoors

Place webs in areas where they can stretch between two points, like between the porch railing and the wall, or between two pillars. Use clear tape or pins that won’t damage your home’s exterior to secure the ends of your web.

Get your own Inviting Halloween Crafts for Porch Decor today.

Haunted House Silhouettes

Choosing the right materials for silhouette cut-outs

For the haunted house silhouettes, you’ll want to use black poster board or thick black paper. It’s sturdy enough to stand up against some light outside but still easy to cut through.

Creating and cutting out haunted house designs

You can draw your haunted houses, bats, witches, or any scary design right on the black paper. If you’re not comfortable drawing freehand, you can always trace a design. Then, carefully cut out your designs with scissors. If you’re little, you might need an adult to help with this part.

Backlighting for an eerie glow effect

Once your silhouettes are ready, you can place them in your windows and use a lamp or flashlight behind them to create a spooky glow. This makes your haunted house look like it’s alive!

Ideas for arranging your haunted house scene

You can create an entire scene on your porch or in your windows. You could have a haunted house with bats flying around it and a witch flying in the sky. You can stick your cut-outs on the windows or hang them up with a little bit of string.

DIY Witch’s Cauldron

Gathering materials for your cauldron

You’ll need a large pot or bucket to act as your cauldron. Black plastic pots work really well for this. You’ll also want some green tissue paper or green fabric, and a flashlight or a battery-operated light.

Steps to create a witch’s brew effect

Place your green tissue paper or fabric inside the cauldron to look like a magical liquid. Then, put your flashlight or battery-operated light inside to light it up from within. This will make your cauldron look like it’s bubbling with a witch’s brew.

Adding fog or lights for extra spookiness

To make your cauldron even spookier, you can add some fake fog. If you don’t have a fog machine, placing some dry ice in water inside the cauldron can create a foggy effect. Remember, if you’re using dry ice, you need an adult to handle it because it can be very cold.

Safety tips for using electronic components

Always make sure that any lights you use are safe for outdoor use, especially if they might be near water or moisture. Battery-operated lights are usually the safest. And, if you’re using dry ice, ask an adult to help because it can be dangerous to touch.
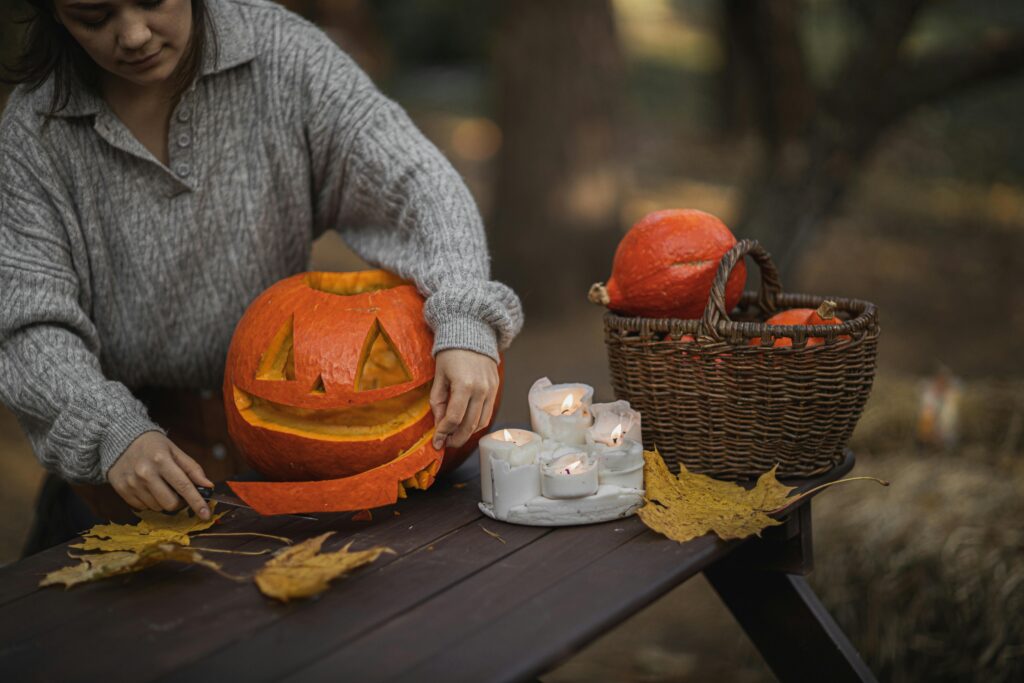
Inviting Halloween Crafts for Porch Decor

This image is property of images.pexels.com.

Pumpkin Patch Corner

Selecting pumpkins of various sizes and shapes

When you’re picking out pumpkins for your porch, try to get a variety of sizes and shapes. Having different kinds makes your pumpkin patch look more interesting and fun.

Ideas for decorating pumpkins without carving

You can decorate your pumpkins by painting them, using stickers, or even just drawing on them with markers. You can turn them into cats, witches, or even write messages like “Happy Halloween!”

Incorporating fall flowers and leaves

To make your pumpkin patch even more special, you can add some fall flowers and leaves around your pumpkins. This makes it look like your pumpkins are sitting in a real patch.

Setting up a mini-pumpkin patch on the porch

Arrange your pumpkins in a corner of your porch. You can use hay or straw to set them on to make it look more like a patch. Then, scatter your fall flowers and leaves around to complete the scene.

Ghostly Hanging Ornaments

Materials for making ghost ornaments

To make these fun ghosts, you need white fabric or tissues, string, and markers. You can also use small balls or crumpled paper to give your ghosts a head.

Creating different ghost expressions

Use markers to draw faces on your ghosts. You can make them scary, surprised, or even silly. It’s fun to see how many different expressions you can create.

Ideas for hanging and securing the ghosts

You can hang your ghosts from trees, the porch ceiling, or even the door handle. Use string to tie them up. If it’s breezy, your ghosts will flutter and look like they’re flying.

Using lighting to create shadow effects

Positioning a light underneath or behind your ghosts can create spooky shadows. This makes them even more ghostly, especially when the light moves and makes the shadows dance.
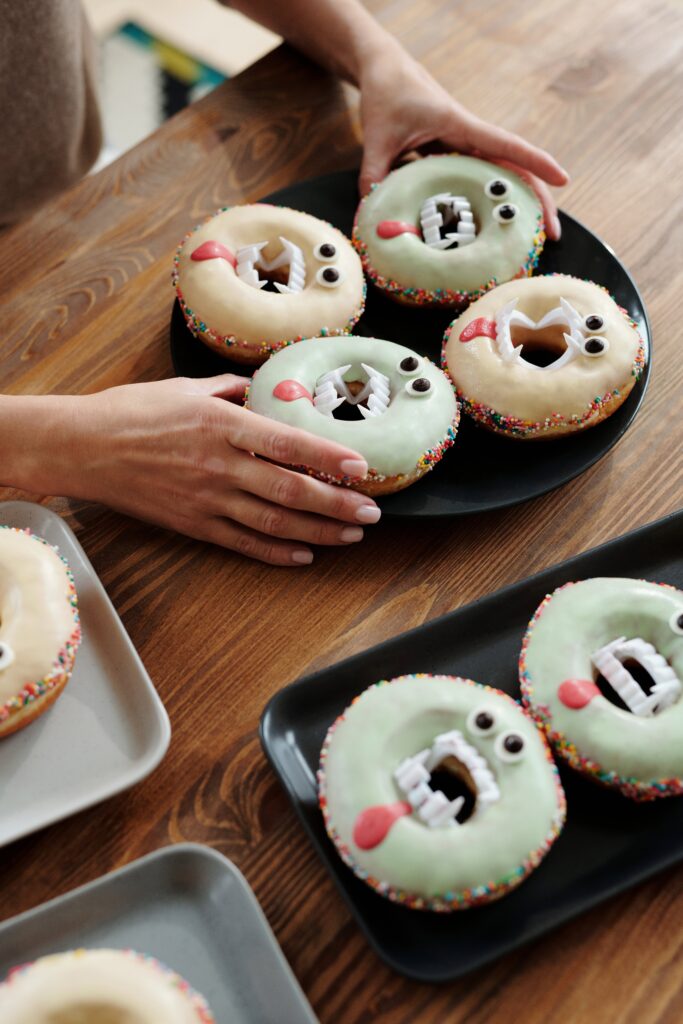
Inviting Halloween Crafts for Porch Decor

This image is property of images.pexels.com.

Frightening Front Door Wreaths

Choosing a theme for your Halloween wreath

First, decide what kind of spooky theme you want for your wreath. It could be ghosts, spiders, witches, or anything that feels Halloweeny to you.

Materials needed for a DIY wreath

You’ll need a wreath base, which can be made from vine, straw, or foam. Then, collect decorations that match your theme – like fake spiders, small skeletons, or artificial black roses.

Step-by-step construction of your wreath

Wrap your wreath base with ribbon or strips of fabric. Then, start attaching your decorations. You can glue them, tie them, or even tuck them into the wreath base if it’s made of vines or straw. Keep adding decorations until your wreath feels just spooky enough.

Adding finishing touches for a professional look

Add a big bow, some Halloween lights, or even a fake crow for an extra touch of spookiness. Remember, you can never be too spooky for Halloween.

Eerie Outdoor Sound Effects

Selecting soundtracks and sound effects

There are lots of scary sounds and music you can play to make your porch feel eerie. Look for soundtracks with howling wind, creaking doors, or ghostly moans.

Tips for setting up outdoor speakers

Make sure your speakers are safe for outdoor use. You can hide them behind decorations or place them up high so the sound comes from all around.

Synchronizing sound with other decorations

If you have decorations that move or light up, try to match the sound effects to their actions. Like a creaking sound when a skeleton moves or a witch’s cackle when lights flicker.

Safety considerations for electronics outdoors

Keep all cords and electronics away from places where they might get wet. Use extension cords that are meant for outdoor use and keep speakers at a volume that’s spooky but not so loud it bothers the neighbors.
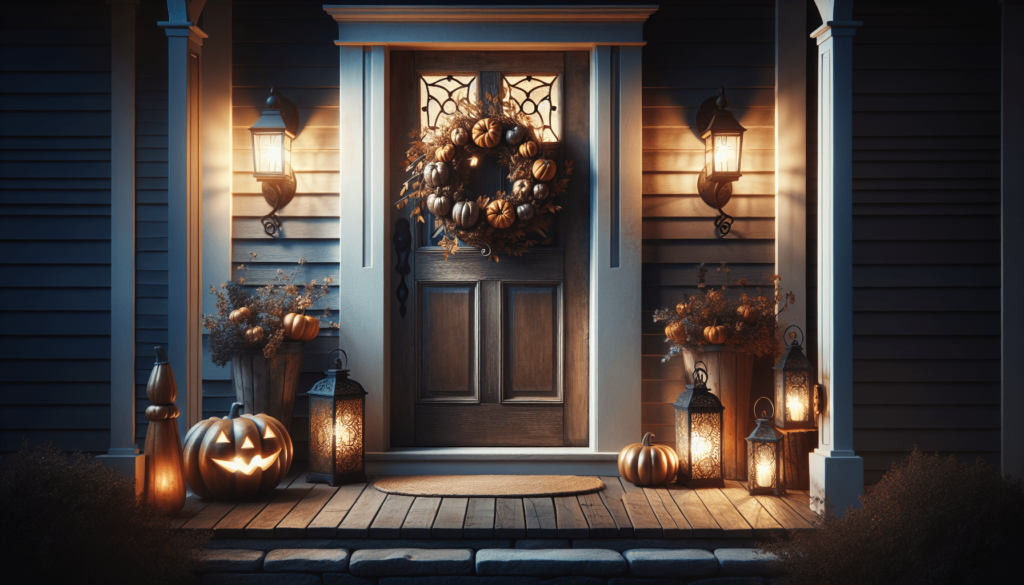
Inviting Halloween Crafts for Porch Decor

Animated Halloween Figures

Choosing the right figures for your porch

Pick figures that fit with the rest of your decorations. A moving witch, a crawling zombie, or even a flying bat can be fun choices.

Setting up and securing figures outdoors

Make sure your figures are securely fastened so they won’t tip over or blow away if it gets windy. You can use stakes, sandbags, or even just place them where they’re sheltered by other decorations.

Incorporating motion sensors for interactive scares

Some animated figures come with motion sensors that make them start moving or making noise when someone walks by. This can be a fun surprise for trick-or-treaters.

Maintenance and storage tips for animatronics

After Halloween, clean your figures and check for any damage. Store them in a dry place where they won’t get crushed. Taking care of them means they’ll be ready for next Halloween.

Scarecrow Sentry

Building your scarecrow from scratch

Start with some old clothes for your scarecrow’s body. Stuff them with straw, leaves, or even crumpled paper to give them shape. Then, add a head made from a burlap sack or an old pillowcase.

Ideas for scarecrow costumes and themes

Dress your scarecrow as something spooky, like a headless horseman or a zombie, for Halloween. You can also just put them in old farm clothes for a classic look.

Positioning and securing your scarecrow

Make sure your scarecrow is seen but also secure. You can sit them in a chair, tie them to a post, or even make them stand if you create a strong enough frame.

Adding interactive elements to your scarecrow

Make your scarecrow more fun by adding a voice box that speaks when someone comes near, or by giving it moving parts, like arms that lift in the wind. Remember, the goal is to make your porch the spookiest and most fun place for Halloween.

Check out the Inviting Halloween Crafts for Porch Decor here.

Inviting Halloween Crafts for Porch Decor Read More »

Halloween DIY Flower Arrangements

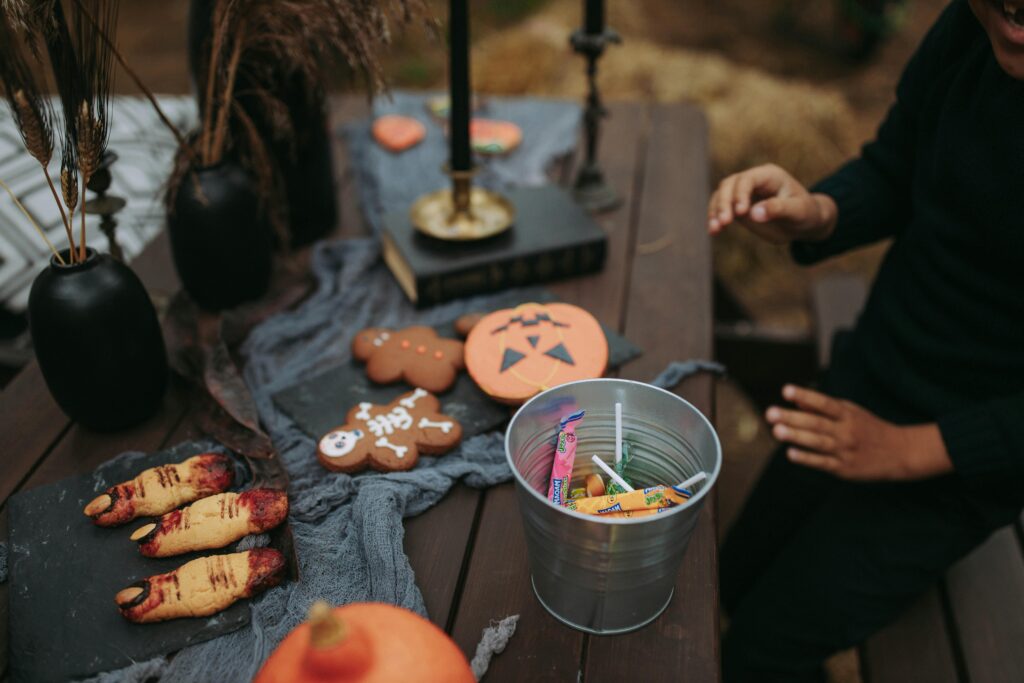
Today, you’re going to learn all about making your very own Halloween flower arrangements! Imagine using flowers to create something spooky and fun that you can decorate your house with for Halloween. You’ll get to pick out your favorite flowers and maybe even find some Halloween decorations to mix with them. It’s like making your room ready for a Halloween party where the flowers are the stars. Keep reading, and you’ll find out how to turn ordinary flowers into something extraordinary that screams Halloween.

Find your new Halloween DIY Flower Arrangements on this page.

Choosing the Right Flowers

When you start making your own Halloween flower arrangement, picking the right flowers is super important. Let’s dive into how you can pick the perfect flowers that shout “Halloween”!

Selecting Halloween-themed colors

Think about the colors you see a lot during Halloween – like orange, black, purple, and even green. These colors are great to use for your flower arrangement because they remind everyone of Halloween. Orange flowers can be like little pumpkins, while black flowers look mysterious and spooky.

Considering seasonal flowers

It’s also a good idea to choose flowers that are in season during Halloween. This means they are fresher and might even cost less. Fall flowers like marigolds (which are bright and orange) and chrysanthemums come in lots of Halloween colors!

Incorporating non-traditional plants for a spooky effect

Who says you only need to use flowers? You can use other plants to make your arrangement look even spookier. Think about adding some twisty branches or dark leaves. These can make your arrangement look like it came from a haunted forest!

Tips for ensuring flower longevity

You want your spooky flowers to last as long as possible, right? Make sure to cut the stems at an angle so they can drink lots of water. Changing the water every day and keeping your flowers away from direct sunlight also helps them stay fresh longer.

Selecting a Theme

Picking a theme can make your Halloween flower arrangement extra special. Let’s check out some fun ideas!

Classic Halloween themes

Classic themes are all about pumpkins, ghosts, and witches. Think about using orange and black flowers, and maybe you can even find some cute ghost decorations to add in!

Elegant Halloween arrangements

If you want something a bit fancier, you can create an elegant Halloween arrangement. Use deep purples and add some silver or gold to make it look chic and spooky at the same time.

Kid-friendly options

For a kid-friendly arrangement, think fun and not too scary. Bright colors, smiling pumpkins, and maybe even some candy hidden among the flowers can make it perfect for kids.

Horror-inspired floral designs

If you love spooky stories and movies, you might want to make a horror-inspired arrangement. Dark red flowers can look like they’re from a vampire’s garden, and adding some fake cobwebs can make it extra creepy.

Halloween DIY Flower Arrangements

This image is property of images.unsplash.com.

Check out the Halloween DIY Flower Arrangements here.

Choosing a Container

The container you choose for your flowers is super important. It’s like the outfit for your flower arrangement!

Repurposing household items

You can use lots of things you already have at home. How about a Halloween candy bowl or even a carved-out pumpkin? Get creative!

Using traditional Halloween decorations

If you have Halloween decorations like cauldrons or witch hats, these can be super cool to use as containers for your flowers.

DIY container decoration ideas

If you like crafts, you can decorate your own container. Use paint, stickers, or even wrap a container in bandages to make it look like a mummy!

Considering the arrangement’s placement

Think about where you want to put your arrangement. If it’s for the dinner table, make sure it’s not too tall so people can see over it. If it’s for the porch, make sure it’s big enough to be seen from the street.

Prepping Your Flowers and Materials

Before you start arranging, you need to get your flowers and materials ready.

Cleaning and cutting your flowers

Make sure to clean your flowers and cut the stems. This helps the flowers drink water and live longer.

Choosing the right filler greens

Filler greens help your arrangement look full and can add to the Halloween feel. Look for dark or spiky greens to add some spookiness.

Gathering additional decorative elements

Think about adding some Halloween decorations like small pumpkins, fake spiders, or anything else that fits your theme.

Preparation of tools and workspace

Make sure you have everything you need like scissors, and maybe even some gloves if you’re working with thorny stems. Clear a space to work so you have enough room.

Halloween DIY Flower Arrangements

This image is property of images.unsplash.com.

Arrangement Techniques

Now, let’s put it all together!

Basic principles of flower arrangement

You want to start with your biggest flowers first and place them where they look best. Then, fill in around them with smaller flowers and greens.

Creating a focal point with larger blooms

Pick a big, beautiful flower to be the star of your arrangement. This draws everyone’s eye and makes your arrangement stand out.

Layering colors and textures

Mixing different colors and textures makes your arrangement more interesting. Don’t be afraid to mix things up and see what looks good together.

Incorporating elements of height and drama

Adding some taller elements or interesting shapes can make your arrangement look really dramatic and perfect for Halloween.

Adding Halloween Accessories

To make your arrangement scream Halloween, don’t forget the fun accessories!

Incorporating Halloween toys and figurines

Small Halloween toys or figurines can make your arrangement a lot more fun. It’s like they’re hidden surprises among the flowers!

Using cobwebs and faux insects for effect

Fake cobwebs or little plastic spiders can add a creepy touch to your flowers. It’s all about making it feel like Halloween.

Adding LED lights or candles for ambiance

Lights can make your arrangement extra special, especially in the evening. Just make sure if you’re using candles, they’re in a safe spot where they can’t start a fire.

Customizing with handmade crafts

If you like making things, you can add your own crafts to the arrangement. Maybe you’ve made a tiny witch hat or some paper ghosts. Go ahead and add them in!

Halloween DIY Flower Arrangements

This image is property of images.unsplash.com.

Creating a Centerpiece

Your Halloween flower arrangement can be the perfect centerpiece for any gathering or just to spruce up your home for the season.

Planning the size and shape

Think about where your centerpiece will go and plan its size and shape to fit perfectly. Not too big, not too small, just right.

Balancing the arrangement

Make sure your centerpiece looks good from all sides. This means spreading out the colors and elements so every angle is interesting.

Centerpiece ideas for Halloween parties

For a party, you might want a centerpiece that’s a bit more exciting. Think about adding dry ice for a fog effect or making it part of a game.

Dinner table centerpiece tips

Remember, for the dinner table, you want your centerpiece to not block anyone’s view. It should be beautiful but not in the way of the conversation.

Front Porch Decor

Your front porch is the first thing people see, so make it Halloween-ready with your flower arrangement!

Welcoming arrangements for the entryway

A nice big arrangement by your front door can welcome guests and trick-or-treaters. Use lots of Halloween colors and maybe a sign that says “Happy Halloween!”

Using pumpkins and gourds

Pumpkins and gourds are perfect for the porch. You can even use them as containers for your flowers, or just arrange them around your flower display.

Themed door wreaths

A Halloween wreath on your door is another great way to welcome people. You can make one with flowers, or add some to a wreath made of leaves or twigs.

Safe outdoor lighting options

If you’re lighting up your porch, make sure to use lights that are safe for outdoors. This way, even at night, your Halloween decorations can shine.

Halloween DIY Flower Arrangements

Eco-Friendly Options

We all want to take care of our planet, so here are some ideas for making your Halloween decorations a bit greener.

Using live plants and sustainable materials

Instead of cut flowers, consider using potted plants that can live on after Halloween. Look for materials that are easy on the environment like paper or natural fabrics.

Creating compostable arrangements

If you do use cut flowers, think about making your arrangement compostable. This means avoiding plastic and using natural materials instead.

Tips for reducing waste

Try to use decorations that you can reuse every year. And when it comes to flowers, maybe you can plant them if they’re not too spooky for your garden!

Ideas for reusing Halloween decorations

After Halloween, see if there are decorations you can repurpose or give to someone else. Maybe a friend is already planning next year’s party!

Workshops and Community Events

Getting together with others to share ideas and have fun making arrangements can be a great way to spend a Halloween-themed day.

Finding local flower arranging workshops

Check out if there are any workshops in your area. It’s a fun way to learn new skills and meet people who also love Halloween and flowers.

Hosting a DIY arrangement party

You could also host your own party. Invite friends over and everyone can make their own spooky arrangement to take home.

Sharing creations on social media

Don’t forget to show off your creations! Share them on social media and see what everyone thinks. You might inspire someone else to make their own.

Engaging with the community for ideas and inspiration

The best part about sharing is seeing what others have made. You can get so many great ideas and inspiration from people all over the world. So, have fun making your Halloween flower arrangements and see what spooky, beautiful, and creative ideas come to life!

Find your new Halloween DIY Flower Arrangements on this page.

Halloween DIY Flower Arrangements Read More »
Cute Halloween DIY Crafting for Kids

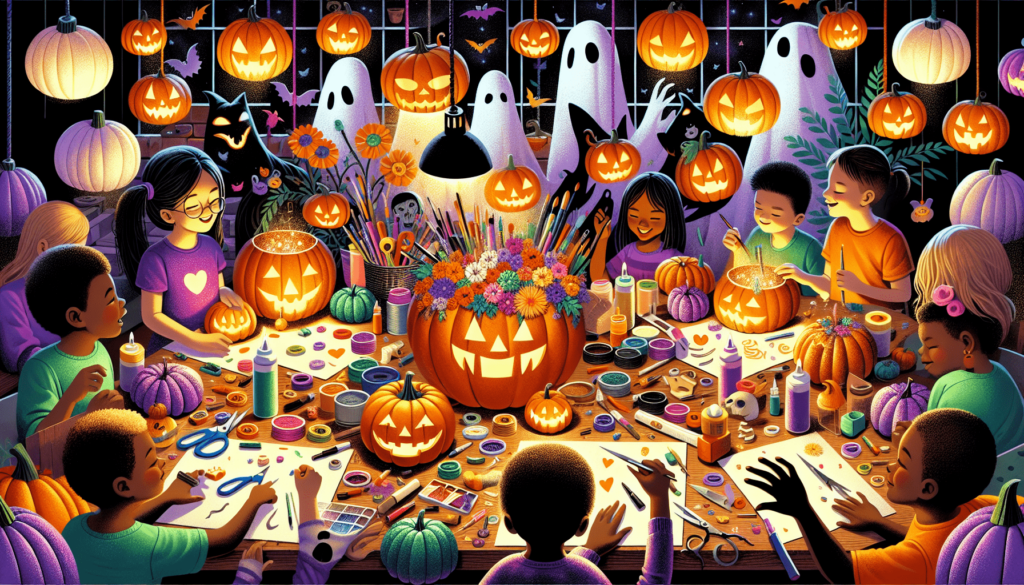
Imagine making your own Halloween decorations and crafts that are super cute and just for you! In this article, you’ll learn how to create fun Halloween projects that you can do by yourself or with friends and family. From spooky ghosts to adorable pumpkins, these crafts are perfect for adding a bit of Halloween spirit to your home. Let’s get your creative juices flowing and start crafting some amazing Halloween decorations!

See the Cute Halloween DIY Crafting for Kids in detail.

Spooky Paper Plate Ghosts

Getting ready for Halloween can be a lot of fun, especially when you make your very own decorations. Let’s start with something simple and super fun: Spooky Paper Plate Ghosts!

Materials needed: paper plates, white paint, black marker, yarn for hanging

You’ll need some paper plates, white paint, a black marker, and some yarn. That’s everything you need to make your ghost!

Step-by-step instructions

First, paint your paper plate all white and let it dry. Make sure you cover it well so it looks like a real ghost. After the paint dries, use the black marker to draw a spooky or funny face on your ghost. Lastly, poke a hole at the top, tie some yarn through it, and now you’ve got yourself a ghost ready to hang!

Decorating ideas

You can get really creative here. Try using colorful markers, stickers, or even glitter to make your ghost extra special. If you want to try something different, you can cut the bottom of the plate to make it look like your ghost has wavy edges!

Safety tips for young children

When you’re painting and cutting, always have an adult to help you. Make sure not to put small decorations like stickers in your mouth. Safety first!

Creepy Crawly Spider Rings

Do you like creepy crawlies? Let’s make some spider rings you can wear to scare your friends!

Materials needed: black pipe cleaners, small black pom poms, googly eyes, glue

For these scary spiders, grab some black pipe cleaners, small black pom poms, googly eyes, and some glue.

How to twist pipe cleaners into spider legs

Take four pipe cleaners and twist them together in the middle. This twist becomes the spider’s body where you will attach the pom pom. Bend each end to look like spooky spider legs.

Attaching the pom pom to create the body

Glue the small black pom pom onto the twisted middle part of your pipe cleaners. This pom pom is your spider’s body.

Adding googly eyes for the final touch

Glue two googly eyes on the pom pom to give your spider a silly or spooky look. Wait for the glue to dry, and your spider ring is ready to wear!

Cute Halloween DIY Crafting for Kids

Get your own Cute Halloween DIY Crafting for Kids today.

Haunted Pumpkin Mason Jars

Let’s make some Halloween lights with a pumpkin twist!

Materials needed: mason jars, orange and green paint, paintbrushes, LED tea lights

You’ll need mason jars, orange and green paint, paintbrushes, and some LED tea lights to make your jars glow.

Painting your jar to look like a pumpkin

Paint the outside of your mason jar orange. You might need a few coats to make it nice and bright. Let the paint dry completely.

Using green paint for the lid to mimic leaves

Now, paint the lid green to look like the pumpkin’s leaves. Once the paint dries, you can place the LED tea light inside the jar to make it shine like a pumpkin.

Safety advice for using LED lights inside the jars

Remember to use LED tea lights instead of real candles, especially if you are putting the lid on the jar. LED lights are much safer and won’t get hot.

Witches’ Hat Origami

How about making a witch’s hat out of paper? It’s magic time!

Materials needed: black paper, optional decorations (stickers, glitter)

All you need is some black paper and whatever decorations you like, such as stickers or glitter.

Basic folds for creating a witch’s hat

Fold your black paper into a triangle, then bend the top down to look like a hat. You can ask an adult to help with the folds.

Ideas for customizing your hat

Now it’s time to decorate! Add some stickers or glitter to make your witch’s hat sparkle. Be as creative as you want.

Incorporating these into a Halloween display

You can make a few hats and display them around the house. They can be decorations on the table or you can even hang them up!

Cute Halloween DIY Crafting for Kids

Monster Rock Painting

Creating scary monsters or fun creatures on rocks can be a great outdoor decoration.

Materials needed: smooth rocks, acrylic paint, brushes, sealant spray

You’ll need smooth rocks, acrylic paint in various colors, brushes, and sealant spray to protect your painted rocks.

Preparation of rocks for painting

First, clean your rocks with water and let them dry. This helps the paint stick better.

Design ideas for cute monster faces

Use your imagination to paint cute or scary monster faces. Bright colors and big eyes usually look great!

Sealing your painted rocks for outdoor decoration

After the paint dries, spray your rocks with sealant. This protects the paint from rain and sun, so you can decorate your garden with them.

Ghoulish Lantern Jars

These lanterns will add a spooky touch to any room or porch.

Materials needed: glass jars, tissue paper (various colors), glue, LED candles

You’ll need glass jars, colored tissue paper, glue, and LED candles to create your lanterns.

Instructions for layering tissue paper on jars

Cut the tissue paper into small pieces. Then glue them all over the jar in a patchy pattern. You can overlap colors for a cool effect.

Creating faces for your ghouls

Once the glue is dry, draw spooky faces on your jars with markers. You can make them as scary or as silly as you like.

Lighting your lanterns safely with LED candles

Place an LED candle inside your jar to light up your spooky creation. Remember, LED candles are much safer than real ones.

Bewitched Halloween Wands

Wave your magic wand and let the Halloween fun begin!

Materials needed: sticks or dowels, paint, ribbons, glitter

For these magical wands, you’ll need sticks or dowels, paint, ribbons, and glitter.

Painting and decorating your wand

Paint your stick any color you like. Once it’s dry, decorate it with glitter, stickers, or whatever you wish to make it magical.

Attaching ribbons for a magical effect

Glue some ribbons at the top of your wand. They’ll look amazing when you wave your wand around.

Themes and inspiration for your wands

Think about what kind of magic your wand has. Is it for casting spells, turning things into chocolate, or maybe making things float? Decorate it based on its magical powers!

Felt Vampire Bookmarks

Keep your place in your favorite Halloween story with a cute vampire bookmark.

Materials needed: felt in various colors, scissors, glue, googly eyes

You’ll need different colors of felt, scissors to cut out shapes, glue, and googly eyes for your vampire’s face.

Cutting felt into vampire shapes

Cut your felt into a basic vampire shape. Don’t forget his cape!

Assembling your bookmark

Glue the pieces together to form your vampire. Add the googly eyes and any other details like a mouth or fangs.

Customization options for your vampire characters

You can make your vampire bookmark unique by choosing different colors for its cape or adding accessories like a bow tie or a hat.

Eerie Eyeball Slime

Slime is fun, but have you ever made it spooky?

Materials needed: clear glue, borax, water, plastic eyeballs

To make this eerie slime, you need clear glue, borax, water, and some plastic eyeballs for the spooky effect.

Mixing your slime ingredients

Mix the clear glue with water. In another bowl, dissolve a small amount of borax in water. Slowly add the borax solution to the glue mixture until it becomes slime.

Incorporating eyeballs into your slime

Once your slime is ready, mix in the plastic eyeballs. Now, as you play with your slime, you’ll find eyeballs looking back at you!

Storage and safety tips

Keep your slime in an airtight container so it doesn’t dry out. Remember, never eat the slime or the eyeballs, and always wash your hands after playing with it.

Ghostly Garlands

Decorate your room with a string of spooky ghosts.

Materials needed: white fabric or paper, string or yarn, markers, scissors

You’ll need white fabric or paper, string or yarn to hang them on, markers to draw faces, and scissors to cut them out.

Cutting ghost shapes

Cut out ghost shapes from your fabric or paper. You can draw a ghost on paper first and use it as a template.

Decorating faces on your ghosts

Using a marker, draw spooky or funny faces on your ghosts. Make each one unique!

Stringing ghosts to create a garland

Make a small hole at the top of each ghost and thread your string or yarn through it. Now you can hang your ghostly garland anywhere you like for a spooky decoration.

Check out the Cute Halloween DIY Crafting for Kids here.

Cute Halloween DIY Crafting for Kids Read More »

Halloween DIY Table Centerpieces

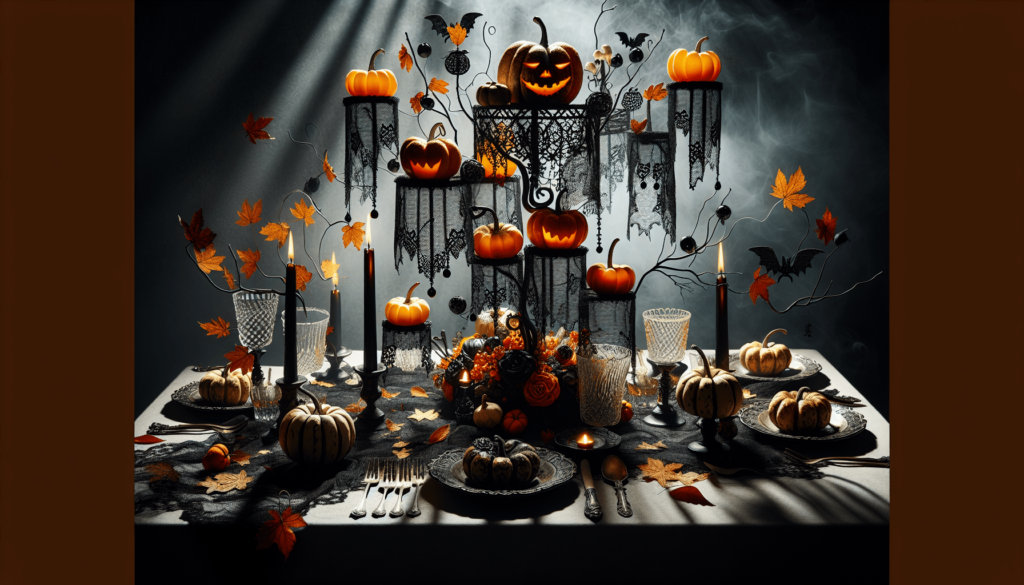
Imagine making your very own spooky centerpieces for Halloween to decorate your table and make it look super cool! This article will show you how to create Halloween DIY table centerpieces using simple things you might already have at home. You’ll learn how to turn ordinary objects into amazing Halloween decorations that will wow everyone who sees them. Let’s get creative and make your table the spookiest one ever!

Halloween DIY Table Centerpieces

This image is property of images.pexels.com.

Find your new Halloween DIY Table Centerpieces on this page.

Choosing Your Theme

When you’re getting ready for Halloween, the very first thing you need to decide is what your Halloween theme is going to be. This is like choosing what kind of adventure you want to have!

Classic Halloween: Pumpkins, Ghosts, and Bats

Imagine your table filled with smiling carved pumpkins, friendly ghosts floating around, and bats hanging above. This is a fun and traditional way to celebrate Halloween. You can make everything feel like it’s right out of a spooky, but friendly, Halloween story.

Elegant Gothic: Black Lace, Candles, and Dark Florals

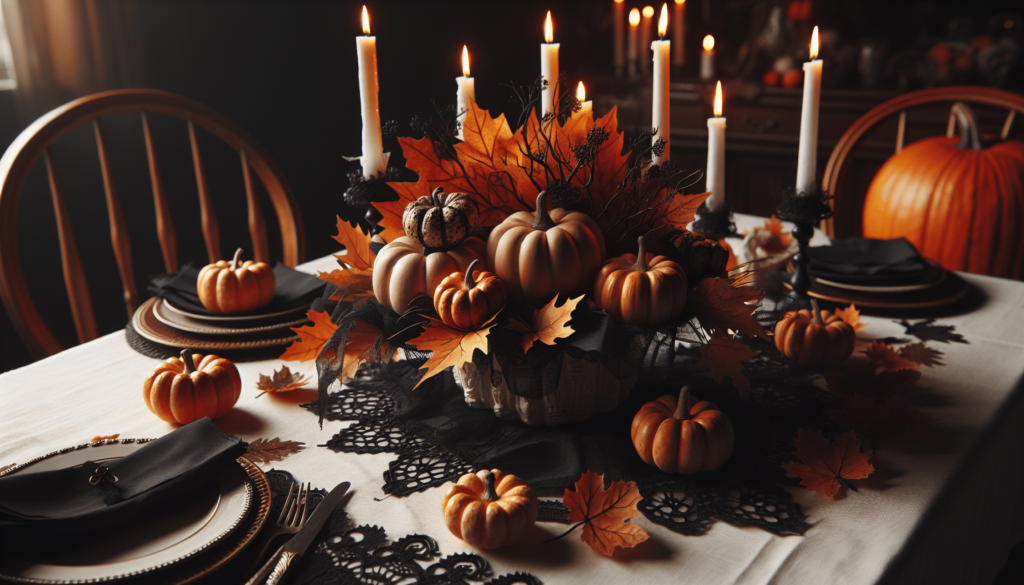
If you want something a little more fancy, an elegant Gothic theme might be perfect. Picture your table with beautiful black lace, candles casting soft shadows, and dark flowers looking mysterious. It’s like bringing a magical, spooky castle to your home!

Spooky Cute: Friendly Monsters, Colorful Candy, and Playful Decor

For those who love everything cute, a ‘Spooky Cute’ theme is filled with adorable monsters, heaps of colorful candy, and decorations that make everyone smile. It’s a way to celebrate Halloween that’s not scary at all and perfect for younger guests.

Haunted House: Creepy Dolls, Cobwebs, and Vintage Items

Want to feel like you’re dining in an old haunted house? Decorate with creepy dolls that seem to glance around, drape cobwebs across the corners, and use old-fashioned items to make it feel like you’re in a spooky story from long ago.

Autumn Harvest: Leaves, Acorns, and Warm Tones

For a cozy Halloween, an Autumn Harvest theme is filled with the beautiful colors of falling leaves, acorns, and everything that makes you think of a warm, inviting fall day. It’s a lovely way to celebrate the season itself.

Materials and Tools Needed

To make your Halloween table centerpieces, you’ll need some tools and materials. It’s like preparing your toolbox for a fun crafting adventure!

Basic Crafting Supplies: Scissors, Glue, and Paint

Start with the basics! You’ll need scissors for cutting, glue to stick things together, and paint to add colors. These are your main tools to create almost anything.

Specialty Items: Modeling Clay, LED Lights, and Fabric

For special projects, you might need modeling clay to shape your own decorations, LED lights to make things glow, and fabric to add texture and layers to your design.

Recycled Materials: Jars, Bottles, and Cardboard

You can use things like old jars, bottles, and cardboard. These recycled materials are not only good for the environment, but they also add character to your decorations.

Natural Elements: Branches, Pumpkins, and Flowers

Bringing in bits of nature like branches, pumpkins, and fresh flowers can make your centerpiece feel more alive and in touch with the season.

Where to Find Materials: Craft Stores, Nature, and Home

You can find these materials at craft stores, in nature (like picking up branches and leaves from the ground), and even around your home. It’s like a treasure hunt!

Learn more about the Halloween DIY Table Centerpieces here.

Pumpkin Centerpieces

Now, let’s dive into making some awesome pumpkin centerpieces for your table.

Carved Pumpkin Vases

Turn a pumpkin into a vase by carving it out and placing a container inside. You can fill it with flowers or branches, making it a beautiful and festive centerpiece.

Painted Pumpkin Stacks

Stack pumpkins of different sizes on top of each other after painting them with fun designs. You can use colors that match your theme, and it’ll look like a cute pumpkin tower!

Mini Pumpkin Holders

Use mini pumpkins as holders for things like candles or name cards. Just make a small hole on the top, and place whatever you need inside. It’s simple and adorable!

Decorative Pumpkin Baskets

Carve open a pumpkin and use it as a basket to hold candy or other decorations. It’s like having a little piece of the Halloween spirit right on your table.

Tips for Preserving Pumpkins Longer

To keep your pumpkins looking fresh, you can use a little bit of bleach in water to clean them out, or petroleum jelly on the cut edges to seal in moisture. This means your pumpkin decorations can last longer!

Candle and Light Decorations

Candles and lights can make your Halloween table glow with an enchanting light. Here’s how you can make your own spooky illuminations.

Creepy Candle Arrangements

Place candles of different heights together and let them drip wax over each other for a creepy effect. You can even put them in old bottles for an extra spooky look.

Homemade Halloween Lanterns

Make lanterns out of jars or paper bags cut with Halloween shapes. When you place a candle inside, the light will shine through the shapes, creating a magical effect.

Glow-in-the-Dark Centerpieces

Use glow-in-the-dark paint on jars, pumpkins, or even flowers to create centerpieces that light up the night without any candles. It’s like having little bits of moonlight right on your table.

LED Light-Up Tablescapes

Arrange LED lights under transparent or semi-transparent objects to create an otherworldly glow. It’s a safe way to add light to your table without any flames.

Safety Tips for Candles and Lights

Always keep candles away from anything that can catch fire, and never leave them burning unattended. If you’re using electric lights, make sure all the wires are safe and not frayed.

Halloween DIY Table Centerpieces

This image is property of images.pexels.com.

Floral Arrangements

Flowers aren’t just for spring! Here’s how you can use them to make your Halloween table spooky and beautiful.

Dark and Moody Floral Centerpieces

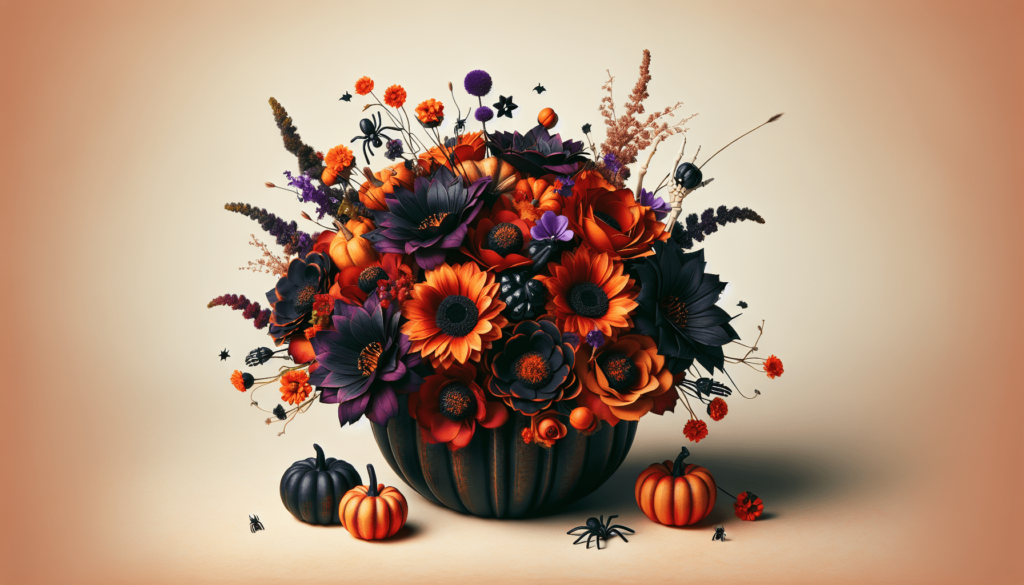
Choose flowers in dark colors like deep reds, purples, and blacks, and arrange them with some dried branches to create a mysterious look.

DIY Dried Flower Bouquets

Dry your own flowers by hanging them upside down in a dark, dry place. Once they’re dried, you can make bouquets that will last a long time and look perfect for a spooky vibe.

Incorporating Halloween Items into Florals

Mix in mini pumpkins, fake spiders, or small skulls with your flowers to add a little Halloween surprise in your bouquets.

Edible Flower Decorations

Some flowers are safe to eat and can make your dishes look beautiful. Just make sure the flowers you use are edible and haven’t been treated with any chemicals.

Maintaining Fresh Flowers Longer

Keep your fresh flowers in water and cut the stems a little each day to help them drink better. Also, keep them away from direct sunlight and heat to make them last longer.

Edible Centerpieces

Why not make your centerpieces delicious? Here are some tasty ideas.

Candy Corn Jars

Fill jars with layers of candy corn or other Halloween candies. It’s simple, colorful, and yummy!

Themed Fruit and Vegetable Platters

Arrange fruits and vegetables on a platter in fun shapes like pumpkins or ghosts. You can use cookie cutters to help shape them. Healthy and festive!

Creepy Cupcake Stands

Create a stand of cupcakes decorated to look like monsters, ghosts, or other Halloween themes. They’re a treat for the eyes and the taste buds.

Chocolate Graveyards

Make a little graveyard on your table with chocolate pudding, cookie crumbs for dirt, and pieces of candy or cookies for tombstones. It’s a spooky, sweet delight.

Healthy Halloween Snack Arrangements

Make healthy snacks look fun by arranging them in Halloween-themed shapes or containers. Think carrot fingers, celery ghosts, or yogurt ghouls!

Halloween DIY Table Centerpieces

This image is property of images.pexels.com.

Kids’ Craft Table

Let the little ones get in on the fun with a craft table just for them.

Simple Pumpkin Painting Station

Set up a station where kids can paint mini pumpkins. It’s less messy than carving and just as much fun.

DIY Halloween Masks and Accessories

Provide materials like paper, glitter, glue, and string, so kids can make their own Halloween masks and accessories. Let their imaginations run wild!

Crafting Edible Halloween Treats

Kids can also make their own Halloween treats with guidance. Think chocolate-dipped fruits or decorating cupcakes.

Ghostly Paper Crafts

Provide paper, scissors, and markers, and let kids create their own ghostly decorations. They can make paper chains, ghosts, or even paper lanterns.

Safety Tips for Kids’ Crafts

Make sure all the crafting materials are safe for kids to use, supervise any activities that might need adult help, and keep sharp tools out of reach of little hands.

Eco-Friendly Options

It’s also important to think about how we can celebrate Halloween in a way that’s good for our planet.

Using Biodegradable Materials

Choose materials that can break down naturally, like paper or natural fibers, for your decorations.

Repurposing Household Items

Before buying new decorations, see what you can use from around your house. Old clothes can become ghostly drapes, and empty jars can turn into lanterns.

Natural Dyes and Paints

If you’re coloring anything, try to use natural dyes or paints. They’re better for the environment and often safer for kids, too.

Compostable Decoration Ideas

Think about decorations that can be composted after Halloween, like real pumpkins, gourds, or cornstalks.

Reducing Waste During Halloween

Try to avoid single-use plastics and materials that can’t be recycled or composted. Every little bit helps in keeping our world spookily sustainable!

Halloween DIY Table Centerpieces

Setting Up the Table

Once you’ve gathered your materials and made your decorations, it’s time to set up your Halloween table.

Arrangement Tips for Visual Balance

Place taller items in the center or at the back, and shorter items in front. This lets everyone see the whole spooky setup.

Choosing Tablecloths and Runners

Pick a tablecloth or runner that matches your theme. Black for Gothic elegance, orange for a classic Halloween, or leaf patterns for an Autumn Harvest look.

Layering Decor for Depth

Use layers to add depth to your table. Place things on top of each other or use different textures to make it more interesting.

Incorporating Height for Dynamism

Mix things of different heights to make your table more dynamic. Tall candle holders, medium-sized pumpkins, and low dishes of treats can all coexist beautifully.

Final Touches: Adding Small Details

Remember the little details like themed napkin rings, confetti, or scattered leaves. They can make your table truly special.

Digital and Virtual Centerpiece Ideas

Even if you’re celebrating virtually, you can still make it festive!

Creating a Digital Backdrop for Virtual Parties

Design or find a spooky digital backdrop for your video calls. It sets the mood for a virtual Halloween party.

Interactive Halloween Apps and Games for the Table

Find apps or online games that fit the Halloween theme. You can play them with your guests, even if they’re far away.

DIY Halloween Zoom Backgrounds

Create your own spooky backgrounds for Zoom. You can use photos, drawings, or digital art to make something unique.

Virtual Reality Experiences for Guests

If you’re into technology, explore virtual reality experiences that can be shared during your Halloween get-together. It’s like stepping into another world together!

Combining Physical and Digital Decor Elements

Mix real decorations with digital ones by setting up your table against your digital backdrop. It blends the real and the virtual for a truly magical Halloween.

By following these ideas, you can create a Halloween table that’s full of fun, creativity, and spooky surprises. Happy crafting!

Learn more about the Halloween DIY Table Centerpieces here.

Halloween DIY Table Centerpieces Read More »

Halloween DIY Ornaments

If you love making things and Halloween is one of your favorite times of the year, then you’re going to be super excited about making your very own Halloween ornaments. Imagine turning pumpkins, ghosts, and witches into cute decorations with your own hands! These Halloween DIY crafts are not only fun to make but will also make your home look spooky and special. So, grab your craft supplies, and let’s start creating some magical Halloween decorations together!

See the Halloween DIY Ornaments in detail.

Choosing the Right Materials for Halloween Ornaments

Understanding Different Types of Craft Materials

When you’re making Halloween ornaments, it’s like going on a treasure hunt. You can find many different materials to use, just like different treasures. Some materials are hard and strong, like wood or plastic. Others are soft and easy to shape, like paper or clay. It’s important to think about what you’re making to choose the best material. For example, if you’re making a big, hanging ghost, you might want to pick a light and floaty material like cloth.

Eco-Friendly and Sustainable Options

Making Halloween decorations is more fun when we help the Earth too! You can look for materials that are good for the planet, like paper from recycled magazines or fabric from old clothes. Also, things from nature, like leaves or acorns, can make great decorations. These choices are not only good for our planet, but they also make your decorations special because you’re reusing materials in creative ways.

Where to Source Your Materials

Finding materials for your Halloween crafts can be an adventure. You can start at home by looking for old boxes, paper, or fabric that you don’t need anymore. If you want more, garage sales and thrift stores are like treasure chests waiting to be opened. They often have lots of things you can use, and it helps to recycle too. Craft stores are also great, especially for special items like sparkly glue or Halloween stickers. Just remember, the best materials are the ones that let you create, have fun, and care for our Earth.

Basic Tools Required for DIY Halloween Ornaments

Crafting Scissors and Cutting Tools

To make your Halloween crafts, you’ll need some tools to cut things into spooky shapes. A good pair of scissors is like a wizard’s wand; it lets you turn ordinary materials into magical decorations. For harder materials, you might need help from an adult to use special cutting tools. Safety first means more fun making and less time worrying!

Glues and Adhesives Best for Crafts

Sticking things together is a key part of crafting. Imagine glues and adhesives as the invisible force that holds your Halloween world together. There are many kinds, like white glue for paper or stronger ones for wood and plastic. There’s even glitter glue to add some sparkle! Remember, choosing the right glue means your spooky creations will last longer and look better.

Paints, Brushes, and Coloring Tools

Think of your Halloween decorations as a blank canvas waiting to come to life. Paints, markers, and crayons are your tools to add color, shadows, and details. Brushes can be big for covering large areas or tiny for adding small, scary details. Choosing water-based paints is a good idea because they’re safer and easier to clean up. Let your imagination play with colors and make your Halloween decorations unforgettable.

Halloween DIY Ornaments

This image is property of images.pexels.com.

Get your own Halloween DIY Ornaments today.

Theme Ideas for Halloween Ornaments

Classic Horror and Gothic Themes

For a really spooky Halloween, think about classic horror stories and gothic tales. Imagine creating your own haunted castle with paper and paint, or scary vampires out of clay. You can make decorations that remind everyone of thrilling stories and spooky nights, like gloomy bats or mysterious fog around a moon.

Cute and Spooky: Kid-Friendly Options

Not all Halloween decorations need to be scary. You can also make them cute and friendly! Think about a smiling ghost or a goofy pumpkin. These can be fun to make and won’t give you nightmares. Using bright colors and soft materials can help make your Halloween cute and spooky at the same time.

Modern and Artistic Halloween Inspirations

You can also turn Halloween into an art project. This means thinking outside the box and using colors like purple, green, and silver. You can make decorations that are different, like a neon-colored spider web or abstract pumpkin art. It’s all about being creative and making Halloween your own.

Creating Ghostly Ornaments

Materials and Templates

To start your ghostly creations, you need some white or light-colored fabric and maybe some paper to draw your ghost shapes. There are templates online, or you can draw your own spooky ghost shapes. You’ll also need something like yarn or string to hang them up.

Step-by-Step Instructions

  1. First, cut your fabric into ghost shapes using your template or drawing.
  2. If you want, you can draw faces on your ghosts with markers.
  3. Attach a piece of string or yarn to the top of each ghost.
  4. Now, your ghosts are ready to fly around and spook up the place!

Customization Ideas

You can make each ghost unique by adding different faces, using different fabrics, or even tying little bows around their necks. Think about creating a whole family of ghosts with big ghosts, little ghosts, and even pet ghosts!

Halloween DIY Ornaments

This image is property of images.pexels.com.

Crafting Witchy Decorations

Witch Hat and Broomstick Ornaments

For witchy decorations, you can make small witch hats out of black paper and tiny broomsticks from twigs and string. Imagine how cute they would look hanging around or placed next to each other as if a group of witches has just flown in!

Potion Bottle Charms

Potion bottle charms can be made using small glass bottles filled with colored water or glitter. You can even draw or print tiny labels to stick on them, naming each potion. It’s like making your own magical concoctions!

Incorporating Witchy Symbols

Adding symbols to your decorations can make them even more mysterious. You can draw moons, stars, or even little cats to add to your witchy theme. These can be added to any decoration, like the hats, broomsticks, or around your potion bottles.

Jack-O’-Lantern Creations

Choosing the Right Pumpkins

For your Jack-O’-Lanterns, it’s fun to pick different sizes and shapes of pumpkins. Some can be tall and thin, while others are short and round. Think about what kind of faces they might have based on their shapes!

Carving Techniques and Safety

Carving pumpkins is a big project and should be done with an adult. You can draw the face you want on the pumpkin first, then carefully cut along the lines. Remember, safety is the most important thing, so take your time and be careful.

Alternative No-Carve Pumpkin Ideas

If carving isn’t your thing, you can decorate pumpkins without cutting them! You can paint faces on them, glue decorations like paper bats or hats, or even use stickers. This way, everyone can safely make a special pumpkin for Halloween.

Halloween DIY Ornaments

This image is property of images.pexels.com.

Spooky Tree and Hanging Ornaments

Creating a Haunted Tree Centerpiece

You can make a spooky tree using branches you find outside. Paint them black or dark gray and let them dry. Then, you can set them up in a vase to make a haunted tree. After that, you can hang your homemade ghosts, bats, and spiders from the branches.

DIY Bats, Spiders, and Web Ornaments

Making bats and spiders is fun with black paper or felt. You can cut out their shapes and add details like eyes or webbing with white paint. Then, you can hang them around your haunted tree or anywhere you want to add some spookiness.

Balancing Theme and Aesthetics

When making your Halloween decorations, think about how they all look together. You can choose a color theme, like black and orange, or mix different shapes and sizes. Remember, the most important thing is that it makes you happy and adds to the Halloween fun.

Haunted House Miniatures

Building the Base Structure

Creating a miniature haunted house starts with making the shape of the house from cardboard or thick paper. You can cut out windows and doors and even add a roof. It’s like being an architect for a tiny, spooky world.

Adding the Spooky Details

Once your house is built, you can add the spooky details. This means painting it dark colors, drawing cracks in the walls, or making tiny ghosts to live inside. You can also make tiny furniture or cobwebs to make it look old and haunted.

Lighting and Special Effects

A really cool part of making a miniature haunted house is adding lights or special effects. You can put a small light inside to make the windows glow or add cotton to look like fog. This makes your haunted house come to life in a spooky but fun way.

Halloween DIY Ornaments

Ghoulish Garland and Banners

Paper Crafts and Fabric Options

Making garland or banners is easy with paper or fabric. You can cut out shapes like pumpkins, ghosts, or bats and then string them together. If using fabric, you can sew or glue the shapes to a long string. It’s a fun way to decorate any room or door.

Designs and Lettering Ideas

You can also add letters to your decorations to spell out “Happy Halloween” or any spooky message you like. Using different colors and fonts can make your message stand out. Think about using glitter or glow-in-the-dark paint for extra fun.

Assembly and Display Tips

Once your garland or banner is ready, think about where it will look best. You can hang it above a door, across a window, or even around a table. Using tape or small hooks can help hang your decorations without damaging walls or furniture.

Packaging and Storing Your Halloween DIY Ornaments

Materials for Safe Storage

When Halloween is over, storing your decorations carefully means you can use them again next year. Wrapping fragile items in tissue paper or bubble wrap can protect them. Storing everything in boxes or bags keeps them clean and organized.

Organizing Tips for Small and Fragile Items

For small or delicate items, using small boxes or containers can help keep them safe. You can label everything so it’s easy to find next year. Remember, taking care of your decorations means more fun for many Halloweens to come.

Preventing Damage and Wear

A good tip is to keep your decorations in a cool, dry place. This helps prevent damage from moisture or heat. Checking your decorations when you take them out next year means you can fix any small problems before they get bigger. It’s like taking care of a little Halloween garden every year.

Find your new Halloween DIY Ornaments on this page.

Halloween DIY Ornaments Read More »

Halloween DIY Ideas for Toddlers

Get ready for some super fun Halloween crafts just for you! If you have little hands and love to create, this article is your special guide to making your own Halloween decorations and costumes. You’ll discover easy-peasy ideas that are perfect for toddlers like you to do with a bit of help from a grown-up. Imagine turning paper plates into spooky masks or making a cute ghost with your own footprints. Let’s grab some glue, scissors, and colorful papers, and start crafting your own Halloween magic!

Halloween DIY Ideas for Toddlers

This image is property of images.pexels.com.

See the Halloween DIY Ideas for Toddlers in detail.

Simple Halloween Craft Ideas for Toddlers

It’s time to get crafty for Halloween! These simple craft ideas are perfect for little hands, so you can have lots of spooky fun together.

Handprint Bats

You can make cute little bats using your hands! First, paint your palms and fingers black, but keep your thumbs clean. Press your painted hands onto a piece of paper to make wings. Once it’s dry, add googly eyes and a smile to create your bat’s face. These bats are fun to hang around the house.

Pumpkin Stamping

Grab an apple, cut it in half, and dip the flat side into orange paint. Then, stamp it onto paper to make pumpkin shapes. You can add faces and stems with markers. It’s a fun way to make lots of little pumpkin friends!

Halloween Collage

Gather some Halloween-themed pictures from old magazines or print them out. Cut them up and stick them onto a big piece of paper to make a spooky collage. You can add stickers, glitter, or anything else you like to make it extra special.

DIY Toddler-Friendly Halloween Decor

Decorating for Halloween can be a blast with these easy DIY ideas.

Paper Plate Ghosts

Grab a white paper plate and help your toddler cut out the bottom to make the ghost’s flowy shape. Draw a face with a marker, and then tape a piece of string to the top. Your ghost is ready to float around your home!

Window Monster Stickers

Use colored paper to cut out scary monster shapes like eyes, mouths, and noses. Stick them to your windows with a little bit of water. When it gets dark, your house will have a monster party going on in the windows! Don’t worry, you can easily peel them off after Halloween.

DIY Spooky Lanterns

Turn an old jar into a spooky lantern. Paint the outside with translucent paint, and when it’s dry, draw on a creepy face. Pop a battery-operated tea light inside to make it glow. It’s perfect for lighting up a dark corner!

Click to view the Halloween DIY Ideas for Toddlers.

Halloween-Themed Sensory Activities

Halloween isn’t just for looking – it’s for touching, too! Try these squishy, squashy, and fun sensory activities.

Spider Web Discovery Bin

Fill a bin with pretend spider webs and hide little toys like spiders or small pumpkins inside. You can look for the toys in the webs and feel all the squishy and stretchy textures.

Halloween Playdough Creations

Make some playdough with orange, black, and purple colors. Then, use cookie cutters to make Halloween shapes or roll the dough into spooky characters. Squishing playdough is great for your fingers and super fun!

Monster Slime Fun

Slime is always a hit! Mix glue, water, and some laundry detergent, then add a few drops of food coloring to make it Halloween-themed. Once it’s the right gooey texture, you can squish it, stretch it, and pretend it’s monster goo!

No-Carve Pumpkin Decorating

Pumpkins are a big part of Halloween, and you can decorate them without having to use any sharp tools.

Sticker and Marker Pumpkins

Get a bunch of colorful stickers and markers. Decorate your pumpkin by sticking stickers all over it and drawing on funny faces or designs with the markers. It’s safe, easy, and you can change your pumpkin’s look any time you like!

Glitter Glue Pumpkins

Glitter glue is great for adding some sparkle to your pumpkin. Make patterns, shapes, or letters with the glitter glue. It’s a bit messy but super sparkly and pretty once it’s dry.

Painted Pumpkins

Painting a pumpkin gives you endless possibilities. Use washable paints and paintbrushes to make a masterpiece. Stripes, dots, or even your favorite character can make your pumpkin unique and special.

Halloween DIY Ideas for Toddlers

This image is property of images.pexels.com.

Halloween Costume Crafts for Toddlers

Dress-up time is even better when you’ve made part of your costume yourself!

DIY Animal Ears Headbands

Cut out ears from felt or cardboard and glue them onto a headband. Whether you want to be a cat, bunny, or bear, your handmade ears will be the perfect addition to your costume.

Superhero Capes from Old T-Shirts

Take an old t-shirt and cut the sleeves and sides off to make a cape. With some fabric markers or paint, you can add a superhero logo. Watch how your toddler turns into a superkid as soon as they put their cape on!

Simple Tutu Skirts for Costumes

Cut strips of tulle and tie them onto an elastic band that fits around your toddler’s waist. You can use different colors to match any costume – a fairy, princess, or even a pumpkin. Tutus are fun to twirl in and make any outfit fancy.

Healthy Halloween-Inspired Snacks

Treats can be tasty and good for you, too!

Fruit and Veggie Monster Faces

Cut up fruits and veggies to create silly faces on a plate. Use cucumber slices for eyes, a slice of bell pepper for a smile, and shredded carrots for hair. Playing with food like this can be super fun, and you can eat your creations afterward.

Mini Pumpkin Granola Bites

Mix some granola with honey or peanut butter and form little balls. Then, use a bit of food coloring to make them look like mini pumpkins. These bite-sized snacks are delicious and healthy!

Monster Apple Bites

Cut an apple into slices, then take a little bite out of each piece to make a mouth. Stick sunflower seeds in for teeth and use a bit of peanut butter to glue on some eyes made from marshmallows or raisins. They’re little apple monsters that are yummy to eat!

Halloween DIY Ideas for Toddlers

This image is property of images.pexels.com.

Festive Halloween Coloring Pages and Printables

Sometimes, a good coloring or activity page is all you need for a quiet craft time.

Customizable Trick-or-Treat Bags

Print out a picture that you can color and decorate, then glue it onto a plain bag. Now, you have a personalized trick-or-treat bag that’s all ready for candy collecting.

Printable Halloween Masks

Find some mask shapes online and print them on cardstock. Color them in, add string or elastic to the sides, and you’ve got a mask for an instant disguise.

Halloween-Themed Coloring Sheets

Coloring is great because you can do it over and over again. Print out lots of Halloween-themed coloring sheets and spend time filling them with your favorite colors. Show off your artwork when you’re done!

Easy Halloween Garland and Bunting

Add some spooky flair to your home with homemade garland and bunting.

Ghost and Bat Paper Chains

Cut strips of white and black paper. Loop them into chains, alternating colors, and add ghost and bat shapes that you’ve cut out and decorated. String up your chain to decorate any room.

Pumpkin Bunting with Felt

Cut out pumpkin shapes from orange felt. Glue on faces with black felt, punch two holes at the top of each pumpkin, and thread them onto a string. Hang your pumpkin bunting up for a cute decoration.

Creepy Crawly Bug Garland

Use egg cartons to create little bugs. Cut out the cups, paint them, and then add pipe cleaners for legs. Once they’re dry, string them together to make a creepy crawly bug garland that looks cool hanging up.

Halloween DIY Ideas for Toddlers

Halloween Storytime with DIY Puppets

Stories are so much more fun with puppets you’ve made yourself.

Making Sock Puppets

Transform an old sock into a spooky character by decorating it with felt, yarn, and buttons for the eyes and mouth. Slip your hand inside, and it’s showtime!

Paper Bag Monster Puppets

Take a paper bag and turn it upside down. The bottom of the bag is the monster’s face, where you can glue on eyes and teeth. Your hand goes inside to move the puppet and tell a story.

Finger Puppet Witches and Ghosts

Cut out small pieces of fabric or felt to fit your fingers, and create mini witch and ghost costumes. Draw faces with markers, and your fingers are turned into characters for tiny puppet plays.

Halloween Themed Story Stones

Story stones can spark your imagination and help you create all sorts of tales.

Painting Characters on Stones

Find some smooth stones and paint them to look like different Halloween characters. You can make a pumpkin, a ghost, or even a little black cat. Let them dry, and then it’s time to play!

Creating Scenarios for Play

Think of a spooky scene like a haunted house or a dark, mysterious forest. Use different stones to act out what’s happening, and make up stories as you go along. It’s like being a director of your own Halloween play!

Interactive Storytelling with Stones

When you’re telling a story, use the stones to help show what’s happening. Move them around to act out different parts of the tale. This makes storytelling a lot more fun, because you can see and touch the story as it unfolds.

And that wraps up our collection of Halloween DIY ideas for toddlers. Remember, the most important thing is to have fun together and let your imagination run wild. Happy crafting and Happy Halloween!

Find your new Halloween DIY Ideas for Toddlers on this page.

Halloween DIY Ideas for Toddlers Read More »

DIY Halloween Garland Decorations

Get ready for a spooky and fun craft! In this article, you’ll learn how to make your very own Halloween garland decorations. With some simple supplies and a bit of creativity, you can create something really special to hang in your house. This will make your home look perfect for Halloween, and you’ll have a great time making it. So grab your scissors, and let’s start crafting some ghostly garlands together!

DIY Halloween Garland Decorations

This image is property of pixabay.com.

See the DIY Halloween Garland Decorations in detail.

Choosing Your Halloween Garland Theme

When you decide to make your own Halloween garland, you’ll want to pick a theme that you really like. This theme decides what colors, shapes, and decorations your garland will have. Here are some fun ideas.

Classic Spooky: Ghosts, Bats, and Spiders

Imagine your room with little white ghosts, black bats, and creepy spiders hanging around. That is what a Classic Spooky theme looks like. You can use white, black, and maybe some orange to keep it looking Halloween-y.

Autumn Harvest: Pumpkins, Leaves, and Acorns

If you love when leaves change color and the weather gets cooler, the Autumn Harvest theme might be perfect for you. Your garland can have orange pumpkins, yellow and red leaves, and brown acorns. It will feel like you brought the outdoors, inside!

Ghoulish Glam: Black, Purple, and Silver Accents

Sometimes, Halloween can be a bit fancy. That’s where Ghoulish Glam comes in. This theme uses dark colors like black and adds shiny purple and silver. It’s spooky in a really cool way!

Haunted House: Creepy Portraits and Aged Paper

Do you like old, spooky houses with secrets? A Haunted House theme can have pictures like the ones you might find in an old mansion, with frames drawn on aged paper. It’s like making your place into a fun, scary story.

Pop Culture: Icons from Horror Movies and TV Shows

For those who love movies and TV shows with monsters and heroes, you can make a Pop Culture theme garland. Cut out shapes or characters from your favorite scary stories. It’s like throwing a party with famous monsters and ghosts!

Gathering Essential Supplies

Before you start making your garland, let’s gather all the things you’ll need to create your spooky masterpiece.

Types of Paper and Cardstock

You can use different kinds of paper, like thin regular paper or thick cardstock. Cardstock is really good for keeping your garland strong. You can find it in lots of colors too!

Adhesives: Glue, Tape, and More

Things might get a little sticky! You’ll use glue or tape to put your garland together. Stick the parts carefully so they stay and look nice.

Crafting Tools: Scissors, Punches, and Cutting Machines

You’ll need tools like scissors to cut out shapes. If you have them, punches or cutting machines can make super cool shapes without a lot of work.

Decorative Elements: Glitter, Paint, Ribbons

Make your garland special by adding fun stuff like glitter, paint, or ribbons. Just remember to let paint and glue dry before hanging up your garland.

Hanging Supplies: String, Twine, and Fishing Line

To hang up your garland, you’ll need something like string, twine, or clear fishing line. Make sure it’s strong enough to hold up all your amazing decorations.

See the DIY Halloween Garland Decorations in detail.

Paper Garland Basics

Now let’s learn how to make a simple paper garland!

Cutting Out Shapes: Templates and Freehand

You can draw shapes yourself or use templates, which are like patterns, to help make perfect ghosts or pumpkins. If templates sound tough, don’t worry, doing it freehand is also fun!

Creating Paper Chains: Loops and Strips

Cut paper into strips and then make them into loops, sticking each one into another to make a chain. This is an easy way to make a garland that you can decorate even more!

Accentuating with Color and Texture

Add different colors or textures to your shapes to make them stand out. You can use crayons, markers, or even different types of paper that feel bumpy or smooth.

Assembling Layers for a 3D Effect

You can stick layers of paper on top of each other to make your decorations look 3D, like a pumpkin that looks round. It’s like making a paper sticker pile!

Securing Pieces Together

Make sure you stick everything together really well with glue or tape. You don’t want your spooky friends falling down during your Halloween fun!

Fabric Garland Variations

Fabric garlands are a bit different from paper ones, so here are some ways to play with fabric.

Choosing Halloween-Themed Fabrics

First, pick out some Halloween-themed fabrics. Look for ones with pumpkins, ghosts, or just cool colors like orange and black.

Cutting Fabric Strips: Sizes and Patterns

Cut the fabric into strips. They can be thick or thin, straight or zigzag. They don’t all have to be the same, and mixing them up can look really nice.

Knotting Techniques for a Rustic Look

Tie the fabric strips in knots on a string to make them look rustic, like they belong in a cozy, spooky cabin in the woods.

Adding Extras: Burlap and Lace

You can add other cool stuff to your fabric garland, like rough burlap for an old-timey look or pretty lace for a fancy touch.

Maintenance and Storage Tips

When you’re taking down your garland after Halloween, fold it nicely and put it somewhere safe so you can hang it up again next year without it being all wrinkly and messy.

DIY Halloween Garland Decorations

This image is property of pixabay.com.

Lighting Up Your Garland

Lights make everything more magical! Here’s how to light up your garland.

Incorporating String Lights

Wrap a string of small lights around your garland. This works really well with paper or fabric and looks like tiny stars shining in between your decorations!

Selecting Safe and Suitable Lights

Pick lights that are safe. LED lights are cool because they don’t get hot, so they won’t start a fire or hurt your fingers.

Battery-Powered Versus Plug-In Options

Decide if you want battery-powered lights, which don’t need to be near a plug, or plug-in ones, which can glow as long as you want without needing new batteries.

Weaving Lights Into Your Garland

Carefully weave the lights in and out of your garland. You want them to show, but you also don’t want the wires to be the main thing people see.

Troubleshooting Common Lighting Issues

Sometimes, lights don’t work the way they should. Check if the batteries need changing or if a bulb has gone out. Be careful and ask an adult if you need help!

Eco-Friendly and Upcycled Garlands

It’s important to take care of our planet, so here are some tips for making a garland that’s good for the Earth.

Using Recycled Materials

You can use things like old newspapers or magazines to make your garland. This helps recycle, which is great for the Earth!

Repurposing Old Decorations

If you have old Halloween decorations, you can turn them into parts of your new garland. It’s like giving them a second chance to be awesome!

Natural Elements: Sticks, Stones, and Pinecones

You can even use things from outside like sticks, stones, or pinecones. Just make sure they’re clean before you bring them inside.

Biodegradable Alternatives to Traditional Supplies

Instead of plastic, look for things that can break down in the ground over time, like paper or natural string.

Crafting with a Sustainable Mindset

Think about how you can make cool stuff while still caring for the planet. Use less plastic and try not to waste materials.

DIY Halloween Garland Decorations

This image is property of pixabay.com.

Creating Character-Specific Garland Pieces

Let’s make some garland decorations that look like different Halloween characters.

Designing Your Own Monsters

Draw and cut out your own monsters. Give them funny eyes or silly teeth. It’s your chance to make a monster friend!

Witches and Wizards: Hats and Cauldrons

Cut out shapes that remind you of witches and wizards, like pointy hats or bubbling cauldrons. You can even draw stars or moons on them.

Zombies and Mummies: Bandages and Braaains

To make zombie or mummy decorations, use strips of white paper or fabric to look like bandages. If you want to be a bit gross (in a fun way), you can add pink and red paper to look like brains.

Vampires and Werewolves: Fangs and Fur

For vampires, you can cut out sharp fangs from white paper. For werewolves, use brown or gray fabric that’s soft like fur.

Stitching and Stuffing 3D Elements

If you want to make your shapes puffy, like a round pumpkin, you can stitch around the edges and stuff it with a little bit of cotton or fabric scraps.

Interactive Garland Ideas

Garlands can be more than just pretty to look at. They can be fun to play with too!

Adding Hidden Surprises

Put little surprises or candies in your garland that people can find and take out. It’s like a mini treasure hunt!

Making Moveable Parts

Use thread or brads (those little metal things that let paper spin around) to make parts of your garland move. Maybe a bat can flap its wings!

Crafting Garland That Doubles as a Game

Create a garland that’s also a game. You can play by trying to guess the names of the different monsters or finding the matching pairs of decorations.

Educational Themed Garlands for Kids

If you’re making a garland for little kids, you can include shapes or colors they’re learning about. It’s fun and helps them learn at the same time.

Ensuring the Safety of Interactive Components

Make sure any parts that move or can be pulled off are safe for everyone, especially little kids who might put things in their mouths.

DIY Halloween Garland Decorations

Garland Installation and Placement

Once your garland is ready, decide where to hang it up to make your space extra spooky.

Assessing Your Space: Indoors Versus Outdoors

Look around your home. Where would a garland look best? Can it hang across a window? Should it stay inside, or could it hang on the porch?

Best Practices for Hanging and Securing Garland

Make sure your garland is safe and won’t fall down. You might need tape, thumbtacks, or even hooks, depending on where you’re hanging it.

Using Garland to Frame Doorways and Windows

Garlands look great around doorways or windows. They act like a frame, making anything inside or outside look special.

Creating a Focal Point in Party Areas

If you’re having a Halloween party, choose a spot where you want everyone to look, like over a food table. Hang your garland there to make it the center of attention.

Dealing with Environmental Factors: Wind and Rain

If you’re hanging your garland outside, make sure it won’t blow away or get ruined by rain. Use stronger materials and check the weather forecast.

Lessons Learned and Next Year’s Plans

After Halloween, think about how making your garland went and what you can do next year to make it even better.

Reflecting on the Crafting Experience

Think about what was fun and what was tricky. Maybe you learned a new way to cut paper that you liked or discovered that you need better scissors.

Notes on What Worked and What Didn’t

Write down what you want to remember for next year, like which glue was the strongest or what color looked the best at night.

Gathering Feedback from Guests and Trick-or-Treaters

Ask people who see your garland what they think. Did they like the lights? Did the paper ghosts make them smile? Their ideas can help you make an even cooler garland next time.

Planning for Future Halloween Crafting

Start thinking about what you want to make for next Halloween. Maybe you’ll go bigger or try a new theme. Dream up all the fun things you can create!

Sharing Your Creations on Social Media

If you took pictures of your garland, you can show them to more people by putting them on places like Facebook or Instagram. It’s a great way to share your hard work and creativity with friends and family, and who knows, you might inspire someone else to make their own!

See the DIY Halloween Garland Decorations in detail.

DIY Halloween Garland Decorations Read More »

Halloween Crafts Using Paper Plates

Imagine you have some paper plates, a few colors, and a big imagination! You can turn those simple plates into spooky, fun decorations for Halloween. From grinning pumpkins to silly ghosts, this article will show you how to make your own Halloween pals with just paper plates and a little bit of craft magic. Get ready to create your very own paper plate monsters, witches, and cats that will make everyone smile when they come to trick-or-treat at your door!

Halloween Crafts Using Paper Plates

Check out the Halloween Crafts Using Paper Plates here.

Benefits of Creating Halloween Crafts with Paper Plates

Inexpensive and Accessible Materials

You’ll be super happy to know that making Halloween crafts with paper plates is easy on your piggy bank! Paper plates are not only cheap, but you can find them almost anywhere, like at your local grocery store or party shop. You don’t need fancy stuff to start creating spooky Halloween decorations.

Encouraging Creativity and Imagination

Guess what? When you make your own Halloween crafts, you’re like an artist making a cool painting. The best part is that you can use your imagination to turn a simple paper plate into almost anything spooky, like a ghost, pumpkin, or even a black cat. It’s fun to see what wild and wonderful ideas you come up with!

Fun Activity for All Ages

Whether you’re a little kid or a grown-up, making crafts with paper plates is fun for everyone. You can sit down with your family or friends and everyone can pick their favorite Halloween thing to make. You might be surprised how much fun the older kids and grown-ups have when they’re crafting with you!

Eco-Friendly – Recycling and Reusing Materials

Did you know you’re also taking care of the Earth when you make crafts with paper plates? Instead of throwing them away, you’re turning them into awesome decorations. It’s a great way to recycle and reuse things, which is good for our planet.

Great for Classroom or at Home

Whether you’re in school or hanging out at home, you can make these Halloween crafts just about anywhere. Teachers love doing these projects in classrooms because all the kids can join in. And at home, you can spread out on the kitchen table and get crafty with your family.

Safety Tips for Crafting with Children

Non-Toxic Supplies

Make sure the supplies you’re using, like glue or paint, are safe. They should say “non-toxic” on them, which means they’re okay for children to use. If you get something on your skin, it shouldn’t hurt you.

Supervision with Scissors and Other Tools

Sometimes you need to use scissors to cut the paper plates. Since scissors can be sharp, it’s important that a grown-up is there to watch over you or help you with the cutting part. This keeps everyone safe while having fun.

Age-Appropriate Craft Selection

Choose Halloween crafts that are just right for how old you are. That means if you’re still very young, you might do projects that don’t need sharp tools or complicated steps. There are lots of easy and fun crafts perfect for younger kids.

Keeping the Crafting Area Clean and Safe

When you’re crafting, your space might get a little messy with pieces of paper plates, glue, and paint. It’s a good idea to keep your crafting area clean so nobody trips or spills stuff. Safety first!

See the Halloween Crafts Using Paper Plates in detail.

Preparation and Materials Needed

List of Basic Supplies

Here’s a list of basic supplies you’ll need for your paper plate Halloween crafts:

  • Paper plates (white ones are great, but any color will do)
  • Scissors (make sure you have an adult help if you need it)
  • Paints and paintbrushes
  • Markers or crayons
  • Glue or tape
  • Decorations like streamers, glitter, or googly eyes

Organizing Your Workspace

Now, find a spot where you can spread out all your supplies. You can put down an old tablecloth or some newspapers to keep things clean. Make sure there’s enough room for you to work on your spooky creations.

Pre-Cutting Shapes for Younger Children

If you’re crafting with little brothers or sisters, it might be a good idea to pre-cut shapes they need for their crafts. This way, they can focus on the fun parts like painting and decorating.

Choosing the Right Paints and Markers

Remember, you want to use non-toxic paints and markers that are safe for kids. Water-based acrylic paints are good because they dry quickly. And washable markers are great too because they come off your skin easily.

Paper Plate Jack-O’-Lanterns

Creating the Pumpkin Base

First, you’ll paint your paper plate orange to make it look like a pumpkin. You might need a couple of coats to make the color nice and bright. Let it dry completely before moving to the next step.

Cutting Out Facial Features

Get creative with the pumpkin’s face! Think about the kind of face you want it to have – scary, funny, or maybe even surprised. Once you have an idea, have a grown-up help you cut out the eyes, nose, and mouth.

Adding Dimension and Texture

If you want to make your pumpkin even cooler, you can add things like yarn for a textured stem or use a sponge to add bumps to the pumpkin, so it looks more real.

Variations and Creative Ideas

There’s no limit to your imagination! You can make different kinds of Jack-O’-Lanterns with all sorts of faces. You could also use pieces of black paper to glue on the face instead of cutting it out for a different look.

Halloween Crafts Using Paper Plates

Ghastly Paper Plate Ghosts

Simplicity of the Ghost Shape

For the ghost, the shape is super simple! Just turn your paper plate white if it isn’t already, and then cut the bottom to look like it’s floating.

Decorating with Floating Streamers

You can add streamers or even torn-up tissue paper to the bottom of your ghost to make it look like it’s floating through the air.

Glow-in-the-Dark Options

Want to make your ghost extra spooky? Use glow-in-the-dark paint to add details! When the lights go out, your ghost will gently glow.

Creating a Haunting Display

Once you’ve finished your ghosts, you can hang them up with some string. They’ll move around in the air and look like they’re really floating around!

Wickedly Fun Paper Plate Witches

Crafting the Witch’s Face

To start your witch, paint your paper plate green for the face. When it’s dry, you can add the features like a crooked nose, a creepy smile, or a wart.

Fashioning the Pointed Hat

Cut another paper plate or some cardstock to make a pointed witch’s hat. You can decorate it with stars, moons, or anything magical. Then, attach it to the top of your witch’s head.

Customizing the Witch’s Facial Features

Use markers, paint or even some craft supplies like yarn for hair to give your witch personality. Big googly eyes can make her look funny, or you can draw her eyes with a marker for a different effect.

Accessorizing Your Witchcraft

It’s fun to add accessories to your witch. Maybe she needs a broom made from a stick and some straw or paper tassels. Or you could make a little cat out of a smaller paper plate to go with her.

Creepy Paper Plate Spiders

Utilizing the Plate for the Spider’s Body

Your spider’s body starts with a paper plate painted black or any other creepy color you like. The round shape is perfect for a spider’s body!

Choosing Materials for the Legs

You can use lots of different things for the spider legs. Pipe cleaners work great because they are bendy. You can also cut strips of paper and fold them to make them look like legs.

Incorporating Movement with Bendable Limbs

If you’re using pipe cleaners or something similar for the legs, you can twist and bend them to make your spider look like it’s moving.

Hanging and Displaying Your Spiders

You can hang your spiders from the ceiling with some string or even tape them to the wall. If you put them all over, it will look like they’re crawling everywhere!

Chilling Paper Plate Skeletons

Building the Skeleton’s Body Structure

Starting with the top of your paper plate, draw and cut out a skull shape. Then use white paper to cut out bones for the arms, legs, and body.

Designing Skull and Limb Pieces

The skull can be simple with just eyes and a mouth, or you can get more detailed. For the limbs, use longer pieces for the legs and arms, and smaller pieces for hands and feet.

Assembling with Brads for Joint Movement

If you have little metal pieces called brads, you can use them to connect the bones together. This way, your skeleton can move its arms and legs!

Creative Variations of Skeleton Themes

You could make a pirate skeleton by adding a paper eye patch and a hat, or even a dinosaur skeleton by arranging the bones in a different shape. Get as creative as you want!

Eerie Paper Plate Bats

Designing the Bat’s Wing Shape

Cut the sides of your paper plate to make wings for your bat. It’s like making a big M shape on each side of the plate.

Painting and Detailing Techniques

You can paint your bat black or dark purple and then add details like eyes or fangs with white paint or a marker.

Creating a Flock of Bats Wall Decoration

Make lots of bats and then stick all of them to a wall like they’re flying together. It’ll look really cool, like a whole bunch of bats are swooping through your room.

Adding Features like Googly Eyes or Glitter

To make your bats even more exciting, glue on some googly eyes so they look like they’re watching you. Or you could sprinkle a little bit of glitter on the wings for a shiny effect.

Final Touches and Displaying Your Crafts

Protective Coatings for Durability

If you want to keep your crafts looking good, you can put a clear protective coating on them, like mod podge or clear glue. This helps them last longer and stops the paint from chipping.

Creative Use of Lighting

Imagine making your crafts glow with some fairy lights or a small flashlight! It would make your Halloween decorations even spookier when the lights are dim.

Display Tips for Parties and Gatherings

When you have friends or family over for a Halloween party, you can show off your crafts by hanging them up or placing them on tables. You can even make a special spooky corner with all of your decorations.

Storing Your Crafts for Next Halloween

After Halloween, you might want to keep your crafts for next year. Store them in a box in a dry place so you can use them again. It’s great to see your artwork come out every Halloween!

Learn more about the Halloween Crafts Using Paper Plates here.

Halloween Crafts Using Paper Plates Read More »
Easy to Make DIY Halloween Costumes

Are you excited about Halloween and want to make your own costume? You can create something super cool using things you already have at home! This article is all about easy-to-make DIY Halloween costumes that will make you look like you stepped out of a spooky story. You’ll find fun ideas for turning old clothes and craft supplies into a disguise that will have all your friends saying, “Wow!” Get ready to make this Halloween the most fun one yet with your awesome homemade costume!

Easy to Make DIY Halloween Costumes

Find your new Easy to Make DIY Halloween Costumes on this page.

The Classic Ghost Costume

A ghost costume is super fun and really easy for you to make. You’ll look like a spooky ghost in no time!

Essentials: What You Need to Start

To make a ghost costume, you only need a few things. Grab an old white sheet from your home that you don’t need anymore and some scissors. Then, find a grown-up to help you cut the sheet.

Creating the Perfect Ghostly Shape

Lay the sheet over your head carefully, so you know where to put the eyes. Make sure it isn’t too long so you won’t trip. Gently take off the sheet and with help, cut holes where your eyes are.

Detailing: Adding Eyes and Mouth

Once the eye holes are cut out, you can make a sad, scary, or silly mouth. You can draw the mouth shape with a marker then cut it out. Remember to see where you are going, so only cut holes where you need to see.

Personalization Tips: Making It Unique

To make your ghost costume unlike any other, you could add some glitter, use colorful markers to draw patterns, or even add a bow. It’s your ghost, so make it special!

Creepy Scarecrow Ensemble

A scarecrow costume is a great idea for Halloween, and you can be creative with clothes you already have!

Gathering Materials: Clothing and Accessories

First, find an old flannel shirt and some baggy pants; jeans or brown pants work well. Look for a floppy hat and some straw or yellow yarn which will be like the scarecrow’s straw.

Assembling the Costume: Stitching and Patching

If the clothes are perfect, you’re lucky! But to make them look more like a scarecrow, add some patches. You can cut other fabric and glue or sew it on for a patchy look.

Adding the Scare Factor: Makeup and Props

For your face, you can use makeup or face paint to draw stitches or a big smile. Find a stick to carry as your scarecrow post, and don’t forget to act a bit floppy!

Safety and Comfort: Ensuring a Good Fit

Make sure your costume isn’t too big; it should be comfy and safe to walk in. Use a belt to hold up the pants if you need to.

Find your new Easy to Make DIY Halloween Costumes on this page.

Classic Witch or Wizard Look

With a cape, a hat, and a wand, you can become a witch or a wizard and cast spells all night!

The Basics: Cape, Hat, and Wand

Your cape can be any color. A simple black trash bag with a hole for your head can work! For the hat, you can make one from paper or find an old hat and cover it with fabric. Don’t forget a stick from the yard for your wand!

DIY Wand Craft: Materials and Design

To make the wand special, you can paint the stick or cover it with tin foil or shiny paper. You can even add beads or ribbons.

Styling the Cape and Hat: Adding Personality

If you want to make the cape and hat look cooler, add some glitter, stars, or moon shapes. You can use fabric paint or glue things on.

Accessorizing: Adding the Magic Touch

Find a necklace, a magic-looking stone, or anything shiny. It’ll make you feel more like a real witch or wizard.

DIY Superhero Glam

Being a superhero is exciting, and you can create your very own superhero costume!

Selecting Your Superhero: Inspiration Sources

Think about your favorite superhero or create your own. What colors do they wear? What are their powers? Keep this in mind as you make your costume.

Crafting the Emblem: Logo Creation

Every superhero has a logo! You can cut out a logo design from felt or cardboard and then attach it to the front of your shirt using glue or tape.

Cape or No Cape?: Making the Costume

Some superheroes have capes, and some don’t. If you want one, you can make it out of fabric or even a towel. If no cape, that’s okay—maybe you’ll be a flying superhero!

Final Touches: Mask Making and Accessories

Make a mask out of cardboard or fabric; just ensure you can see properly. You can also create cuffs from toilet paper rolls and decorate them to wear on your wrists.

Easy to Make DIY Halloween Costumes

Pop Art Character Costume

Pop art characters look like they’re from a comic book. They’re very colorful and fun to make!

Inspiration and Design: The Pop Art Look

Look at pop art pictures and see how they use bright colors and bold lines. You want your costume to have those same bright colors and fun shapes.

Face Painting: Achieving the Comic Effect

With face paint, you can draw thick lines to outline your features like in a comic book. Make sure someone helps you and always be mindful not to get paint too close to your eyes.

Dressing Up: Outfit Considerations

Choose clothes that are one solid color or have big, bold patterns. Brightly colored pants and a matching top will give you that classic pop art style.

Accessorizing: Props and Hair

Find accessories that stand out, like a big colorful necklace or a hat. You can also use temporary hair color for a wild hairdo!

Homemade Pirate Attire

Pirates are always a hit! With a few items, you can become a fearsome pirate in no time.

Assembling the Base Outfit: What You Need

For your pirate costume, you’ll need baggy pants and a baggy white shirt. If you have a vest, that would be awesome too!

Creating the Pirate Jacket: A Simple Guide

If you have an old jacket, you can make it look like a pirate one by cutting the sleeves to make them look ragged. If not, that’s okay—you’re still a pirate!

Accessorizing: Hats, Swords, and Eye Patches

To be a great pirate, you need an eye patch you can make from black paper or cloth. A toy sword and a big hat with a feather will complete your look.

Adding Realism: Distress Techniques

Make your outfit look old and worn by rubbing some dirt on it or pulling at the edges to fray it. This makes it look like you’ve been sailing the seas for years!

Zombie Apocalypse Survivor

Surviving a zombie apocalypse means looking rough and ready. You can use old clothes and make them look really worn.

Base Outfit: Rugged and Ready

Find clothes that you can get dirty and tear up a bit. Ripped jeans and a tattered shirt are perfect for a survivor look.

Gory Details: Fake Wounds and Blood

Use red face paint for fake blood. You can even create wounds with tissue paper dipped in the paint. Stick these on your face or arms for a scary effect!

Props: Survival Gear Essentials

Carry props like a toy walkie-talkie, a water bottle, or a toy weapon. This makes it look like you’re ready for anything.

Creating a Backstory: Character Development

Think about the story of how you survived. Did you hide? Did you help save other people? This will make playing your part even more fun!

Famous Movie Monster

You can become a famous monster from a movie and scare all your friends.

Choosing Your Monster: Popular Options

Think about what monster you like the most. Is it Frankenstein, Dracula, or maybe a werewolf?

Facial Features: Masks vs. Makeup

You can use a mask if you find one, or make one using face paint. Whichever way you choose, just remember that being able to see and breathe comfortably is important.

Wardrobe: Authenticity and Comfort

You want to look like the monster but also be able to move around. Find clothes that match what the monster wears and fit you well.

Props and Sound Effects: Adding Scares

If you can find a prop like a chain for Frankenstein or fake fangs for Dracula, that’s perfect! And don’t forget to practice your monster growl or laugh!

Easy Animal Onesies

Animal onesies are comfy and cute. You can make one that’s just your size!

Selecting the Right Fabric: Comfort and Type

Choose a fabric that’s soft and warm. Fleece or flannel are good choices, and they come in a lot of colors.

Pattern Making: Simple Steps for Beginners

You can find simple patterns online or in craft stores. They’ll show you how to cut the fabric so it fits you right.

Sewing and Assembly: Bringing It Together

Ask for help to cut out your fabric and sew it together. Make sure the onesie isn’t too tight or too loose.

Finishing Touches: Ears, Tails, and Paws

Cut out shapes for ears and a tail from your fabric. Sew them onto your onesie and add little paw prints to the feet. Now you’re a cute and cuddly animal!

Fairy Tale Characters

You can be any fairy tale character you like. Choose someone fun, then start creating your costume.

Choosing Your Character: Classic vs. Modern

Would you like to be a classic princess or a brave knight? Or maybe you prefer modern versions of these characters. Decide who you want to be.

Materials and Color Schemes: Setting the Theme

Use colors and materials that match your character. Princesses might wear shiny fabric, while knights can have metallic-looking material.

Creating Accessories: Wands, Crowns, and More

Make your accessories match your character. Crowns can be made of cardboard covered in foil, and wands can be made from sticks with a star on top.

Final Outfit Assembly: Tying It All Together

Put on your outfit and accessories. Do a final check to make sure everything stays in place as you move around and have fun being your fairy tale character!

Discover more about the Easy to Make DIY Halloween Costumes.

Easy to Make DIY Halloween Costumes Read More »
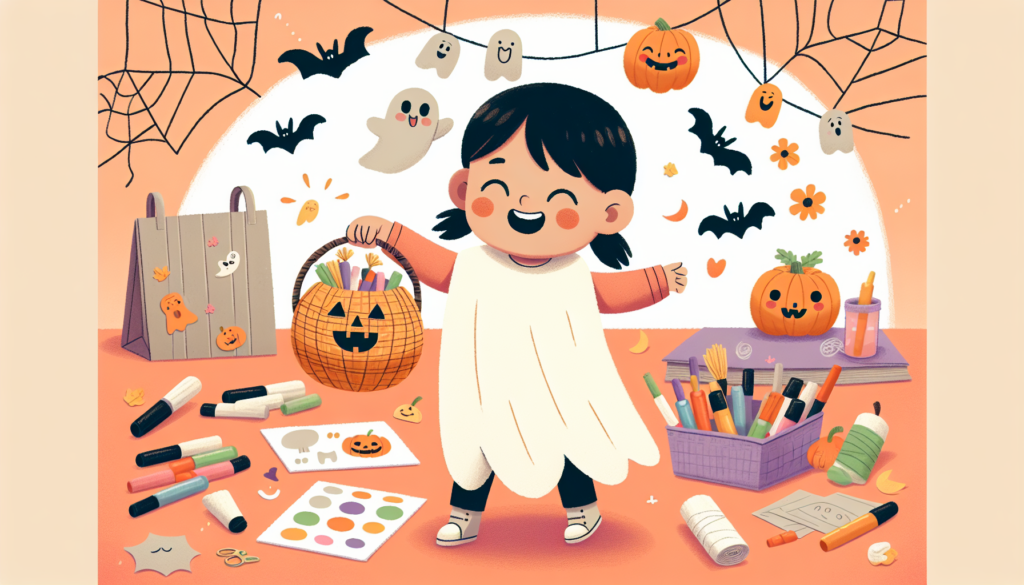
Halloween DIY Projects for Beginners

Imagine it’s almost Halloween and you want to make your house the spookiest on the street! You can do that with some fun Halloween do-it-yourself (DIY) projects that are easy to make. These crafts are perfect if you’re just starting out and don’t worry, making these will be as easy as pie. Spiders, ghosts, and pumpkins – oh my! You’ll learn how to make those and more, all by yourself, to scare and surprise your friends and family with your creepy, crafty skills. Get ready for a Halloween where your house is filled with your own handmade decorations!

Halloween DIY Projects for Beginners

Check out the Halloween DIY Projects for Beginners here.

Simple Spooky Lanterns

Materials Needed for Homemade Lanterns

To make your own spooky lanterns, you’ll need some easy-to-find items. Grab some clean, empty jars – they can be any size you want! You’ll also need paint that glows in the dark, some paintbrushes, and a few tea light candles. If you want to decorate your jars, you can also get some stickers or markers. Make sure you have everything before you start.

Step-by-Step Guide to Creating Your Lantern

First, make sure your jars are clean and dry. Then, take your paintbrush and start painting the inside of the jars with the glow-in-the-dark paint. You might want to do a few coats so it’s extra glowy! After the paint dries, you can put fun stickers on the outside or draw scary faces with markers. Finally, place a tea light candle inside each jar and watch them glow! Remember to ask a grown-up to help you light the candles.

Safety Tips for Using Lanterns as Decor

When you’re using candles, you have to be very careful. Always keep your spooky lanterns away from anything that can burn, like curtains or paper. Never leave a candle burning without an adult nearby, and don’t forget to blow out the candles before you go to bed or leave them alone. If you want to be extra safe, you can use battery-operated tea lights instead of real candles.

Creepy Paper Mache Bowls

Gathering Your Paper Mache Materials

For these scary bowls, you’ll need some newspaper cut into strips, a bowl to use as a mold, and some cling wrap. Also, gather up some flour and water to make your paper mache goo, and a paintbrush to help you stick the paper strips down.

Mixing the Paper Mache Solution

Paper mache sounds fancy but it’s just paper and a special glue that you can make! Mix one part flour with two parts water until it’s smooth and feels a bit like pancake batter. This is your paper mache solution that will help stick all your newspaper strips together.

Molding and Painting Your Bowls

Cover the outside of your bowl mold with cling wrap. Dip your newspaper strips in the paper mache solution and lay them over the bowl; criss-cross the strips to make it strong. After it dries, you can paint your bowl to look like a jack-o’-lantern, a witch’s cauldron, or anything you think is spooky!

Ideas for Using Your Bowls in Halloween Decor

You can use your creepy bowls to hold treats for trick-or-treaters or to scare your family members by filling them with fake spiders or eyeballs. You can also put a battery-powered candle inside to make it look like a glowing scary face!

Get your own Halloween DIY Projects for Beginners today.

Ghoulish Glow-in-the-Dark Decor

Choosing the Right Glow-in-the-Dark Paint

To make things really spooky, you need a good glow-in-the-dark paint. Look for one that says it’s super bright and long-lasting. Some paints work better on certain surfaces, like plastic or wood, so make sure you get the right kind for what you want to decorate.

Applying the Paint for Maximum Glow

When using your glow-in-the-dark paint, paint in a place that has lots of light. After it’s dry, put the painted decor in the dark, and it should glow! Sometimes, you might need a few coats to make it really bright. And remember, the paint needs to ‘charge’ in light before it can glow in the dark.

Creative Ideas for Glow-in-the-Dark Projects

There are so many fun things you can do with glow-in-the-dark paint. Paint little ghosts on rocks to hide around your yard, or make glowing footprints leading to your door for a spooky path. You can also paint a scary message on a poster that only shows up when it gets dark!

Frightful Front Door Wreaths

Basics of Wreath Making

To make a wreath, you’ll start with something round called a wreath form. You can find these at craft stores, or you can make one with twisted-up paper or a cardboard circle. Then, get materials like fake leaves, ribbon, or fabric to wrap around your form and make it look full and spooky.

Decorating Your Wreath with Halloween Themes

Once your wreath form is ready, start decorating it! Use colors like orange, black, and purple to make it look really Halloween-y. You can add fake spiders, miniature pumpkins, or bats to make your wreath extra frightful. Use a hot glue gun to stick them on, but make sure you ask an adult to help because it can get really hot.

Attaching Your Wreath Securely to the Door

When your wreath is all decorated, you’ll want to hang it up for everyone to see! Use a sturdy ribbon or a wreath hanger to put it on your door. Make sure it’s not going to fall off by giving it a little tug to test it out. You wouldn’t want your beautiful wreath to get ruined!

Halloween DIY Projects for Beginners

Macabre Mason Jar Mummies

Materials Needed for Mummy Jars

To make mason jar mummies, you’ll need some clear mason jars, white bandages or gauze, googly eyes, and glue. Get everything together before you start, so you don’t have to stop in the middle of crafting.

Wrapping Technique for the Perfect Mummy Effect

First, dab some glue onto your jar, and stick the end of the bandage onto it. Gently wrap the bandages around the jar, overlapping a little bit so it looks like mummy wrapping. Leave some spaces so you can see a bit of the jar through the bandages. When you’re done wrapping, glue on a pair of googly eyes to give your mummy personality!

Lighting Your Mason Jar Mummies Safely

Put a battery-operated tea light or a small flashlight inside your mummy jar to make it glow. Remember not to use real candles in these, because the bandages could catch fire and that would be very dangerous.

Eerie Haunted House Silhouettes

Designing Your Haunted House Template

To create a haunted house silhouette, you need to first draw a picture of a spooky house. You can make it as big or small as you want, and add creepy details like broken windows, a crooked chimney, and ghostly figures in the doorway.

Cutting and Mounting the Silhouettes

Once you’re happy with your drawing, carefully cut out your haunted house using scissors. Then, use some tape to stick your haunted house onto a window or a wall. Make sure it lays flat so that it looks just right.

Backlighting for an Extra Spooky Effect

If you want your haunted house to stand out at night, you can put a lamp or a flashlight behind it. The light will make the silhouette pop out, and it will look like there’s a creepy haunted house right in your room!

DIY Monster Door

Materials for Creating Your Monster Door

For your monster door, you’ll need things like large sheets of paper or poster board, tape or sticky tack, and markers or paints. Think about what color your monster will be and if you want it to be funny or really scary.

Steps to Transform Your Door into a Monster Face

Cut out two big circles for eyes and a big, wavy line for a mouth. You might want to cut out some teeth or a tongue to add to the mouth. Stick everything onto your door to make a face. You can even add streamers or paper chains for hair.

Adjusting the Design for Different Door Sizes

Depending on how big or small your door is, you might need to make your monster features bigger or smaller. Just make sure that everything looks right together. If your door is really tall, maybe your monster has a long face; if it’s short, your monster might look squished and funny!

Halloween Character Pebbles

Selecting and Preparing Your Pebbles

Find some smooth pebbles or small rocks; it’s better if they’re not too bumpy. Wash them with soap and water to get any dirt off, and then let them dry completely. That way, your paint will stick to them much better.

Painting Techniques for Halloween Characters

Once your pebbles are dry, you can start painting! Use acrylic paints because they stick to rocks well. You can paint them to look like jack-o’-lanterns, ghosts, or even little vampires. Use a small paintbrush for details like faces.

Sealing and Protecting Your Painted Pebbles

After your painted pebbles are completely dry, you should protect them with a clear sealant. This keeps the paint from chipping or washing away if they get wet. Spray the sealant on, or ask an adult to help you brush it on.

Terrifying Toilet Paper Roll Bats

Collecting and Preparing Rolls for Crafts

Start by saving the cardboard rolls from inside your toilet paper or paper towels. Make sure they’re clean and not squished. You’ll need quite a few depending on how many bats you want to make for Halloween.

Crafting Your Bats with Simple Supplies

To make your cardboard roll into a bat, paint it black and let it dry. Then, cut out some wings from black paper or cardstock and stick them to the back of the roll with tape or glue. Add some googly eyes to the front, and maybe some fangs with white paper or a marker.

Hanging and Displaying Your Bat Creations

You can hang your bats around your house by tying a string around the middle and hanging them from the ceiling, on door handles, or anywhere they would look spooky. You could also just set them around on shelves or tables.

Zombie Planters

Selecting Appropriate Plants and Containers

Choose some plants that look a bit like they’d be in a zombie garden – maybe ones with droopy leaves or that look a bit wild. Then, find some old pots or containers that you can decorate to look scary. They don’t have to match; zombies are all different, after all!

Zombifying Your Planters with Paint and Accessories

Paint your pots with gray or green to make them look like zombie skin. You can draw on some stitching

Find your new Halloween DIY Projects for Beginners on this page.

Halloween DIY Projects for Beginners Read More »