Home Decor

Halloween DIY Projects for Beginners

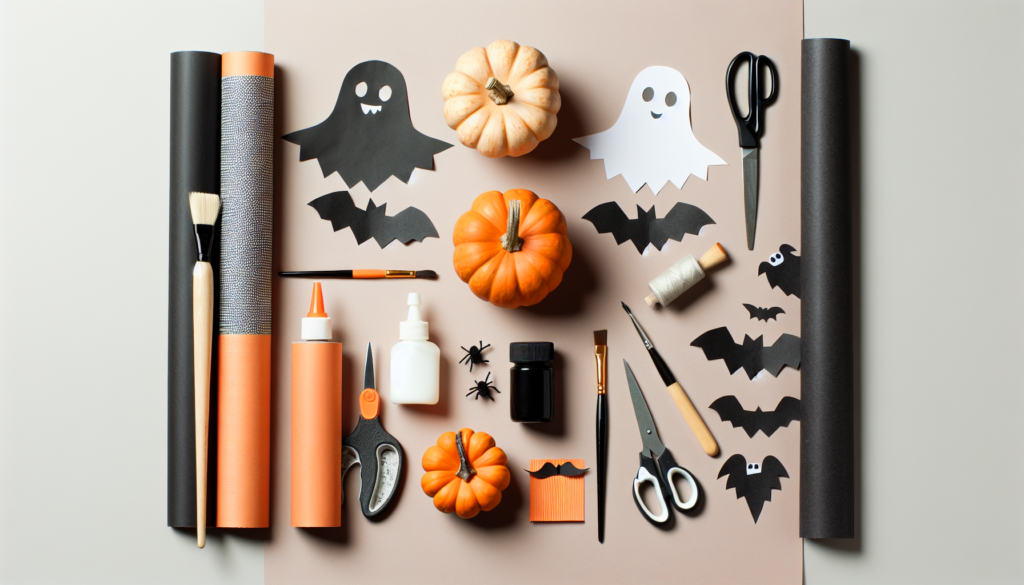
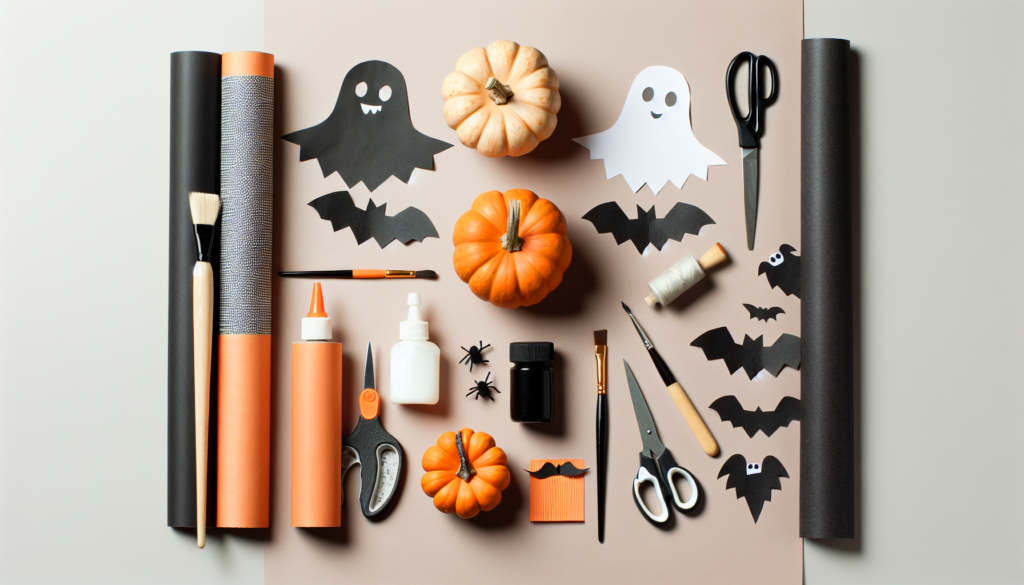
Imagine it’s almost Halloween and you want to make your house the spookiest on the street! You can do that with some fun Halloween do-it-yourself (DIY) projects that are easy to make. These crafts are perfect if you’re just starting out and don’t worry, making these will be as easy as pie. Spiders, ghosts, and pumpkins – oh my! You’ll learn how to make those and more, all by yourself, to scare and surprise your friends and family with your creepy, crafty skills. Get ready for a Halloween where your house is filled with your own handmade decorations!
Halloween DIY Projects for Beginners

Check out the Halloween DIY Projects for Beginners here.

Simple Spooky Lanterns

Materials Needed for Homemade Lanterns

To make your own spooky lanterns, you’ll need some easy-to-find items. Grab some clean, empty jars – they can be any size you want! You’ll also need paint that glows in the dark, some paintbrushes, and a few tea light candles. If you want to decorate your jars, you can also get some stickers or markers. Make sure you have everything before you start.

Step-by-Step Guide to Creating Your Lantern

First, make sure your jars are clean and dry. Then, take your paintbrush and start painting the inside of the jars with the glow-in-the-dark paint. You might want to do a few coats so it’s extra glowy! After the paint dries, you can put fun stickers on the outside or draw scary faces with markers. Finally, place a tea light candle inside each jar and watch them glow! Remember to ask a grown-up to help you light the candles.

Safety Tips for Using Lanterns as Decor

When you’re using candles, you have to be very careful. Always keep your spooky lanterns away from anything that can burn, like curtains or paper. Never leave a candle burning without an adult nearby, and don’t forget to blow out the candles before you go to bed or leave them alone. If you want to be extra safe, you can use battery-operated tea lights instead of real candles.

Creepy Paper Mache Bowls

Gathering Your Paper Mache Materials

For these scary bowls, you’ll need some newspaper cut into strips, a bowl to use as a mold, and some cling wrap. Also, gather up some flour and water to make your paper mache goo, and a paintbrush to help you stick the paper strips down.

Mixing the Paper Mache Solution

Paper mache sounds fancy but it’s just paper and a special glue that you can make! Mix one part flour with two parts water until it’s smooth and feels a bit like pancake batter. This is your paper mache solution that will help stick all your newspaper strips together.

Molding and Painting Your Bowls

Cover the outside of your bowl mold with cling wrap. Dip your newspaper strips in the paper mache solution and lay them over the bowl; criss-cross the strips to make it strong. After it dries, you can paint your bowl to look like a jack-o’-lantern, a witch’s cauldron, or anything you think is spooky!

Ideas for Using Your Bowls in Halloween Decor

You can use your creepy bowls to hold treats for trick-or-treaters or to scare your family members by filling them with fake spiders or eyeballs. You can also put a battery-powered candle inside to make it look like a glowing scary face!

Get your own Halloween DIY Projects for Beginners today.

Ghoulish Glow-in-the-Dark Decor

Choosing the Right Glow-in-the-Dark Paint

To make things really spooky, you need a good glow-in-the-dark paint. Look for one that says it’s super bright and long-lasting. Some paints work better on certain surfaces, like plastic or wood, so make sure you get the right kind for what you want to decorate.

Applying the Paint for Maximum Glow

When using your glow-in-the-dark paint, paint in a place that has lots of light. After it’s dry, put the painted decor in the dark, and it should glow! Sometimes, you might need a few coats to make it really bright. And remember, the paint needs to ‘charge’ in light before it can glow in the dark.

Creative Ideas for Glow-in-the-Dark Projects

There are so many fun things you can do with glow-in-the-dark paint. Paint little ghosts on rocks to hide around your yard, or make glowing footprints leading to your door for a spooky path. You can also paint a scary message on a poster that only shows up when it gets dark!

Frightful Front Door Wreaths

Basics of Wreath Making

To make a wreath, you’ll start with something round called a wreath form. You can find these at craft stores, or you can make one with twisted-up paper or a cardboard circle. Then, get materials like fake leaves, ribbon, or fabric to wrap around your form and make it look full and spooky.

Decorating Your Wreath with Halloween Themes

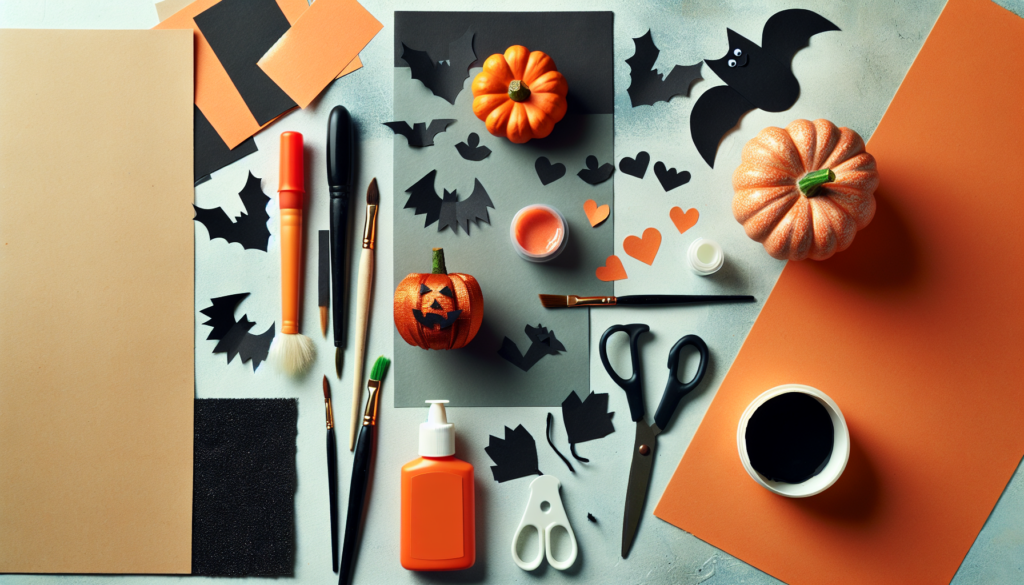
Once your wreath form is ready, start decorating it! Use colors like orange, black, and purple to make it look really Halloween-y. You can add fake spiders, miniature pumpkins, or bats to make your wreath extra frightful. Use a hot glue gun to stick them on, but make sure you ask an adult to help because it can get really hot.

Attaching Your Wreath Securely to the Door

When your wreath is all decorated, you’ll want to hang it up for everyone to see! Use a sturdy ribbon or a wreath hanger to put it on your door. Make sure it’s not going to fall off by giving it a little tug to test it out. You wouldn’t want your beautiful wreath to get ruined!
Halloween DIY Projects for Beginners

Macabre Mason Jar Mummies

Materials Needed for Mummy Jars

To make mason jar mummies, you’ll need some clear mason jars, white bandages or gauze, googly eyes, and glue. Get everything together before you start, so you don’t have to stop in the middle of crafting.

Wrapping Technique for the Perfect Mummy Effect

First, dab some glue onto your jar, and stick the end of the bandage onto it. Gently wrap the bandages around the jar, overlapping a little bit so it looks like mummy wrapping. Leave some spaces so you can see a bit of the jar through the bandages. When you’re done wrapping, glue on a pair of googly eyes to give your mummy personality!

Lighting Your Mason Jar Mummies Safely

Put a battery-operated tea light or a small flashlight inside your mummy jar to make it glow. Remember not to use real candles in these, because the bandages could catch fire and that would be very dangerous.

Eerie Haunted House Silhouettes

Designing Your Haunted House Template

To create a haunted house silhouette, you need to first draw a picture of a spooky house. You can make it as big or small as you want, and add creepy details like broken windows, a crooked chimney, and ghostly figures in the doorway.

Cutting and Mounting the Silhouettes

Once you’re happy with your drawing, carefully cut out your haunted house using scissors. Then, use some tape to stick your haunted house onto a window or a wall. Make sure it lays flat so that it looks just right.

Backlighting for an Extra Spooky Effect

If you want your haunted house to stand out at night, you can put a lamp or a flashlight behind it. The light will make the silhouette pop out, and it will look like there’s a creepy haunted house right in your room!

DIY Monster Door

Materials for Creating Your Monster Door

For your monster door, you’ll need things like large sheets of paper or poster board, tape or sticky tack, and markers or paints. Think about what color your monster will be and if you want it to be funny or really scary.

Steps to Transform Your Door into a Monster Face

Cut out two big circles for eyes and a big, wavy line for a mouth. You might want to cut out some teeth or a tongue to add to the mouth. Stick everything onto your door to make a face. You can even add streamers or paper chains for hair.

Adjusting the Design for Different Door Sizes

Depending on how big or small your door is, you might need to make your monster features bigger or smaller. Just make sure that everything looks right together. If your door is really tall, maybe your monster has a long face; if it’s short, your monster might look squished and funny!

Halloween Character Pebbles

Selecting and Preparing Your Pebbles

Find some smooth pebbles or small rocks; it’s better if they’re not too bumpy. Wash them with soap and water to get any dirt off, and then let them dry completely. That way, your paint will stick to them much better.

Painting Techniques for Halloween Characters

Once your pebbles are dry, you can start painting! Use acrylic paints because they stick to rocks well. You can paint them to look like jack-o’-lanterns, ghosts, or even little vampires. Use a small paintbrush for details like faces.

Sealing and Protecting Your Painted Pebbles

After your painted pebbles are completely dry, you should protect them with a clear sealant. This keeps the paint from chipping or washing away if they get wet. Spray the sealant on, or ask an adult to help you brush it on.

Terrifying Toilet Paper Roll Bats

Collecting and Preparing Rolls for Crafts

Start by saving the cardboard rolls from inside your toilet paper or paper towels. Make sure they’re clean and not squished. You’ll need quite a few depending on how many bats you want to make for Halloween.

Crafting Your Bats with Simple Supplies

To make your cardboard roll into a bat, paint it black and let it dry. Then, cut out some wings from black paper or cardstock and stick them to the back of the roll with tape or glue. Add some googly eyes to the front, and maybe some fangs with white paper or a marker.

Hanging and Displaying Your Bat Creations

You can hang your bats around your house by tying a string around the middle and hanging them from the ceiling, on door handles, or anywhere they would look spooky. You could also just set them around on shelves or tables.

Zombie Planters

Selecting Appropriate Plants and Containers

Choose some plants that look a bit like they’d be in a zombie garden – maybe ones with droopy leaves or that look a bit wild. Then, find some old pots or containers that you can decorate to look scary. They don’t have to match; zombies are all different, after all!

Zombifying Your Planters with Paint and Accessories

Paint your pots with gray or green to make them look like zombie skin. You can draw on some stitching

Find your new Halloween DIY Projects for Beginners on this page.

Halloween DIY Projects for Beginners Read More »

Oriental Cherry Halloween Decorations Review

Oriental Cherry Halloween Decorations Review

Disclosure: As an Amazon Associate, I earn from qualifying purchases.

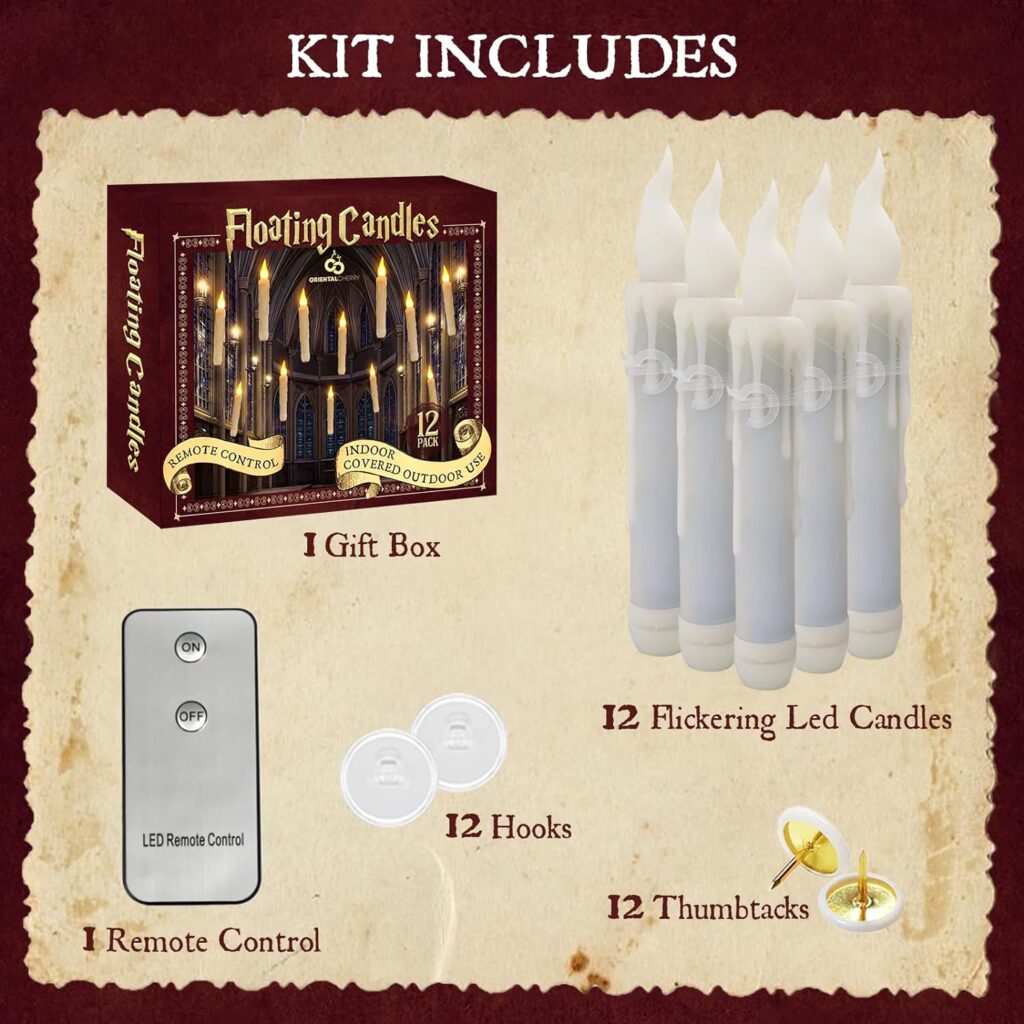
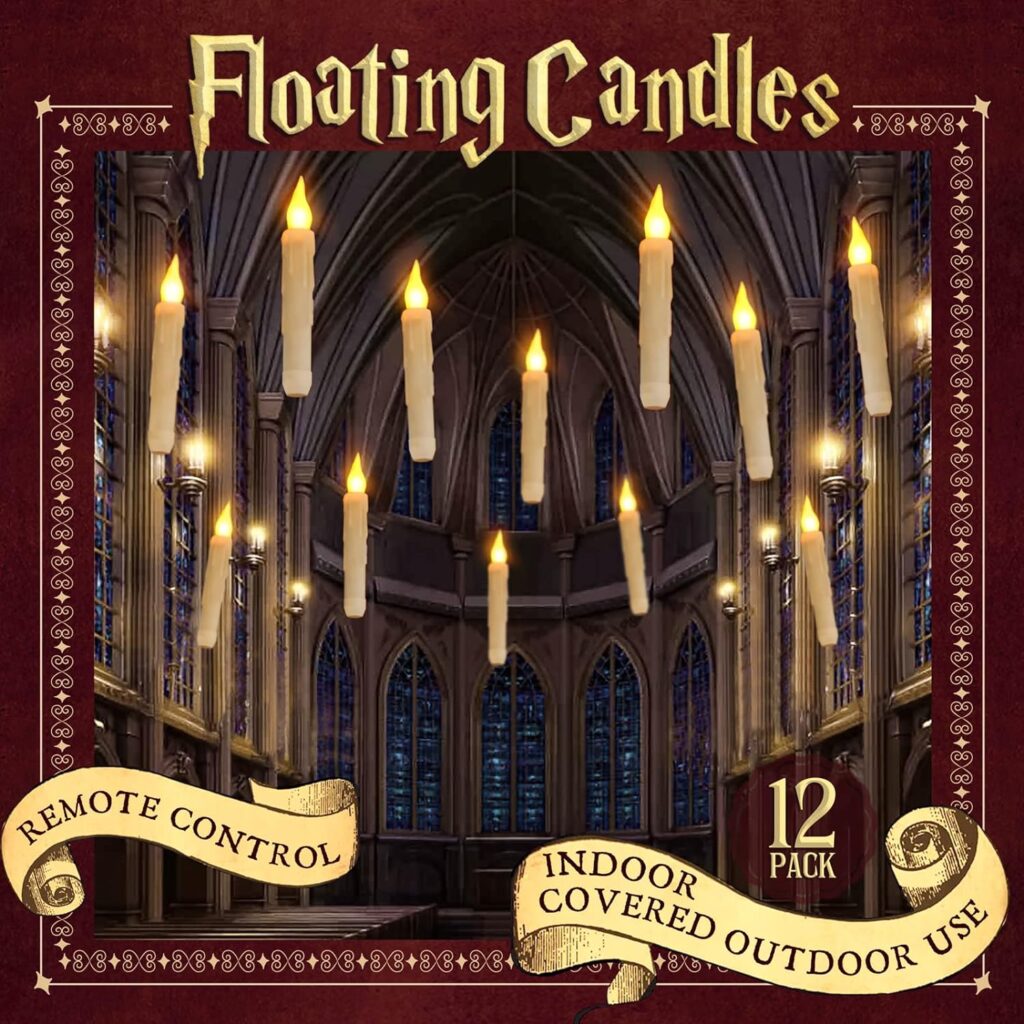
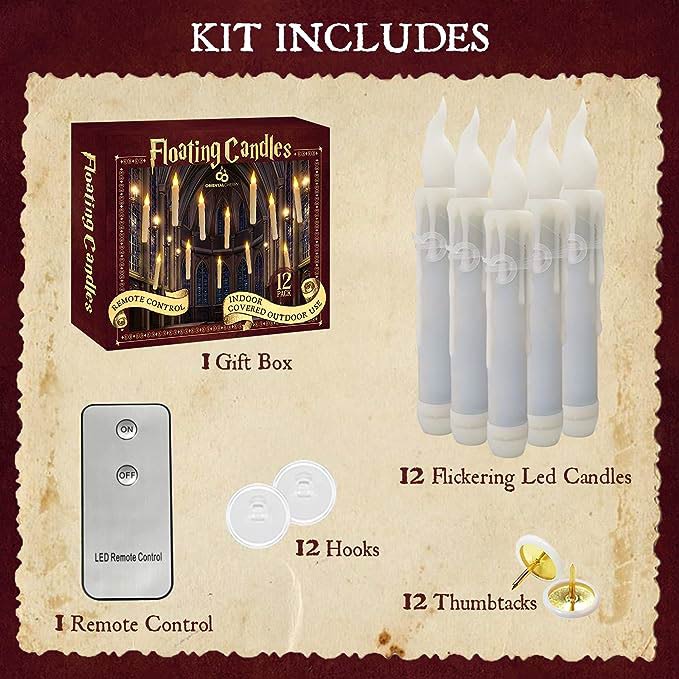
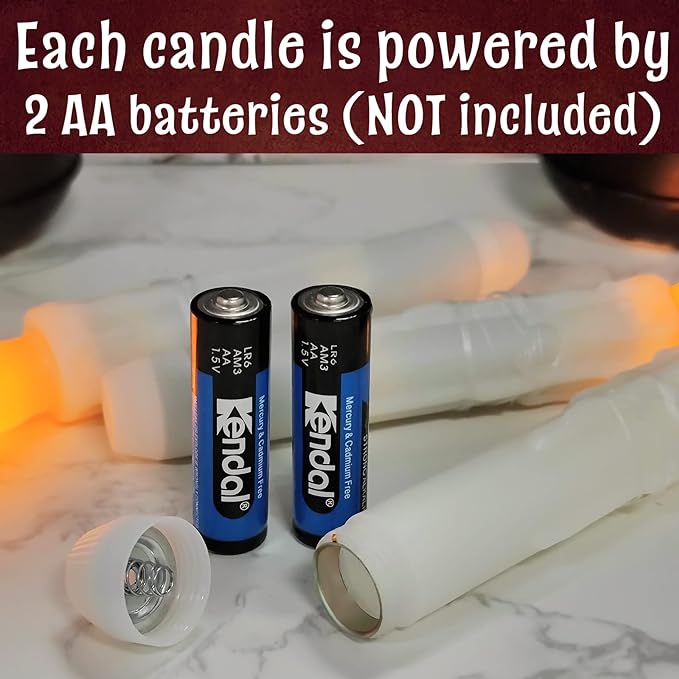
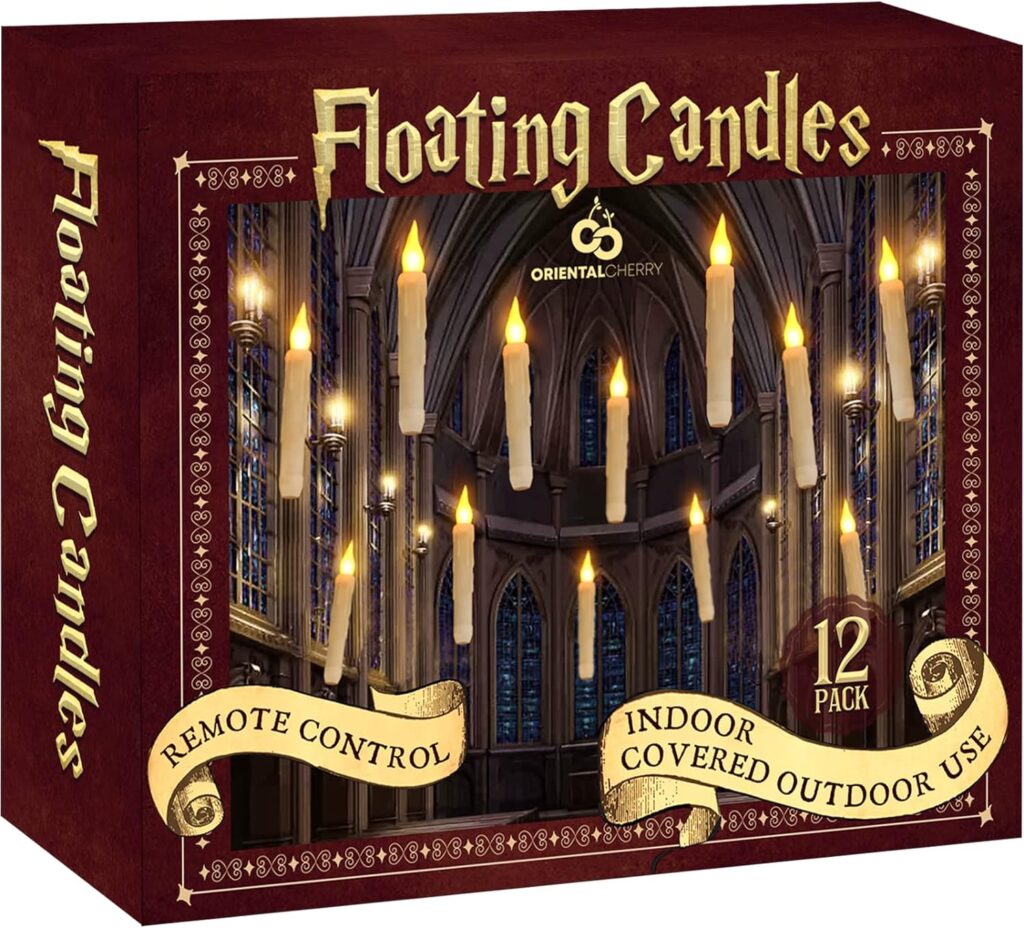
Are you on the hunt for the perfect Halloween decorations? Look no further than the ORIENTAL CHERRY Halloween Decorations – Floating LED Candles with Remote Control – Witch Wizard Christmas Decor for Indoor Home Room Classroom Bedroom Birthday Party! These magical floating candles are ready to instantly transform your space into a scene taken straight from the Great Hall at the School of Witchcraft and Wizardry. With the package inclusive of 12 candles, 12 hooks, 12 thumbtacks, and a remote control, setting up these enchanting illuminations is a breeze. Each candle is pre-attached with a string, allowing for effortless suspension at your desired location. Bonus: there are no safety hazards here! The realistic flickering flame and wax drip effects are all a result of LED technology, providing you with the warm, homely vibe of traditional candles without any risk. With the additional benefit of extended battery life, all it takes is 2 AA batteries per candle, and voila- months of mystical sparkle, all controlled by a common remote. Here’s to your dreamiest Halloween setting yet!

Get your own ORIENTAL CHERRY Halloween Decorations - Floating LED Candles with Remote Control - Witch Wizard Christmas Decor for Indoor Home Room Classroom Bedroom Birthday Party (with Common Remote) today.

Why Consider This Product?

Mysticism, wonder, and flicker; these exact words encapsulate the allure of the ORIENTAL CHERRY Halloween Decorations – Floating LED Candles with Remote Control. Designed perfectly to transport you straight to the Great Hall at the School of Witchcraft and Wizardry, these candles promise a unique and exciting way to light up your space. With a complete package that includes all you need to install them, these candles bestow enchantment and allure to your indoor room, classroom and even make the perfect decor for birthday parties.

One of the defining strengths of this product is its authenticity and particular attention to detail. Unlike your conventional LED candles, these boast realistic flickering flames and a feature that mimics dripping wax, adding further to the realism. They marry the charm of traditional candles without presenting the fire risk or messiness of melting wax. User testimonials have applauded the effortless manner in which these candles invigorate their spaces, making them more inviting and vibrant.

Dazzling Details and Extensive Battery Life

Every ORIENTAL CHERRY Halloween Decoration comes complete with an extensive battery life, Running on only 2 AA batteries per candle (not included), they guarantee months of enchanting illumination. Additionally, they come attached with strings and are hence ready to hang and turn your room into a Harry Potter-like haven effortlessly.

ORIENTAL CHERRY Halloween Decorations - Floating LED Candles with Remote Control - Witch Wizard Christmas Decor for Indoor Home Room Classroom Bedroom Birthday Party (with Common Remote)

This image is property of Amazon.com.

Check out the ORIENTAL CHERRY Halloween Decorations - Floating LED Candles with Remote Control - Witch Wizard Christmas Decor for Indoor Home Room Classroom Bedroom Birthday Party (with Common Remote) here.

Exceptional Quality Standards

The ORIENTAL CHERRY Halloween Decorations uphold the highest standards of quality, ensuring that every unit shipped meets exceptional quality standards. Each flickering LED candle promises durability, highlighting the brand’s commitment to offering value and reliability.

Applications and Significance

Whether you plan to host a Halloween party, want to add a unique charm to your Christmas decor, or desire to turn your bedrooms into a mystical space, these floating LED candles are an excellent choice. They add an instant charm to classrooms as well, and can light up birthday parties in a unique style.

ORIENTAL CHERRY Halloween Decorations - Floating LED Candles with Remote Control - Witch Wizard Christmas Decor for Indoor Home Room Classroom Bedroom Birthday Party (with Common Remote)

This image is property of Amazon.com.

Product Specifications

Product Number Additional Items
Candles 12 Pre-attached strings
Hooks 12 Used for hanging
Thumbtacks 12 Alternative hanging option
Remote control 1 Controls candlelights

Who Needs This

This product is a fantastic addition for anyone keen on adding warmth, charm, and a magical touch to their space. It is especially fitting for people who are fans of the Harry Potter series or Halloween aficionados who love unique decorations.

ORIENTAL CHERRY Halloween Decorations - Floating LED Candles with Remote Control - Witch Wizard Christmas Decor for Indoor Home Room Classroom Bedroom Birthday Party (with Common Remote)

This image is property of Amazon.com.

Pros and Cons

Pros:

  • Lifelike flickering flames
  • No risk of fire or melting wax
  • Extended battery life
  • Comes pre-attached with strings for easy hanging

Cons:

  • Batteries not included
  • Might not be bright enough for large spaces

FAQ’s

Answer commonly asked questions about this product in this section.

ORIENTAL CHERRY Halloween Decorations - Floating LED Candles with Remote Control - Witch Wizard Christmas Decor for Indoor Home Room Classroom Bedroom Birthday Party (with Common Remote)

This image is property of Amazon.com.

Tips and Tricks For Best Results

To enhance your experience, opt for high-quality batteries. Moreover, trying unique hanging positions can also add to the mystery and charm of your decor.

Final Thoughts

Add Magic to Your Life

In conclusion, the ORIENTAL CHERRY Halloween Decorations provide an easy and enchanting way to transform your ordinary space into a mesmerising, mystic room. Their flickering flames, extended battery lives and relatively hassle-free installation make them a standout choice for unique ambiance addition. Include these in your decor and experience the magic they bring to your life.

Learn more about the ORIENTAL CHERRY Halloween Decorations - Floating LED Candles with Remote Control - Witch Wizard Christmas Decor for Indoor Home Room Classroom Bedroom Birthday Party (with Common Remote) here.

Oriental Cherry Halloween Decorations Review Read More »

The Halloween Junkie Take: Upcycled Halloween Transforms Thrift Store Finds Into Creepy Decor

Let’s imagine this, you and your family visit a thrift store. You find an old, dusty vase or maybe a weird-looking chair. You might think it’s just some old, unneeded stuff. But, did you know, you can turn these finds into something super cool for Halloween? In this story, we are going to tell you how you can become a Halloween junkie by upcycling – that means reusing and decorating these old things to make your Halloween decorations creepier and fun! Let’s get ready to learn, laugh, and maybe even get a little scared!

The Halloween Junkie Take: Upcycled Halloween Transforms Thrift Store Finds Into Creepy Decor

This image is property of images.pexels.com.

Understanding Upcycling

Defining upcycling

Upcycling, also known as creative reuse, is when you take items that are no longer wanted or needed and transform them into something new and useful. It’s like magic! You take something old and unwanted, and with a wave of your creativity wand, it transforms into something amazing that you can use again!

Environmental benefits of upcycling

Upcycling is not just fun, it’s also good for our Earth. Now, you might think ‘how so?’ Well, think about a toy that’s old and broken. Instead of throwing it away into the trash, if we can turn it into something else, we are reducing waste. When you use upcycling, you help to reduce the amount of waste going to the landfill. And that’s a great way to protect our environment.

Rising trend of upcycling in home décor

People are becoming more and more interested in upcycling. Especially when it comes to decorating their homes. Instead of buying brand new items, they are finding old pieces with character, fixing them up, and using them to add personality to their homes. It’s like taking a bit of the past and bringing it into the present.

Thrift Stores: A Treasure Trove for Decor

Why thrift stores are ideal for Halloween décor hunting

Just like searching for treasure, hunting in Thrift Stores can be a lot of fun! It’s perfect for looking for Halloween décor because you can find all sorts of spooky and wonderful things. You just need a keen eye, a bit of imagination, and voila! You’ve got yourself some unique and creepy Halloween décor.

Common items to look out for in Thrift Stores

There are so many things to be on the lookout for in thrift stores. Look out for old clothing that could be redesigned into costumes or decorations, discarded furniture that could be transformed into frightening features, or vintage items that you could use to create a vintage horror vibe. You never know what treasures you might find!

How to choose items suitable for Halloween décor upcycling

But how do you know what’s good to pick? First, think about what items can be transformed into. Can an old poofy dress be turned into a witch’s costume? Or could an old chair be painted and turned into a frightening throne? Look for items that are sturdy and can be easily altered.

Basic Tools for Upcycling

Essential tools and materials for upcycling

Just like a chef needs their pots and pans, an upcycler needs their tools. You’ll need things like paint, brushes, glue, and other crafting supplies.

Safety precautions when using tools

Remember, always be careful when using these tools! Some paint can be toxic and sharp tools can cause harm if not handled properly. Always ask a grown-up for help when using dangerous tools or materials.

Affordable options for upcycling tools

All these tools and materials don’t need to be expensive. Look for sales, coupons, or even borrow from friends or family!

Techniques to Transform Thrift Store Finds into Creepy Decor

Painting techniques for an aged look

Want your find to look old and creepy? Try using paint! You can use techniques like dry brushing or spattering to give your item an aged look.

Use of fabric to create a spooky touch

Fabric can be a great way to add a touch of spookiness to your décor. You can drape it, sew it, or even rip it to create different effects.

How to use lighting to enhance the creepiness

Lighting can also play a big part in making your décor look creepy. Dim lights or colored lights can cast creepy shadows and create a spooky ambiance.

The Halloween Junkie Take: Upcycled Halloween Transforms Thrift Store Finds Into Creepy Decor

This image is property of images.pexels.com.

Repurposing Old Clothing for Halloween

Key clothing items that can be transformed

Old long dresses, ripped jeans, or torn shirts can all be transformed into creepy Halloween costumes or decorations.

Creating ghoulish garbs: A step-by-step guide

With some creativity, you transform these into ghoulish garbs! You just need to imagine an image of your spookiness and bring it to life with some sewing or painting.

How to use old clothes for scary window silhouettes

You can also use old clothes to create scary window silhouettes. Just cut out shapes of ghosts or bats, and stick them up against your window for a haunted house effect!

Turning Discarded Furniture into Frightening Features

Ideas for creepy chair and table transformations

An old chair or table can be transformed into something frightening with a bit of paint and imagination. You could create a haunted throne or a spooky magic table.

Step by step guide for making a coffin from an old bookshelf

An old bookshelf could become a creepy coffin with just a little work and some paint.

Enhancing scary settings with upcycled furniture

Upcycled furniture can enhance any scary setting. Think of it as the stage set for your Halloween play!

The Halloween Junkie Take: Upcycled Halloween Transforms Thrift Store Finds Into Creepy Decor

This image is property of images.pexels.com.

Creatively Using Dinnerware for Halloween Themes

Transforming old plates into ghostly forms

Old plates can easily be transformed into ghostly forms with some paint and creativity.

Using outdated cups and mugs for a haunting effect

Old mugs and cups can be used to create spooky candle holders or creepy holders for candy!

Turning cutlery into eerie windchimes

Try turning old cutlery into eerie windchimes. The clanging sound will add to the spooky ambiance of Halloween night.

Crafting with Vintage Items for a Vintage Horror Vibe

Using vintage photos in creepy frames

Vintage photos can be used to create an old horror movie vibe. Try putting them in creepy frames for extra effect.

Upcycled vintage suitcases for spellbinding trunks

An old suitcase could be transformed into a spellbinding trunk with some paint and creativity. You can store your magic potions (or candy!) in it.

Old mirrors and an aged terror

Old mirrors can add an aged terror to your Halloween décor. Plus, they’re great for making spooky reflections!

Cost-Effective and Eco-friendly Benefits of Upcycled Halloween Decor

Savings from upcycling

Upcycling can save you money. Instead of buying new decorations, you can make your own out of things you already have or can find cheaply at a thrift store.

Environmental impact of upcycled décor

Eco-friendly benefits of upcycling are huge. By reusing items, you create less waste, use less energy and reduce your carbon footprint.

Teaching children about sustainability through upcycling

You can also show kids how fun and rewarding it can be to use creativity and resourcefulness to give old items a new lease on life. It’s a great lesson in sustainability!

The Halloween Junkie Take

Appreciation for creativity and sustainability in Halloween décor

As a Halloween Junkie, I always get excited seeing the awesome and spooky decors made through upcycling. They put a big grin on my pumpkin face knowing that creativity and sustainability can come together in such a fun and festive way!

Funniest and most impressive thrift store transformations seen.

There have been so many impressive and hilarious thrift store transformations, it’s hard to pick favorites! From bat-covered coffee tables to ghoulish garbs and bone-driven chandeliers, it’s been a fantastic spooky ride!

Final tips for would-be upcycling enthusiasts.

So for anyone who’s thinking about trying upcycling, go for it! Grab your tools, let your imagination fly, and remember, the possibilities are endless with a little creativity. Have a spooktacular time upcycling for Halloween!

The Halloween Junkie Take: Upcycled Halloween Transforms Thrift Store Finds Into Creepy Decor Read More »

The Spooky Artistry of Paper Magic: Silhouettes Shaping Your Window Decorations

Get ready to make your own spooky window decorations using just paper and a bit of magic! This is going to be a fun-filled journey through the world of paper art where we’ll learn to shape eerie silhouettes perfect for Halloween. Are you excited to add a touch of frightful fun to your house? Let’s get started!

The Origins of Paper Magic

Understanding the history of Paper Magic

You might think that making art out of paper is something new, but it’s actually been around for a very long time. A long time ago, people in China discovered how to make paper, and they started using it to create beautiful pieces of art. They would cut, fold, and shape the paper in all sorts of ways, and this is what we now call paper magic.

Cultural influence on Paper Magic

Different cultures around the world have different ways of creating paper magic. In Japan for example, they have origami – which is the art of folding paper. In Mexico, they make pretty decorations called papel picado, where they cut colorful paper into amazing shapes. These different ways show how different cultures shaped and influenced the art of paper magic.

The Unsettling Charm of Silhouettes

The aesthetic appeal of silhouettes

Think about a shadow – it’s just dark shape, right? But when that shape looks like something we recognize, like a person or an animal, it creates a silhouette. Silhouettes can look mysterious and dramatic. It’s like looking at a mystery that’s waiting to be solved and that’s why they look so interesting.

The psychological impact of silhouettes

Now, silhouettes can also make you feel a certain way. They can be calming, exciting, or even a little spooky. That’s because our brains are always trying to figure out what we’re looking at. So when we look at a silhouette, we know it’s a shape of something, but we don’t know what exactly it is. This spurs our imagination and can produce different emotional responses.

The Spooky Artistry of Paper Magic: Silhouettes Shaping Your Window Decorations

This image is property of pixabay.com.

Exploring Halloween Window Decorations

The role of decorations in Halloween

Decorating your home is a big part of why Halloween is fun! When you put spooky decorations all around your house, it not only shows your love for the holiday, but it also makes it more exciting and festive. It’s like turning your home into a haunted house!

Evolving trends in Halloween window decor

There are lots of ways to decorate your windows for Halloween, and these trends change over time. Some people like to put stickers or window clings, while others might prefer hanging decorations. Nowadays, more and more people are using paper silhouettes to give their windows a spooky and dramatic effect.

From Basic to Spooky: The Transformation

Elementary principles of paper art

Creating paper art starts with simple concepts. You cut, fold, curve, and shape the paper to create your designs. Through these basic actions, you can create amazing and intricate works of art.

Introducing spooky elements to paper art

To make your paper art perfect for Halloween, you can add spooky elements to it. Think about things that make you think of Halloween: witches, skeletons, bats, ghosts…these are all great designs for creepy paper art. So when you’re making your paper art, keep these elements in mind.

The Spooky Artistry of Paper Magic: Silhouettes Shaping Your Window Decorations

This image is property of pixabay.com.

Creating Your First Spooky Silhouette

Choosing the right design

When you’re making your first spooky silhouette, you should pick a simple design. Maybe a ghost or a bat would be good options. Once you’ve mastered those, you can move on to more complicated designs.

Preparing the materials

To make your silhouette, you’ll need paper (black works best), a pencil to draw your design, a good pair of scissors for cutting, and some tape or glue to stick your silhouette on the window.

Step-by-step guide to make a spooky silhouette

First, draw your design on the paper. Then, cut it out very carefully. Once it’s cut out, you can stick it on your window. When you turn on the lights inside your house, the shape will appear as a silhouette.

Displaying Your Silhouette Masterpieces

Placement for maximum effect

Where you place your silhouette can also add to the spookiness. Perhaps you can put it somewhere that it will cast a long, eerie shadow. Or maybe, you can put it where there are a lot of trees or branches to make it seem even scarier.

Proper lighting to enhance the spookiness

Lighting is also important. If you light your silhouette from behind, it makes it more dramatic. If you only have a little bit of light, the silhouette can look eerier. Try different lighting arrangements to see which one makes your silhouette look its best.

The Spooky Artistry of Paper Magic: Silhouettes Shaping Your Window Decorations

This image is property of pixabay.com.

Maintaining and Preserving Your Art

Tips for maintaining your paper art

Like all artwork, paper art needs a bit of care. Make sure you don’t get it wet, because water can ruin paper. Also, don’t put it somewhere where it can get easily torn or crumpled.

How to store and preserve your silhouettes for next Halloween

When Halloween is over and you want to keep your silhouettes for next year, store them somewhere flat and safe. You can put them in a folder or a flat box, and make sure to put them somewhere they won’t get crushed.

Safety Precautions With Window Decorations

Considering the safety of your decor

Remember, safety first! Don’t put your decorations somewhere where they might cause accidents, like blocking your view out of the window, or somewhere they can easily catch fire.

Prevention of possible accidents

Also, be careful when you’re putting up your decorations. You might need to use a ladder, so make sure you’re safe and stable.

Inspiration for More Spectacular Creations

Where to find interesting silhouette designs

If you’re not sure what to make next, there are lots of places to find ideas. There are books and websites full of silhouette designs that can give you inspiration.

Creating a series of spooky silhouette decors

Try creating a series of silhouettes that all go together. Maybe a family of ghosts or a spooky tree with bats flying around it. A series can make your Halloween decor even more thrilling!

The Halloween Junkie Take

Reflecting on the joys of Halloween decoration

Being a Halloween junkie is all about loving Halloween, all the decorations and the fun that go with it. Every fake spider web strewn, each ghost silhouette stuck on the window and every carved pumpkin bring a mix of fright and delight that only Halloween can give.

Encourishing creativity in the festive season

So go on, let out the Halloween junkie in you! Design and cut out your spooky silhouettes, stick them on your windows, and let your creativity shine in the spookiest way possible. Remember, Halloween is not just about the scares, but it’s also about creating, imagining, and having a whole lot of fun. Happy Halloween!

The Spooky Artistry of Paper Magic: Silhouettes Shaping Your Window Decorations Read More »

Creating Spooky Halloween Special Effects at Home

Are you ready for some Halloween fun? This article is all about making your home the scariest in the neighborhood! In “Creating Spooky Halloween Special Effects at Home”, you will learn how to create your very own frightful effects that will give just the right amount of spook, making everyone’s Halloween night memorable! From creepy sounds to spine-chilling decorations, this guide is filled with delightful scares. So, put on your best Halloween costume, get your pumpkin ready, and let’s start creating some spooky magic!

Understanding Halloween Special Effects

Halloween is a great time for you to do fun and exciting things. One of these things is using special effects.

What are Halloween special effects?

Halloween special effects are tools we use to make Halloween extra spooky. They use tricks to make your eyes think they see something scary, or your ears hear something that makes your heart feel jittery. These effects could involve neat light tricks, creepy sounds, smoke or fog, and even your own homemade scary decorations!

Difference between professional and home-made Halloween effects

Just like a baker can make cakes and you can make your own cake at home, professionals can make Halloween special effects, and you can too! The difference is that professionals use more expensive tools and have more practice, so their effects can be very complicated and look really real. But your home-made effects can be just as fun and scary, especially when you use your creativity!

Setting the Halloween Mood

Before we start making special effects, we need to think about the mood we want for our Halloween.

Choosing a theme for your Halloween special effects

A theme is like a story or idea we pick for our Halloween. It could be a haunted house, a creepy forest, a witch’s lair, a monster’s cave, or even a fun pumpkin patch. This theme is like our guide that will tell us what special effects to make.

How to create a spooky ambiance in your house

To create a spooky ambiance, you can use decorations that match your theme. For example, if your theme is a haunted house, you can hang fake spider webs and make cardboard ghosts. You can also use projectors or invite friends over to act as your scary creatures!

Understanding the importance of lighting in setting the mood

Lighting is very important because it lets us control what we see and how we feel about it. Dim lights can make a room feel spooky, colored lights can make an area feel strange, and quickly flickering lights can make everything seem scary and unpredictable!

Creating Spooky Halloween Special Effects at Home

This image is property of images.unsplash.com.

Creating Halloween Sounds

In addition to what we see, what we hear is also very important in creating the Halloween mood.

How to make spooky sounds using everyday items

With some creativity, you can use everyday items to make spooky sounds. For example, you can rattle chains for a ghostly effect, rustle leaves for an outdoor effect, or tap on a window lightly to mimic the sound of someone wanting to come in!

Using technology to create creepy Halloween effects

With today’s technology, it is even easier to create spooky Halloween sounds. You can use smartphone apps or websites that play scary noises, or even record your own voice and change it to sound like a witch, a ghost or a werewolf!

Making Halloween Lighting Effects

Let’s now talk about how we can use lights to make everything seem scarier.

DIY home-made lamp tricks

You can do neat tricks with lamps you have at home. You can cover a lamp with colored paper to change its color, or cut out shapes in a black paper and put it in front of the lamp to create spooky shadows!

Effective use of colored lights

Colored lights can make a space feel very different. For example, green lights can make your house feel like a witch’s den, and red lights can make your backyard feel like a monster’s lair.

Creating shadows and illusions with lighting

By placing lights in certain places and angles, you can create shadows that make objects seem larger or scarier than they actually are. You can also use fog to create illusions, like ghostly figures floating around.

Creating Spooky Halloween Special Effects at Home

This image is property of images.unsplash.com.

Spooky Halloween Decoration Ideas

Aside from special effects, another key part of Halloween is decorations.

Hand-made scary props

You can easily make scary props with things you have at home. For example, you can paint stones to look like eyeballs, or use toilet paper to make mummies!

Convert everyday items into spooky creations

You can also use everyday items and make them look spooky. An empty bottle can be a magic potion, and a white sheet can be a ghost!

Using makeup and costumes to add to the spookiness

Don’t forget to use makeup and costumes to scare your friends! You can use face paint to look like a vampire, or wear a black cape to be a witch!

Halloween Fog Machines and Dry Ice

Fog machines and dry ice can make your Halloween look even better!

How to safely use a fog machine

If you have a fog machine, remember to follow the instructions carefully. Always use it away from people’s faces, and don’t forget to turn it off when you’re done!

Creating a DIY fog effect with dry ice

If you don’t have a fog machine, you can use dry ice and warm water to create a fun fog effect. But always have an adult help you with this, as dry ice can be dangerous if not handled correctly.

Caution points while dealing with fog effects

When dealing with fog effects, always make sure they don’t cover the whole floor, as people might trip and fall. Also, make sure there is enough fresh air, as too much fog can make it hard to breathe.

Creating Spooky Halloween Special Effects at Home

This image is property of images.unsplash.com.

Creating a Haunted House

Now, it’s time to create your own haunted house!

Choosing a part of your house for the haunted spot

First, choose a part of your house that you want to turn into a haunted place. It can be your living room, your basement, or even your backyard! This will be your main Halloween area.

How to decorate a room like a haunted house

Next, use your decorations, lights, sounds, and special effects to make this area spooky. Make sure everything matches your theme!

Populating your haunted house with spooky characters

Finally, get your friends or family members to act as the spooky characters in your haunted house. They can be the ghosts that rattle chains, the witches that cackle, or the monsters that growl!

Crafting a Halloween Scare factor

Now that our haunted house is ready, let’s make it even scarier!

Creating a Halloween scare trail

A scare trail is a path that people follow, getting scared at each turn. You can use cardboard boxes to make the path, and hide scary surprises along the way!

Surprising the visitors with unexpected scares

Remember, the best way to scare someone is to surprise them. You can pop out unexpectedly, or use sudden loud sounds or bright lights to startle your visitors!

How to increase the scare factor with sounds and lights

You can also make things scarier by changing the sounds and lights. You can make the sounds scarier or louder, and the lights dimmer or flicker more often, just when people least expect it!

Safety Measures

However, remember that Halloween is supposed to be fun, so always keep everything safe!

Keeping Halloween fun and safe

To keep Halloween fun and safe, make sure everyone knows that it’s all pretend. Also, make sure all your decorations and effects are secure and won’t accidentally hurt anyone.

Precautions while using electrical equipment

If you’re using any electrical items, like lights or speakers, ensure they are all set up properly and are kept away from water. Make sure all wires and plugs are safe to prevent any shocks or fires.

Guidelines while scaring children and adults

When scaring others, remember that different people may find different things scary. Be sure to check what your visitors are comfortable with and never force anyone to participate if they don’t want to.

Fire safety protocols

Finally, don’t forget about fire safety. Never leave open flames unattended and keep all flammable items away from them. Make sure your home has smoke alarms that are functioning perfectly and have a fire extinguisher nearby, just in case.

The Halloween Junkie Take

Well, Halloween enthusiasts, there you go! By getting your hands a little dirty, and your imagination running wild, you can make your home the spookiest spot in town!

Takeaway messages: Halloween is for fun

Remember, Halloween is all about having fun and letting your creativity run wild. Don’t worry about having the scariest house or the best effects – as long as you’re having fun, you’re doing Halloween right!

Clever tricks for last minute Halloween ideas

And if you’re reading this on the morning of October 31st, fret not! You can still use everyday items to create your spooky haven – old clothes for ghosts, carved fruits for creepy eyes, or even simply turning off the lights for a mysterious atmosphere.

Bumping up your décor game next Halloween

So remember, you don’t need to be a professional to create awesome special effects for Halloween. With some creativity and plenty of enthusiasm, you can bump up your Halloween decor game and create your very own spooktacular show! Now go forth and spook to your heart’s content!

Creating Spooky Halloween Special Effects at Home Read More »